🎁 Free bonus seeds with every pack 🚚 Discreet tracked shipping worldwide 🌱 Germination guarantee on every order

Author: buyweedseeds

  • 5 Underrated Cannabis Strains for 2026: Balanced THC/CBD Flavors

    5 Underrated Cannabis Strains for 2026: Balanced THC/CBD Flavors

    In 2026, the cannabis seed market continues to expand with innovative options that go beyond mainstream hype. Many home growers and enthusiasts seek strains offering distinctive flavors alongside balanced THC and CBD profiles, providing nuanced effects without overwhelming potency. This listicle highlights five underrated varieties that deliver on taste, therapeutic balance, and cultivation reliability, helping seed buyers make informed choices for their next grow. As legalization broadens access across more regions, demand grows for strains that combine reliable performance with subtle cannabinoid ratios suited to both recreational and wellness-focused users.

    Why These Strains Stand Out in 2026

    Popular strains often dominate shelves, but underrated gems offer unique terpene profiles and stable genetics suited to varied growing conditions. These selections emphasize balanced cannabinoid ratios, typically ranging from 1:1 to 2:1 THC:CBD, which support relaxed focus and mild euphoria. Growers appreciate their resilience to common pests and moderate flowering times, making them practical for indoor and outdoor setups alike. Terpenes such as myrcene, limonene, caryophyllene, and pinene play key roles in shaping aroma, flavor, and the entourage effect that enhances overall benefits without intensifying psychoactivity.

    Each strain below includes details on flavor notes, effects, and cultivation advice drawn from grower experiences. They stand apart by combining aromatic complexity with functional benefits, appealing to those tired of repetitive commercial varieties. In practice, these varieties perform consistently across different climates when basic environmental controls are maintained, rewarding attentive growers with harvests that preserve delicate terpene profiles.

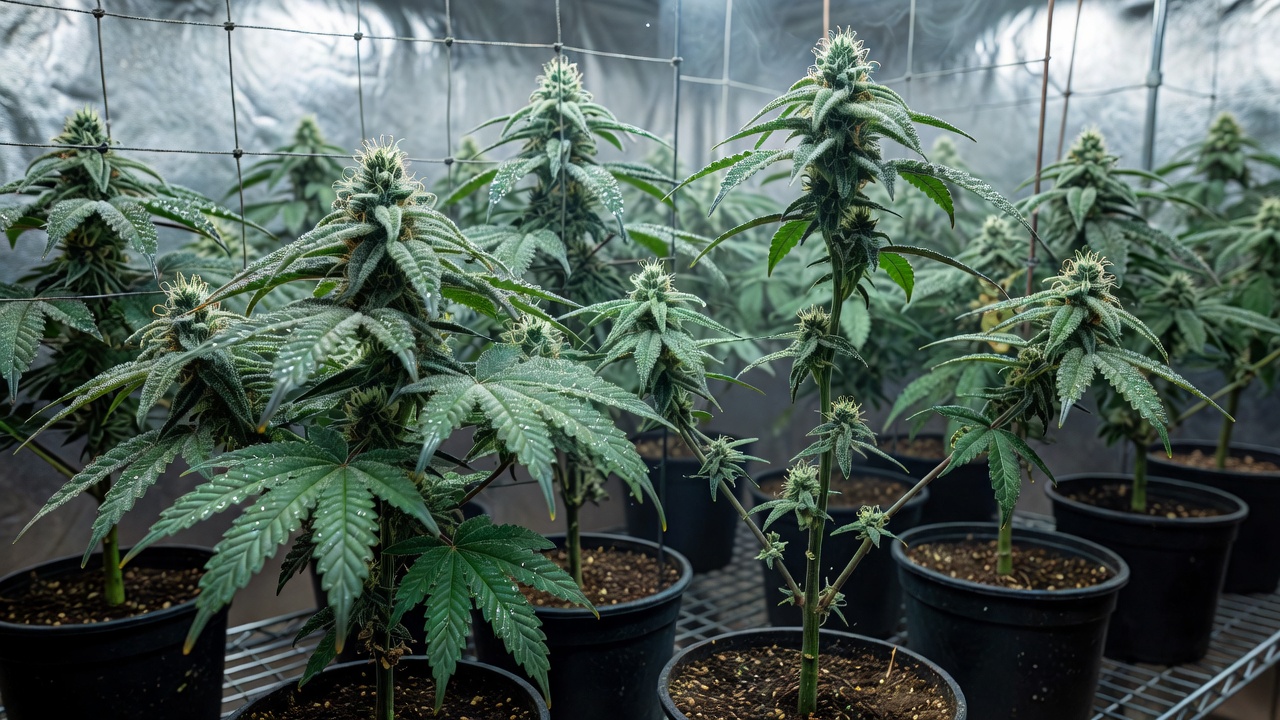
    Sour Tsunami: Earthy Citrus with Functional Balance

    Sour Tsunami delivers a distinctive sour citrus flavor layered with earthy undertones, thanks to its dominant terpenes like myrcene and limonene. Its THC/CBD profile often tests around 10% THC and 8-12% CBD, creating a balanced effect that eases anxiety while maintaining mental clarity. Users report gentle body relaxation ideal for daytime use or creative tasks.

    Flavor and Effects in Detail

    The sour citrus notes emerge prominently during curing, while earthy base tones provide depth. This combination makes it suitable for users seeking functional daytime options that avoid heavy sedation.

    Cultivation Guidance

    Cultivation notes highlight its moderate height and 8-9 week flowering period. It thrives in hydroponic systems or well-aerated soil with consistent humidity around 50%. Maintain pH between 6.0-6.5 in soil and 5.5-5.8 in hydro setups. Provide daytime temperatures of 72-78Β°F and nighttime drops of 5-10 degrees. This strain resists mold better than many sativa-leaning hybrids, rewarding growers with dense, resinous buds. Example: Top plants at week four of veg to encourage lateral branching and yields up to 450 grams per square meter indoors. Monitor for spider mites weekly and apply neem oil preventatively. It stands out for seed buyers seeking reliable CBD content without sacrificing flavor depth.

    Pennywise: Berry Spice and Calm Clarity

    Named for its clown-like appearance in bud structure, Pennywise features sweet berry and spicy notes from caryophyllene and pinene. With THC levels near 8-12% paired with similar CBD, it promotes calm focus suitable for evening relaxation or managing everyday stress. The balanced profile avoids heavy sedation common in higher-THC options.

    Flavor and Effects in Detail

    Berry sweetness pairs with subtle spice on exhale, delivering clear-headed calm that supports light social activities or focused reading without drowsiness.

    Cultivation Guidance

    For cultivation, Pennywise grows compactly, finishing in 7-8 weeks indoors. It prefers organic soil amendments and moderate lighting to maximize CBD expression. Use a living soil mix with added compost tea every two weeks during veg. Home growers value its high yield potential and resistance to temperature fluctuations, making it a standout choice over flashier strains in 2026 seed catalogs. Practical tip: Keep relative humidity at 45-55% during flower and employ LST to keep canopy even under 600W LEDs, often achieving 500 grams per square meter. Check EC levels weekly to avoid nutrient burn.
    Harle-Tsu: Piney Sweetness for Balanced Relief

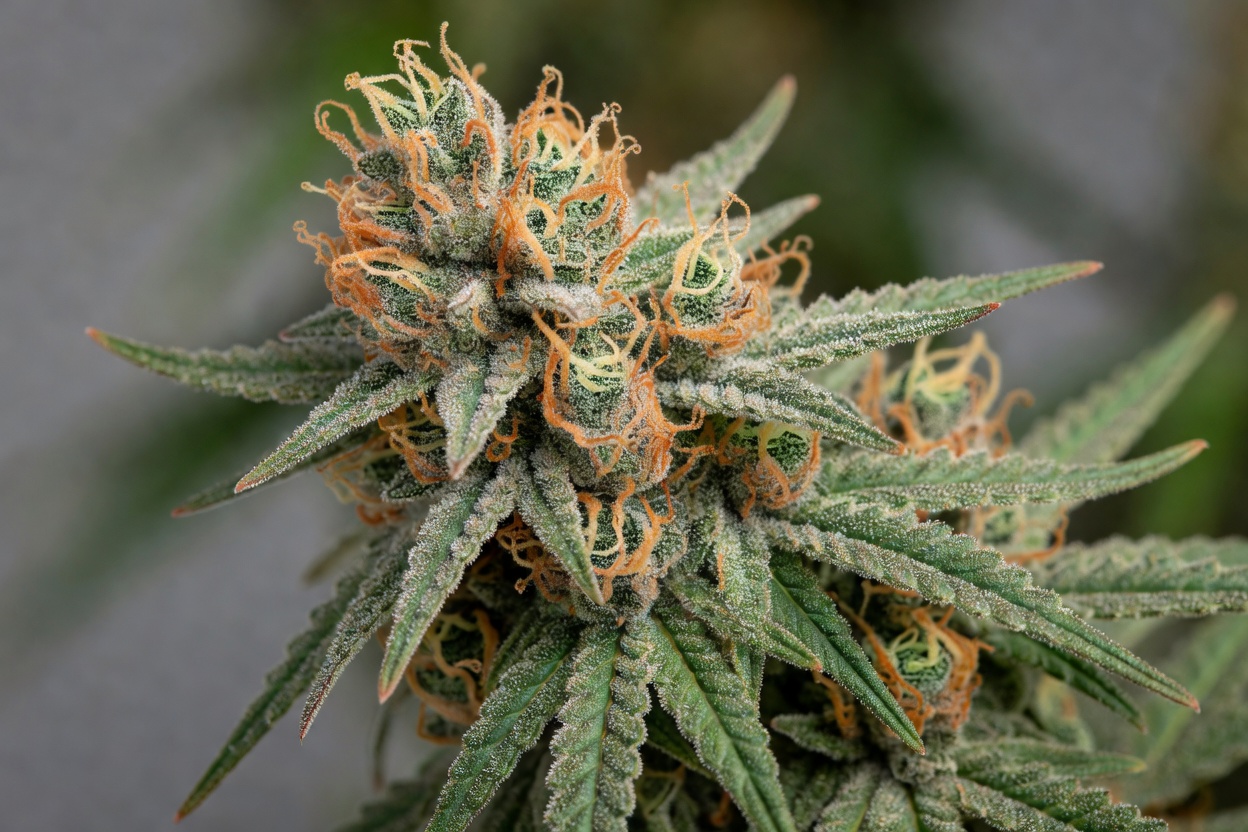
    Harle-Tsu combines pine and sweet herbal flavors with subtle grape hints, driven by its terpene synergy. Its consistent 1:1 THC to CBD ratio around 10% each delivers clear-headed relief and mild anti-inflammatory effects, appealing to medicinal users and recreational growers alike.

    Flavor and Effects in Detail

    Pine-forward aroma transitions to gentle sweetness, supporting users who want relief that remains mentally sharp throughout the day.

    Cultivation Guidance

    This strain excels in cultivation with a short 7-week flower time and strong branching structure. It performs well in both soil and coco coir, requiring standard nutrient schedules. Start seedlings in small pots and transplant once roots fill the container to minimize stress. Seed buyers note its genetic stability, which reduces hermaphrodite risks compared to less refined hybrids, positioning it as an underrated favorite for consistent home harvests. Example setup: Use 5-gallon fabric pots with perlite-amended coco and feed at 800-1000 ppm during peak flower for dense colas.

    ACDC: Woody Citrus Notes and Versatile Effects

    ACDC offers woody citrus aromas with hints of pepper, creating a complex palate. Its high-CBD profile, often 10-15% CBD to 3-5% THC, supports focused relaxation and pain management without intoxication. This makes it particularly suited for growers prioritizing functional daytime strains.

    Flavor and Effects in Detail

    Woody base notes blend with bright citrus and light pepper, offering a clean finish that pairs well with morning routines or work-from-home focus.

    Cultivation Guidance

    Cultivation is straightforward with a 8-9 week cycle and tolerance to cooler climates. It benefits from topping to encourage bushier growth and higher yields. Train plants with SCROG nets in cooler outdoor climates where nights drop to 60Β°F. In 2026, ACDC remains a hidden gem for its adaptability and distinctive flavor that differentiates it from sweeter mainstream varieties. Monitor VPD closely around 0.8-1.0 kPa during flower and flush with pH-balanced water two weeks before harvest.

    Ringo’s Gift: Floral Earth and Gentle Harmony

    Ringo’s Gift presents floral earth tones with subtle fruit undertones via its rich terpene content. Balanced at approximately 8% THC and 10% CBD, it fosters harmonious mood elevation and physical ease, ideal for evening wind-down or social settings.

    Flavor and Effects in Detail

    Floral notes dominate the nose while earth and faint fruit appear on the palate, creating a smooth experience suited to relaxed gatherings.

    Cultivation Guidance

    Growers appreciate its vigorous growth and 8-week flowering indoors, with good resistance to pests. Optimal results come from LST techniques and balanced feeding. Apply low-stress training early in veg and maintain 18/6 lighting until flip. This strain stands out for seed selection due to its unique flavor profile and reliable performance in varied environments. Example: Outdoor growers in temperate zones report success with row covers during unexpected cold snaps, yielding 600 grams per plant when spaced properly.

    Selecting Seeds and Growing Tips for 2026

    When sourcing these strains, prioritize reputable breeders for feminized seeds to ensure balanced cannabinoid expression. Start with quality soil or hydro setups, monitor pH levels closely, and provide 18/6 light during veg for robust development. These varieties reward patience with flavorful, resin-packed harvests suited to enthusiasts seeking alternatives to hype strains.

    Further insights on cannabinoid research are available from nida.nih.gov. Experimenting with these options can refresh your garden and expand your appreciation for nuanced cannabis profiles. Track environmental data in a grow journal to refine techniques across multiple cycles, and consider starting with small test batches before scaling up production.
  • Best High-Yielding Cannabis Strains for Seed Growing in 2026

    Best High-Yielding Cannabis Strains for Seed Growing in 2026

    As home cultivation continues to evolve in 2026, selecting the right high-yielding cannabis strains from seed remains essential for maximizing harvests. Whether growing indoors, outdoors, or in hydroponic systems, understanding strain genetics, combined with precise environmental controls, can lead to impressive results. This guide explores the leading varieties suited for various experience levels and highlights 2026 trends like climate-resilient hybrids and rapid-flowering autos. Home growers benefit from matching genetics to their specific setup, as this reduces common issues like poor germination or uneven growth and increases overall success rates.

    Leading High-Yield Strains for 2026

    Among the standout options this year are Gorilla Glue #4, known for its massive resin production and yields up to 600 grams per square meter indoors. This strain thrives when given 18 hours of light during vegetation and benefits from early topping to control its vigorous stretch. Northern Lights offers reliable performance with dense buds and resistance to common pests, making it ideal for beginners. It performs well in soil with minimal feeding and reaches harvest in nine weeks of flower. Sour Diesel provides energetic effects and strong outdoor yields exceeding 700 grams per plant in optimal conditions. For advanced growers, strains like Amnesia Haze deliver potent THC levels and extended vegetative growth for bigger colas. Give this variety at least four weeks of vegetative time before switching to flower to maximize cola size.

    2026 trends emphasize autoflowering varieties such as Royal Auto or new crosses with enhanced terpene profiles for better pest resistance. These strains flower in 8-10 weeks regardless of light cycles, suiting quick-turnaround setups. Always source quality seeds from reputable breeders to ensure genetic stability and high germination rates. Test a small batch of seeds first by placing them in a damp paper towel for 24 to 48 hours to confirm viability before committing to a full grow.

    Optimal Lighting for Seed-Grown Cannabis

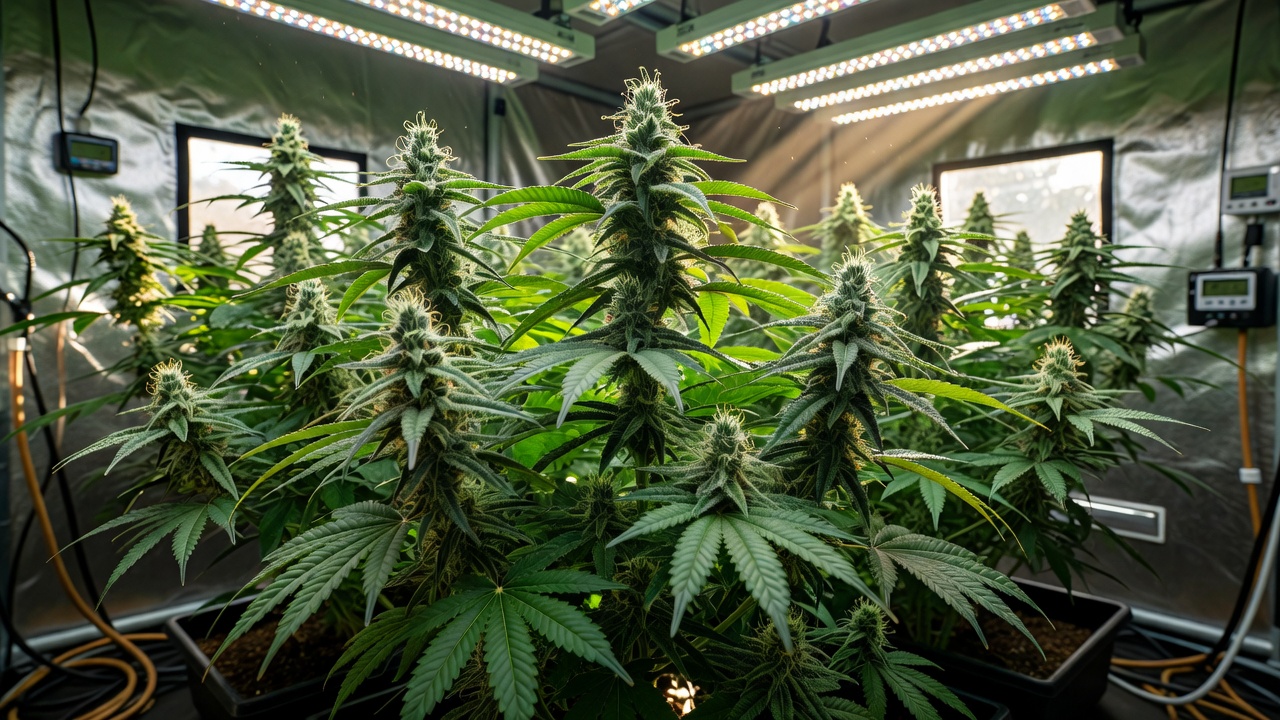
    Lighting plays a critical role in transitioning seedlings to vigorous plants. Start with full-spectrum LED grow lights at 18-24 hours daily during vegetative stages to promote strong root and leaf development. Switch to 12/12 schedules for flowering to trigger bud formation. High-yielding strains respond well to intensities around 600-1000 PPFD, but monitor for light burn on sensitive leaves. Keep a daily log of light distance and intensity readings to avoid stressing plants during the transition to bloom.

    In 2026, smart lighting systems with adjustable spectra are gaining popularity, allowing growers to fine-tune blue light for growth and red for flowering. Position lights 30-60 cm above the canopy and rotate plants regularly for even exposure. Outdoor growers should select strains that thrive in full sun, aiming for at least 6-8 hours of direct light daily. Supplement with reflective mylar sheeting on walls to increase light efficiency by up to 30 percent without raising electricity costs.

    Practical Indoor Lighting Schedule Example

    A typical indoor schedule begins with 24 hours of light for the first three days after germination, then drops to 18 hours until week four. At that point, reduce to 12 hours to initiate flowering. Check leaf tips weekly for signs of stress and adjust height accordingly.

    Nutrient Management Strategies

    Proper nutrition supports the heavy demands of high-yield genetics. Begin seedlings with light, balanced formulas rich in nitrogen, then transition to phosphorus-heavy mixes during bloom. Organic options like compost teas enhance soil biology, while hydro systems benefit from precise EC monitoring between 1.2-2.0 mS/cm. Mix nutrients in small batches and apply only after testing pH to prevent imbalances that slow growth.

    Avoid overfeeding, which can cause nutrient lockout and reduce yields. Flush plants with pH-balanced water in the final two weeks. Authoritative resources such as CDC marijuana guidelines stress safe handling practices during cultivation. Track pH levels between 6.0-7.0 for soil and 5.5-6.5 for hydro to optimize uptake. In practice, a weekly feeding chart helps beginners stay consistent while advanced growers adjust based on leaf color and growth speed.

    Training Techniques to Boost Yields

    Low-stress training (LST) and topping encourage bushier growth and multiple colas. For beginners, LST involves gently bending stems to create an even canopy, increasing light penetration without shock. Advanced techniques like SCROG (screen of green) or defoliation remove lower foliage to direct energy to buds.

    • Top plants at the fourth node for branching.
    • Use ties or nets to spread branches horizontally.
    • Apply these methods early in veg for best results on strains like White Widow.
    • Monitor recovery for three days after any training and provide extra humidity if leaves droop.
    • These approaches can boost yields by 20-40% when combined with the right genetics. Combine LST with a simple bamboo stake grid for even better light distribution in small tents.

      Beginner vs Advanced Grower Tips

      Beginners should start with forgiving strains like Northern Lights that tolerate minor errors in watering or lighting. Focus on stable environments and simple soil grows. Advanced cultivators can experiment with CO2 supplementation and advanced pruning on high-THC varieties for record harvests. Record daily temperature and humidity readings to spot patterns that affect final yield.

      In 2026, many enthusiasts incorporate AI monitoring apps for real-time adjustments, a trend bridging experience gaps. These tools alert growers to pH drifts or temperature spikes before they damage plants.

      Adapting to Different Growing Setups

      Indoor setups favor compact strains with controlled humidity at 40-50% during flower. Outdoor requires pest-resistant options suited to local climates. Hydroponics accelerates growth for fast-yield autos but demands vigilant maintenance. Check reservoir temperatures daily to keep them between 18 and 22 degrees Celsius.

      Scale nutrients and training accordinglyβ€”soil buffers errors better than coco or DWC systems. In hydro, change nutrient solution every seven to ten days to maintain oxygen levels and prevent root rot.

      Conclusion

      Choosing high-yielding cannabis strains from seed and applying targeted cultivation practices sets the foundation for abundant 2026 harvests. By mastering lighting, nutrients, and training while matching strains to your skill level and setup, home growers can achieve professional-level results. Stay updated on emerging trends and always prioritize quality genetics for success. Consistent observation and small adjustments throughout the cycle often make the difference between average and exceptional yields.

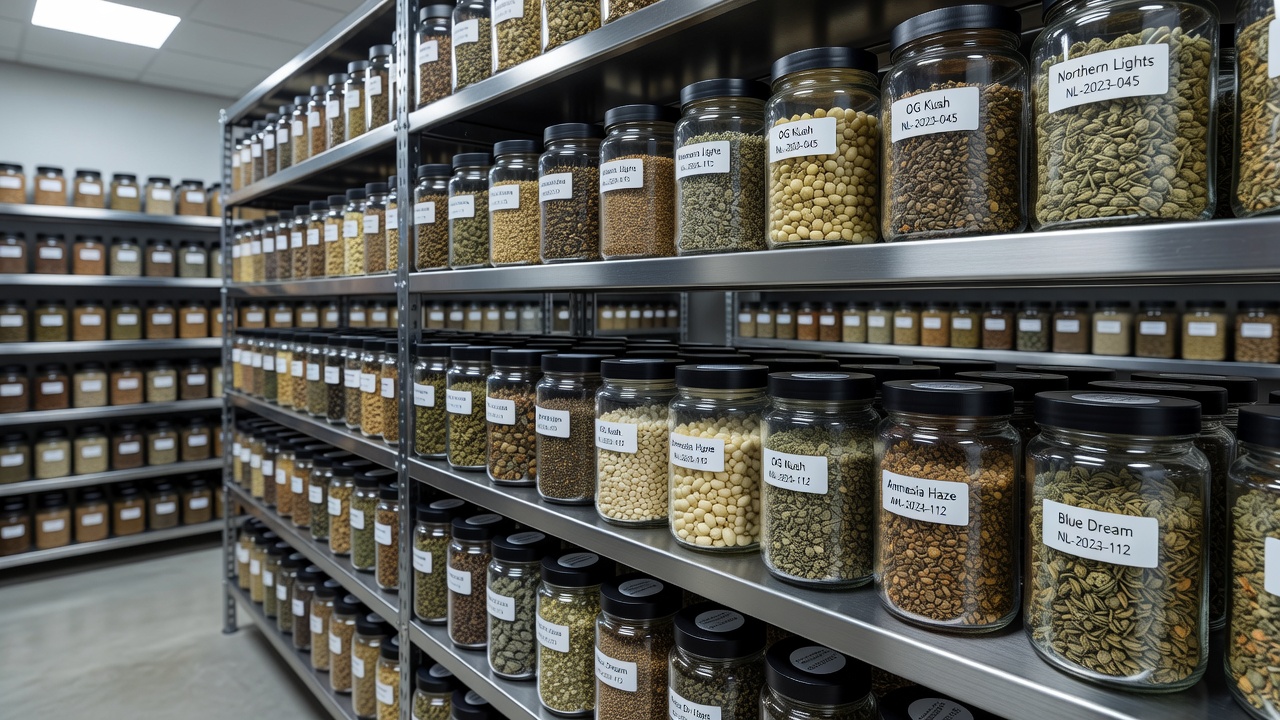
  • Epigenetics in Cannabis: Selecting Stable Seed Bank Genetics 2026

    Epigenetics in Cannabis: Selecting Stable Seed Bank Genetics 2026

    As home growers seek consistent results from cannabis seeds, understanding epigenetics has become essential in 2026. Epigenetic factors modify gene expression without altering DNA sequences, affecting traits like potency, yield, and resilience in ways traditional genetics cannot predict. When sourcing from seed banks, buyers must look beyond basic lineage to evaluate how environmental histories influence seed performance. This approach helps secure stable genetics for enhanced breeding and cultivation outcomes. For example, a grower in a controlled indoor tent using LED lights at 18/6 during veg might still encounter unexpected variations if the parent plants experienced heat stress, leading to lower THC expression in the offspring despite identical genetics on paper.

    Understanding Epigenetics in Cannabis Cultivation

    Epigenetics involves mechanisms such as DNA methylation and histone modification that respond to environmental cues. In cannabis, these processes determine how plants express traits under varying light, temperature, and nutrient conditions. Seed banks that document parental plant environments provide more reliable offerings because they account for these influences. Growers benefit from recognizing that even identical genetic lines can produce varied phenotypes due to epigenetic marks inherited from previous generations. Consider a practical scenario where two batches of the same Blue Dream lineage are purchased: one from a bank that grew mothers under steady 75Β°F conditions with balanced organic nutrients, and another from a source with fluctuating humidity during flowering. The first batch typically delivers uniform canopy growth and consistent 18% THC levels, while the second may show 10-15% variation in resin production across siblings.

    Research from institutions like the National Institutes of Health highlights how stress during flowering can imprint lasting changes on offspring. For cannabis enthusiasts, this means selecting seeds from breeders who maintain controlled environments to minimize unwanted epigenetic variations. Such practices lead to more predictable growth cycles and reduced phenotypic drift in home setups. A concrete example involves monitoring VPD levels between 0.8-1.2 kPa during the final four weeks of flower to avoid stress-induced methylation that could suppress terpene profiles like myrcene or limonene in future generations.

    Key Environmental Triggers to Monitor

    Growers should track specific variables that commonly trigger epigenetic responses. Temperature swings above 85Β°F during lights-on periods, pH fluctuations outside 6.0-6.5 in soil, or inconsistent CO2 supplementation at 800-1200 ppm can all leave marks. In one documented case, a Pacific Northwest outdoor cultivator noted that seeds from parents exposed to late-season cold snaps produced plants with delayed flowering by up to 10 days compared to siblings from climate-controlled stock.

    How Epigenetic Factors Affect Genetic Stability

    Stable cannabis genetics rely on minimizing epigenetic instability passed through seeds. Unstable lines may exhibit inconsistent resin production or hermaphroditic tendencies triggered by prior environmental stresses on parent plants. Seed banks addressing this offer detailed grow histories, helping buyers avoid lines prone to variation. In practice, this stability translates to uniform crops that perform well across different indoor or outdoor conditions. An advanced grower might run a side-by-side test: plant 10 seeds from a stabilized line versus 10 from a less-documented source, noting that the former shows only 5% hermaphrodite risk under identical 12/12 lighting after week four of flower.

    Advanced growers in 2026 prioritize banks that use epigenetic testing data during breeding. These tests reveal methylation patterns linked to desirable traits like pest resistance. By focusing on such metrics, enthusiasts achieve better breeding outcomes without relying solely on visual selection of mother plants. For instance, selecting mothers that demonstrated strong resistance after deliberate spider mite exposure allows breeders to pass on those adaptive marks, resulting in offspring that require 30% less pesticide intervention in subsequent grows.

    Evaluating Seed Bank Offerings for Reliability

    When browsing seed banks, examine descriptions for mentions of stabilized lines and environmental controls during breeding. Reputable sources provide information on generation counts and selection pressures applied to reduce epigenetic noise. Look for transparency regarding parent plant conditions, as this directly impacts trait reliability in the seeds you purchase. Always request or review any available data on grow-room parameters such as daily light integral (DLI) values around 40-60 mol/mΒ²/day during vegetative stages.

    • Review customer feedback on phenotype consistency across multiple grows, focusing on reports that mention identical flowering times and cannabinoid percentages within a 2% margin.
    • Check for certifications or third-party lab reports on genetic stability, including any mentions of methylation analysis or multi-generational testing results.
    • Prioritize banks publishing detailed breeding logs from 2024 onward that list exact nutrient regimens, light schedules, and stress events avoided.
    • Compare batch photos and user-submitted grow journals to spot patterns of variation in leaf morphology or bud density.

    These steps filter out offerings where epigenetic factors may undermine expected results. In one practical application, a home grower cross-checked three banks for a sought-after OG Kush phenotype and selected the supplier whose logs showed zero temperature excursions above 80Β°F, yielding a crop with 95% uniformity in plant height at harvest.

    Practical Buying Tips Beyond Basic Genetics

    Start by matching seed selections to your specific growing environment to counteract potential epigenetic mismatches. Choose feminized or regular seeds from banks emphasizing multi-generational stability testing. Always verify batch dates and storage conditions, since improper handling can introduce new epigenetic stresses post-harvest. Store seeds at 40Β°F and 30% relative humidity in airtight containers to preserve existing marks. Additionally, cross-reference strain information with independent databases for reported variations. This helps identify lines where epigenetic influences have been successfully managed. Home growers report higher success rates when combining these checks with small test grows before committing to larger purchases. Begin with a 4-plant trial under your exact setupβ€”same medium, lights, and feeding scheduleβ€”to observe real-world expression before scaling to 20 or more plants.

    Advanced 2026 Strategies for Enhanced Breeding

    In 2026, leverage emerging tools like epigenetic profiling services offered by select seed banks to predict trait expression more accurately. Integrate data from climate simulations during selection to simulate real-world variables. Breeders now combine traditional backcrossing with epigenetic markers for superior outcomes in hybrid development. For example, using software models that replicate 95Β°F heat waves allows selection of lines less prone to cannabinoid degradation. Stay updated via industry resources on new testing protocols that quantify environmental impacts on seed lots. This strategy allows enthusiasts to select offerings optimized for specific breeding goals, such as higher cannabinoid profiles or faster flowering times. Applying these methods consistently elevates overall cultivation reliability, with some users documenting 20% yield improvements after switching to profiled stock.

    Conclusion

    Mastering epigenetic considerations when buying cannabis seeds empowers home growers to achieve stable, high-performing genetics. By applying these 2026-focused evaluation techniques, enthusiasts secure better results from seed banks while advancing their breeding projects with confidence and precision. Consistent documentation of your own grow conditions further refines future selections, creating a feedback loop that minimizes unwanted variation across seasons.

  • pH and EC Basics for First-Time Cannabis Growers

    pH and EC Basics for First-Time Cannabis Growers

    Starting your first cannabis grow with easy seeds is an exciting journey, but understanding pH and EC is essential for healthy plants and bountiful harvests. These two measurements control how well your plants absorb nutrients, preventing common issues like deficiencies or toxicities that can stunt growth or ruin yields. For beginners, mastering these basics early sets the foundation for success in any home setup, whether soil, coco, or hydroponics. This guide breaks down the science in simple terms, explains why balance matters, and provides practical steps using affordable tools. Many new growers find that consistent monitoring turns unpredictable results into reliable, high-quality harvests.

    What Is pH and Why Does It Matter for Cannabis?

    pH measures the acidity or alkalinity of your growing medium and nutrient solution on a scale from 0 to 14, with 7 being neutral. Cannabis thrives in slightly acidic conditions, ideally between 6.0 and 7.0 for soil grows and 5.5 to 6.5 for hydro or coco. When pH drifts outside this range, nutrients become locked out even if present in the solution, leading to yellowing leaves, slow growth, or burnt tips. For example, at a pH below 5.8 in hydro systems, iron and manganese become overly available while phosphorus uptake drops sharply.

    Easy cannabis seeds, bred for resilience, still suffer when pH imbalances occur during critical stages like seedling or flowering. Maintaining proper pH ensures roots uptake nitrogen, phosphorus, and potassium efficiently. Many first-time growers overlook this, resulting in frustrated attempts and wasted resources. Regular checks prevent these problems and promote vigorous plants from the start.

    pH Targets by Medium and Stage

    In soil, aim for 6.2–6.8 throughout the cycle because soil microbes help buffer swings. In coco coir or rockwool, keep the solution between 5.8 and 6.2 to compensate for the medium’s lower buffering capacity. During the first two weeks after germination, stay on the lower end of the range (5.8–6.0) to encourage rapid root development. As plants enter flowering, gradually raise the target toward 6.3–6.5 so phosphorus and potassium remain available for bud formation.

    Understanding EC and Nutrient Strength

    EC, or electrical conductivity, gauges the concentration of dissolved salts and nutrients in your water or medium. Measured in millisiemens per centimeter (mS/cm) or parts per million (ppm), it indicates how strong your nutrient mix is. Beginners often overfeed, pushing EC too high and causing nutrient burn, while underfeeding leads to deficiencies. A practical rule is to start seedlings at 0.4–0.6 mS/cm and raise the value only after the third set of true leaves appears.

    For easy cannabis strains, start with low EC around 0.8-1.2 mS/cm during vegetative growth and gradually increase to 1.4-1.8 mS/cm in flowering. Balanced EC works hand-in-hand with pH to avoid toxicity buildup. Without monitoring, salts accumulate in the medium, stressing roots and reducing yields. This is especially important in recirculating systems where imbalances compound quickly.

    EC Adjustments Through the Growth Cycle

    1. Seedling stage: 0.4–0.8 mS/cm to avoid burn on tender roots.
    2. Vegetative stage: 1.0–1.4 mS/cm, increasing every seven days as leaf mass grows.
    3. Flowering weeks 1–4: 1.4–1.6 mS/cm to support bud sites.
    4. Flowering weeks 5–8: 1.6–1.8 mS/cm, then taper back to 1.2 mS/cm in the final two weeks for a clean flush.

    Affordable Tools for Accurate Measurement

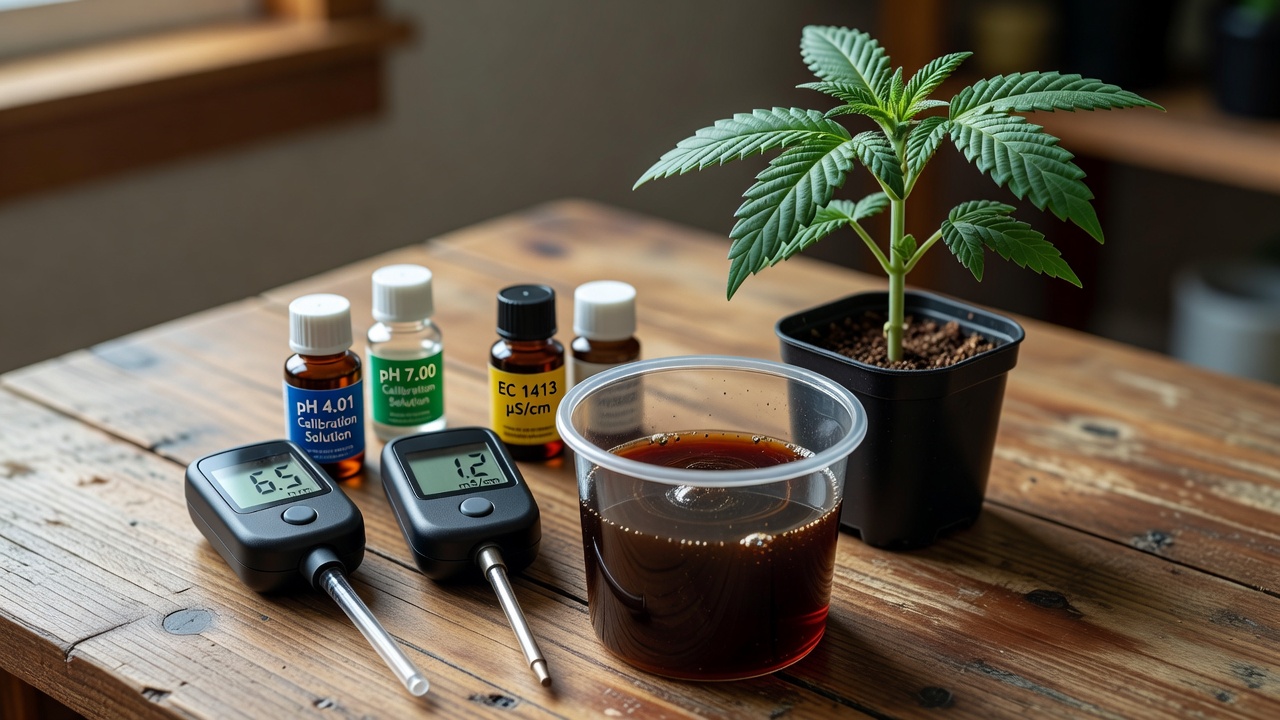
    You do not need expensive lab equipment to monitor pH and EC effectively. Digital pH pens and EC meters from brands like Apera or Bluelab offer reliable readings for under $100. Combo meters that test both parameters simplify the process for beginners. Calibration solutions and storage liquids keep tools accurate over time. Store pH pens upright in storage solution and never let the probe dry out; replace the cap after every use.

    Additional basics include pH up and down solutions (phosphoric acid or potassium hydroxide based), distilled water for mixing, and a simple syringe for precise adjustments. Many growers also use inexpensive soil pH test kits as backups. These tools fit any budget while delivering professional results when used correctly.

    Simple Steps to Measure and Adjust Levels

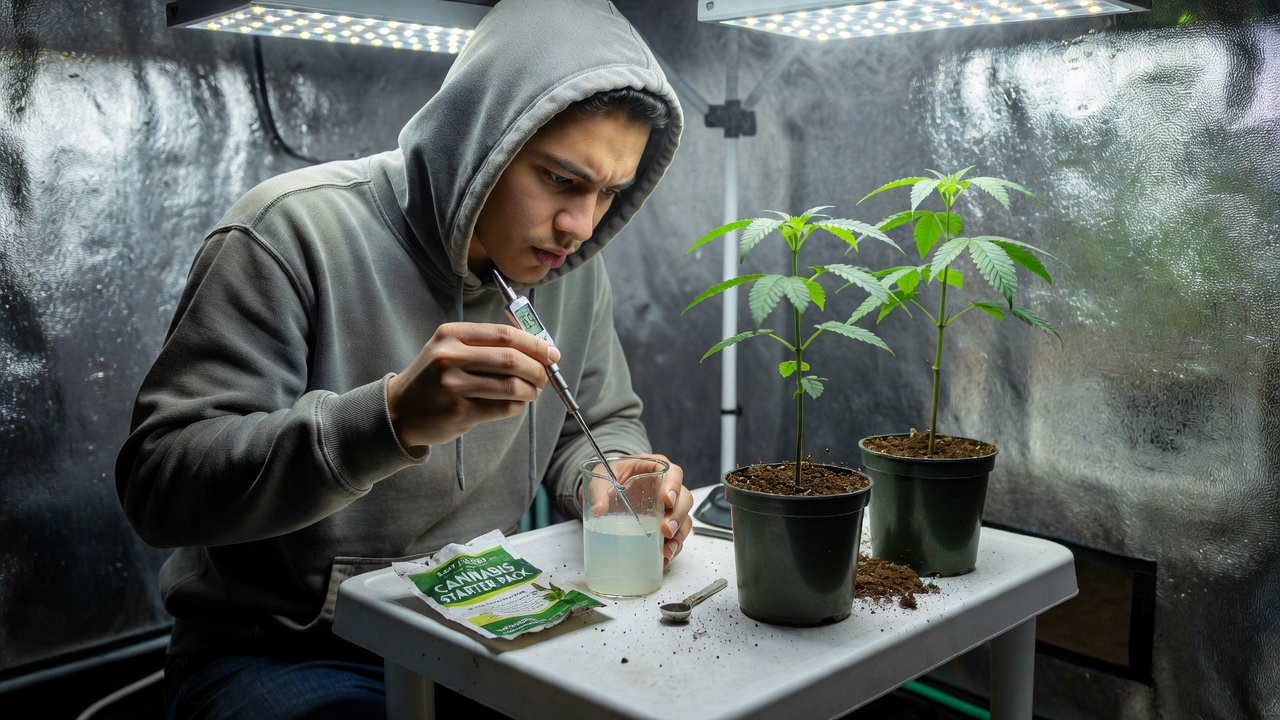
    Begin by calibrating your meters with fresh solutions before each use. For hydro setups, test the nutrient reservoir directly; in soil, measure runoff water after watering. Aim for consistent readings at the same time daily to spot trends early. Always test temperature firstβ€”EC readings rise roughly 2 % per degree Celsius above 25 Β°Cβ€”so cool the sample if needed.

    To adjust pH, add small amounts of pH up or down while stirring, then retest after 15 minutes. For EC, dilute with plain water if too high or add nutrients gradually if low. Always adjust pH after mixing nutrients, as they naturally alter acidity. Document readings in a grow journal to refine your routine across growth phases.

    Daily Monitoring Routine Example

    • Measure reservoir or runoff at 8 a.m. before lights come on.
    • Record pH, EC, and water temperature in a simple spreadsheet.
    • If pH has drifted more than 0.3 units overnight, adjust in 0.1 increments.
    • Flush with plain water every 10–14 days in soil or coco to reset EC to baseline.

    Common Mistakes and How to Avoid Them

    One frequent error is ignoring temperature effectsβ€”warm solutions read higher EC, so measure at room temperature. Another is skipping calibration, leading to false readings and improper adjustments. Overcorrecting pH swings rapidly damages roots, so make changes slowly. A safe practice is to add no more than 0.5 ml of pH adjuster per liter at a time and wait ten minutes before retesting.

    Beginners sometimes use tap water without checking its baseline EC, introducing unwanted minerals. Always start with filtered or RO water for control. Finally, neglecting weekly flushes allows salt buildup; incorporate plain water flushes every 2-3 weeks to reset levels and maintain root health through harvest.

    Optimizing Growth from Seed to Harvest

    With easy cannabis seeds, consistent pH and EC monitoring accelerates vegetative growth and maximizes resin production in flower. Track levels weekly, adjusting based on plant response like leaf color and growth rate. This proactive approach minimizes stress and supports robust development in small home spaces. Watch for early warning signs: dark green, clawing leaves often signal high EC, while pale new growth usually means pH is locking out iron or nitrogen.

    By harvest, balanced conditions yield denser buds and better terpene profiles. Combine these practices with proper lighting, ventilation, and watering schedules for optimal results. Resources from the EPA on water quality further inform safe nutrient practices.

    Conclusion

    Grasping pH and EC transforms beginner cannabis growing from guesswork into predictable success. Using affordable tools and following straightforward measurement steps prevents nutrient issues, ensuring your easy seeds reach their full potential. Stay vigilant, adjust thoughtfully, and enjoy the rewarding process from seed to harvest.

  • Top Outdoor Cannabis Growing Errors That Slash Yields in 2026

    Top Outdoor Cannabis Growing Errors That Slash Yields in 2026

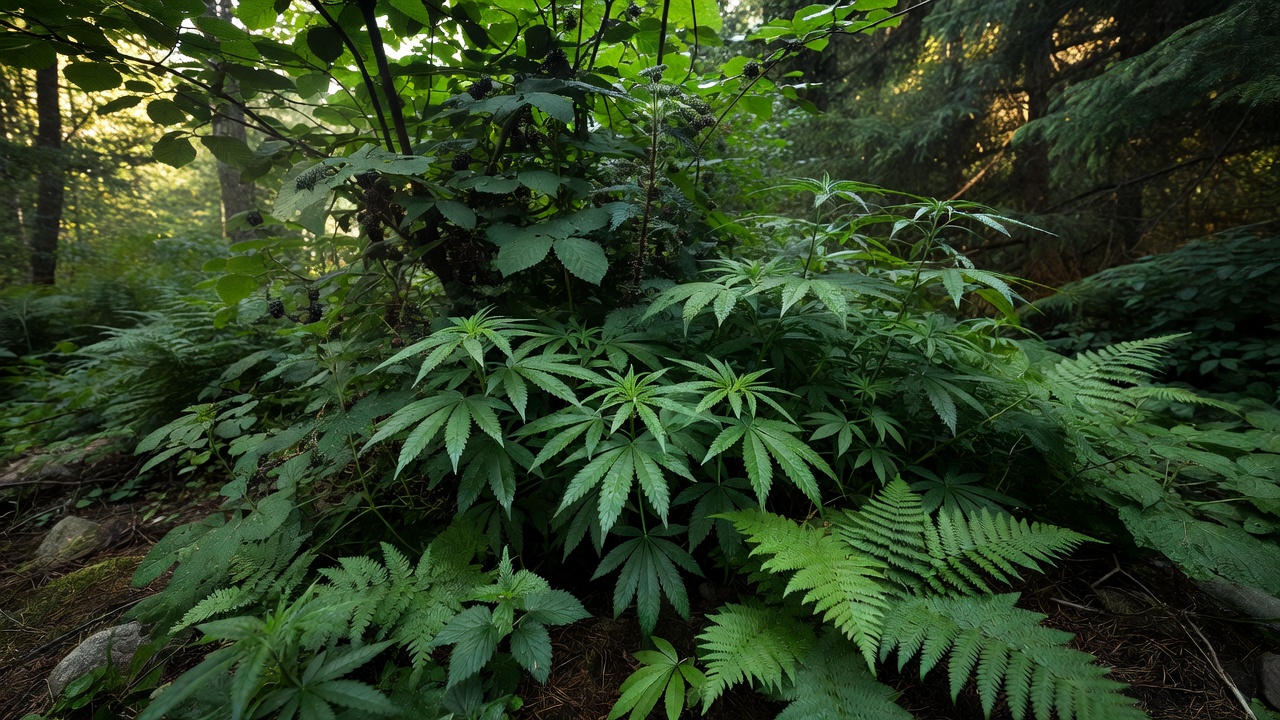
    Outdoor cannabis cultivation offers home growers the chance for massive, sun-grown harvests that can reach several pounds per plant under ideal conditions, but common errors in seed choice, timing, and security frequently destroy potential yields before they ever reach maturity. For seed buyers planning 2026 guerrilla or backyard grows, understanding these pitfalls is essential to success because outdoor environments introduce variables like unpredictable weather, longer daylight shifts, and external threats that indoor setups simply do not face. This guide breaks down the top mistakes and delivers practical fixes to optimize your outdoor results, drawing on real-world experiences from growers who have refined their methods over multiple seasons.

    1. Selecting Seeds Unsuitable for Outdoor Conditions

    Many growers buy popular indoor strains without checking their suitability for outdoor environments, assuming that high-THC genetics will perform equally well under natural sunlight. Autoflowers or photoperiods bred for controlled climates often underperform when exposed to variable weather, shorter seasons, or specific latitudes because they lack the robust root systems and mold resistance needed for open-air growing. This leads to stunted plants, lower resin production, and reduced bud quality that fails to meet expectations at harvest.

    Practical fix: Choose photoperiod strains with strong genetics for outdoor resilience, such as those with indica dominance for faster finishes in northern climates where autumn arrives early. Verify seed banks provide detailed outdoor recommendations and climate zone data before purchase, and cross-reference your USDA hardiness zone with the strain’s flowering time. Always start with fresh, reputable seeds suited to your region’s daylight hours and frost dates; for example, a grower in USDA zone 6 might select a strain finishing in early October rather than one that requires a full 12 weeks of bloom.

    Matching Genetics to Your Latitude

    Consider testing a small number of seeds from multiple outdoor-oriented breeders in your first season. This approach reveals which lines handle local humidity or temperature swings best without risking your entire crop on unproven genetics.

    2. Poor Timing of Planting and Harvest

    Planting too early exposes seedlings to late frosts that can kill tender growth overnight, while delaying start reduces vegetative growth time and leaves plants undersized when flowering begins. In 2026, shifting weather patterns make accurate timing critical because spring warm spells can arrive weeks earlier or later than historical averages. Harvesting prematurely cuts potency as cannabinoids have not fully developed, yet waiting too long risks mold or rain damage during peak season when humidity spikes.

    Fix these issues by tracking local frost dates and lunar cycles for planting windows that align with stable soil temperatures above 50 degrees Fahrenheit. Use climate apps to monitor 2026 forecasts and start seedlings indoors 4-6 weeks before the last frost, hardening them off gradually over 10 days before transplant. For harvest, monitor trichomes closely with a magnifier rather than relying on calendar dates alone; aim for 10-15 percent amber heads on most buds to capture peak effects while avoiding weather-related losses.

    3. Neglecting Site Security in Guerrilla Grows

    Guerrilla growers often overlook security, leading to theft, discovery by authorities, or animal damage that wipes out months of work in a single night. Exposed sites with visible paths or footprints invite problems that destroy entire crops, especially when plants become obvious from trails or clearings during late summer.

    Secure locations by scouting remote areas with natural camouflage like dense brush or tree cover that hides plants from casual view. Rotate sites yearly to avoid patterns that neighbors or hikers might notice, and avoid creating trails by accessing plots from different directions each visit. Install discreet motion cameras or use scent-masking techniques such as planting near aromatic herbs; always plant in small clusters rather than large monocultures to minimize total loss if one spot is compromised.

    4. Inadequate Soil Preparation and Nutrient Management

    Outdoor soil often lacks the balance needed for heavy-feeding cannabis plants that demand consistent access to nitrogen, phosphorus, and potassium throughout their life cycle. Compacted earth, poor drainage, or nutrient deficiencies cause root issues and weak growth throughout the season, resulting in yellowing leaves and sparse yields that fall far short of potential.

    • Test soil pH and amend with organic compost or perlite for better aeration so roots can expand freely and absorb water efficiently.
    • Incorporate slow-release nutrients like bone meal at planting time to support early root development without the risk of chemical burn.
    • Top-dress with worm castings mid-season to sustain flowering and replenish microbial life in the soil around the root zone.

    These steps prevent common deficiencies and support bigger yields without chemical burn risks, giving plants the steady nutrition they need from vegetative stage through full maturity.

    5. Ignoring Pest and Weather Protection

    Pests like spider mites or deer, combined with storms, devastate unprotected outdoor crops by stripping foliage or breaking branches at critical moments. Guerrilla sites are especially vulnerable without regular monitoring because problems can escalate for weeks before discovery.

    Implement integrated pest management using neem oil sprays every 7-10 days during early growth and companion planting with marigolds to deter aphids and other insects naturally. Build simple windbreaks from local brush or use row covers during extreme weather events such as hail or high winds. Check plants weekly for early signs of infestation to intervene before widespread damage occurs, and keep a small field journal noting any recurring issues for future seasons.

    6. Rushing or Delaying Final Harvest Decisions

    Many seed buyers harvest based on breeder timelines alone, missing peak cannabinoid development or exposing buds to autumn rains that introduce bud rot. This directly reduces marketable yield and quality, turning what could have been premium flower into lower-grade material.

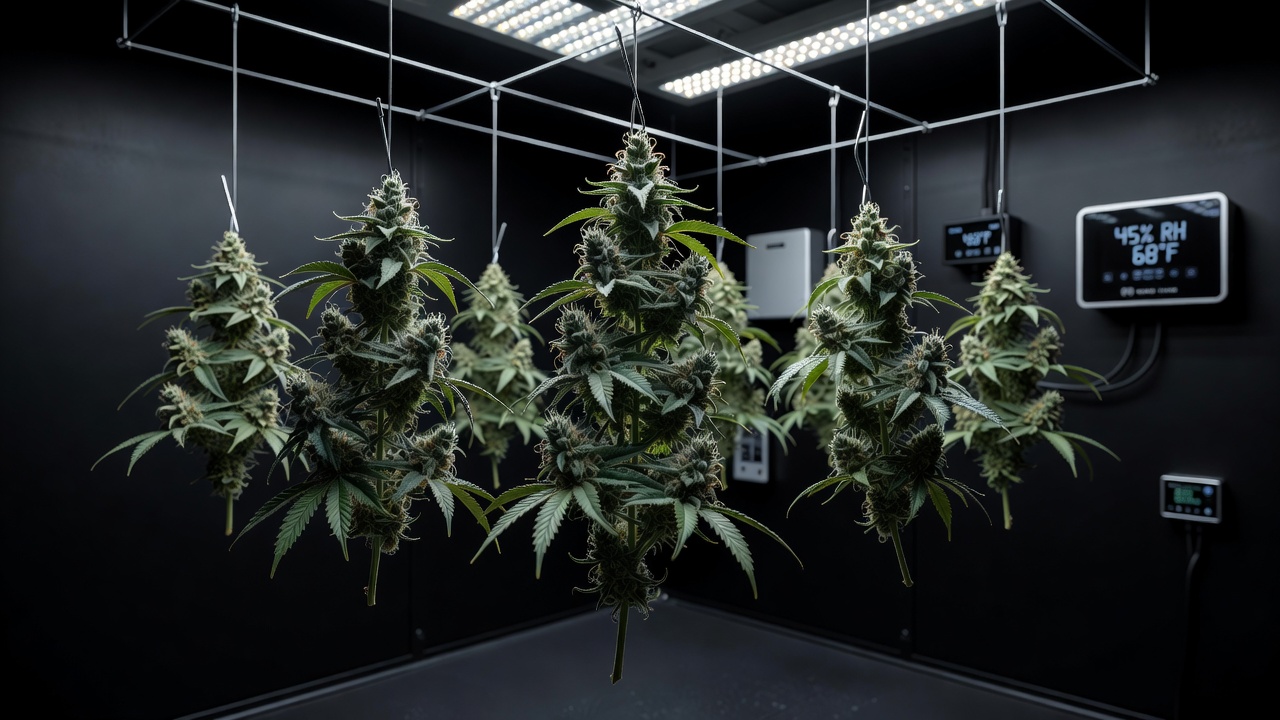
    Adopt a patient approach by sampling buds from multiple plants and examining trichome color under magnification at least twice before deciding. Dry and cure properly post-harvest to preserve terpenes by hanging branches in a dark space with 45-55 percent humidity for 10-14 days. Adjust future 2026 timing based on this season’s results for iterative improvement, noting exact harvest dates and weather conditions in your records.

    Optimizing Your 2026 Outdoor and Guerrilla Grows

    By addressing these errors proactively, seed buyers can achieve significantly higher yields from outdoor cannabis that rival or exceed indoor results when conditions are managed well. Focus on climate-appropriate genetics, precise timing, and robust security measures that protect your investment from start to finish. For additional authoritative guidance on sustainable practices, consult resources from the USDA on soil health and the EPA for pesticide alternatives. Start planning now to turn common mistakes into consistent outdoor success across multiple seasons.

  • Organic Pest Control in Indoor Cannabis Hydroponics & Grow Tents

    Organic Pest Control in Indoor Cannabis Hydroponics & Grow Tents

    Introduction to Proactive Pest Management in Indoor Cannabis Cultivation

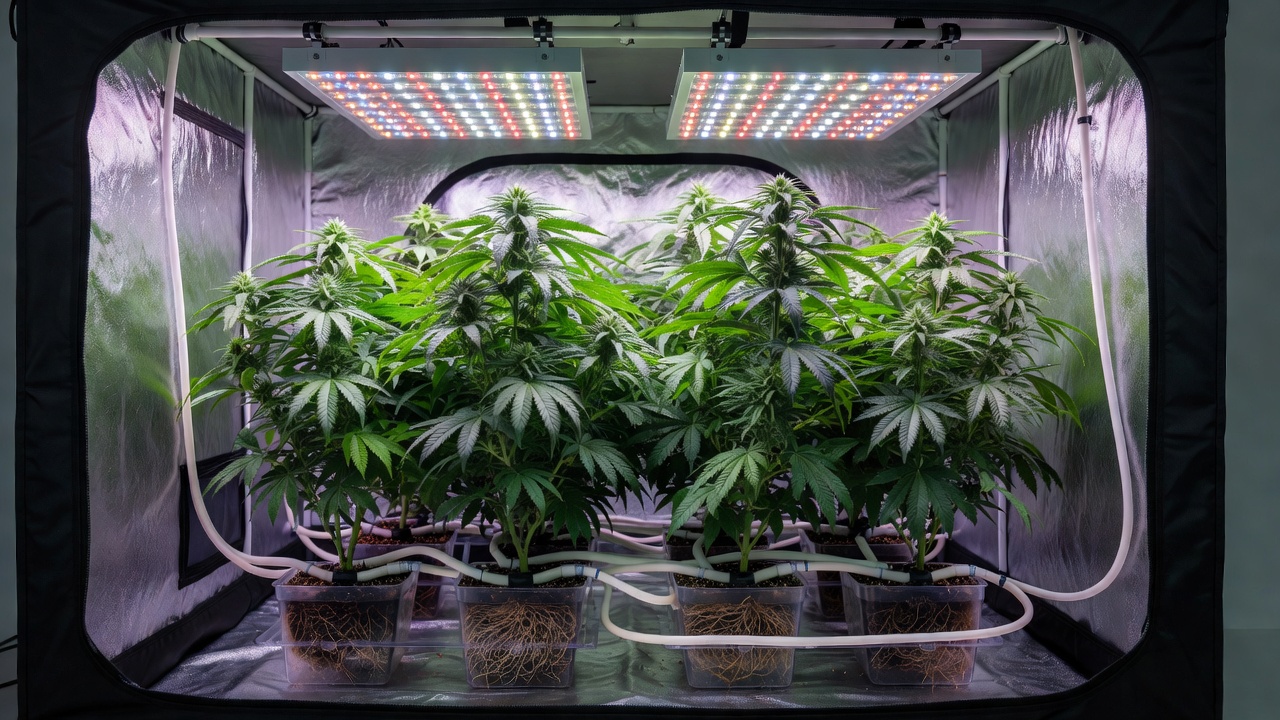
    Indoor cannabis growing in hydroponic systems and grow tents demands vigilant, proactive strategies to prevent pest outbreaks before they compromise yields. In 2026, home growers increasingly rely on organic methods that safeguard plant health without introducing synthetic chemicals. This approach integrates early detection, natural controls, and optimized environmental factors like grow lights optimization to create inhospitable conditions for common invaders such as spider mites, aphids, and fungus gnats.

    Hydroponic setups, while efficient, can accelerate pest spread due to constant moisture and nutrient solutions. Grow tents offer controlled environments but require precise management to avoid humidity spikes that encourage infestations. By focusing on compatible indoor seeds with natural resistance traits, cultivators can reduce vulnerability from the outset. For example, a grower managing a 4×4 tent with a 20-plant hydroponic DWC system might spend 15 minutes each morning checking reservoir temperatures and leaf undersides, catching problems weeks before visible damage appears.

    Why Prevention Beats Reaction in Controlled Environments

    Prevention starts with understanding that once pests establish, even organic treatments require multiple applications and can slow growth. A practical routine includes logging daily humidity, temperature, and plant observations in a simple notebook or app. This data reveals patterns, such as mite flares after heat spikes above 82Β°F, allowing preemptive adjustments like increasing airflow or lowering light intensity.

    Identifying Common Pests in Hydroponic and Grow Tent Environments

    Effective pest management begins with accurate identification. Spider mites often appear as tiny specks on leaf undersides, producing fine webbing that signals advanced colonization. Aphids cluster on new growth, excreting sticky honeydew that attracts mold. Fungus gnats thrive in moist growing media, their larvae damaging roots in hydroponic reservoirs.

    Regular scouting with a magnifying loupe during weekly inspections allows growers to catch issues at the egg or larval stage. Monitoring tools like yellow sticky traps placed strategically near intake vents provide early warnings. In grow tents, checking seals and filters prevents external pests from entering during ventilation cycles. A concrete example: place four yellow traps at canopy height and two near the floor; count insects weekly and act if counts exceed five per trap for two consecutive days.

    Scouting Schedule and Tools for Consistent Detection

    Implement a fixed weekly schedule: Monday for visual checks with a 30x loupe on 10 random leaves per plant, Wednesday for trap counts, and Friday for environmental logging. This rhythm turns identification into habit rather than crisis response. Clear explanations of symptomsβ€”such as stippling on leaves indicating mite feedingβ€”help new growers distinguish pests from nutrient issues.

    Organic Control Strategies Tailored for Indoor Setups

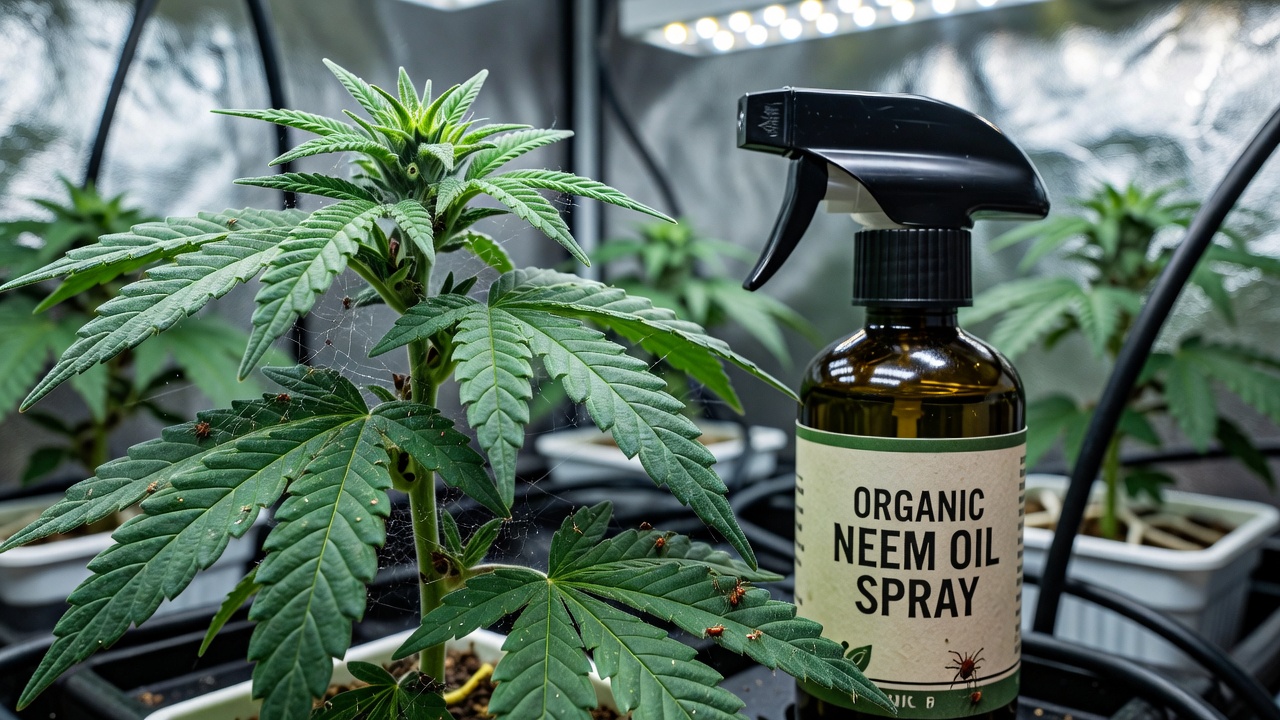
    Once identified, organic interventions focus on disruption rather than eradication. Neem oil emulsions, applied as foliar sprays during lights-off periods, smother soft-bodied insects while remaining safe for hydroponic roots. Beneficial insects such as predatory mites and ladybugs can be introduced directly into the tent for biological control, establishing self-sustaining populations.

    Companion planting with basil or marigold inside the tent deters aphids through natural repellents. For fungus gnats, Bacillus thuringiensis (BTI) treatments in nutrient solutions target larvae without affecting cannabis plants. Maintaining strict hygieneβ€”sterilizing tools and quarantining new clonesβ€”forms the foundation of these chemical-free protocols. In practice, a 5×5 tent grower might release 1,000 Neoseiulus californicus mites at the first sign of spider mites, repeating every 14 days until populations stabilize.

    Step-by-Step Application Examples

    1. Mix 1 oz neem oil with 1 tsp insecticidal soap per gallon of water; agitate thoroughly.
    2. Apply with a fine-mist sprayer at lights-off, covering both leaf surfaces.
    3. Monitor for 48 hours before reintroducing beneficial insects to avoid harming them.

    These steps, repeated at seven-day intervals for three cycles, usually break the pest life cycle without residue concerns in hydroponic systems.

    Selecting Indoor Seeds with Natural Resistance Traits

    Choosing the right genetics significantly reduces pest pressure. Indoor seeds bred for robust leaf structures and vigorous root systems, such as certain indica-dominant hybrids, exhibit greater tolerance to mite feeding. Varieties with higher resin production often deter aphids naturally through glandular trichomes.

    Seed banks emphasizing stability for controlled environments provide strains tested in hydroponic conditions. Pairing resistant cultivars with consistent environmental parameters minimizes stress that otherwise invites infestations, supporting higher yields throughout the flowering cycle. Growers report that strains like certain Northern Lights crosses require 30 percent fewer interventions than sativa-leaning varieties in the same tent.

    Matching Genetics to Your Specific Setup

    When ordering, request seed bank data on pest tolerance and hydroponic performance. Start small test grows of two or three cultivars side-by-side to observe real-world resistance before committing an entire tent. This empirical approach saves time and money over multiple cycles.

    Grow Lights Optimization to Deter Infestations

    Grow lights optimization plays a dual role in plant vigor and pest suppression. Full-spectrum LED arrays positioned at optimal distances promote dense canopies that limit pest access to lower leaves. Adjusting light cycles and intensity prevents excessive heat that drives spider mites to proliferate while encouraging strong plant defenses through enhanced photosynthesis.

    Strategic placement of lights near intake areas also reduces stagnant air pockets where gnats breed. Combining this with oscillating fans ensures even light distribution and airflow, creating an environment where pests struggle to establish colonies. Regular calibration of fixtures maintains these benefits across growth stages. A practical guideline: maintain 18–24 inches between LED tops and canopy during veg, raising to 30 inches in flower to balance light penetration and heat control.

    Airflow and Light Integration Techniques

    • Position two 6-inch oscillating fans per 4×4 tent to eliminate microclimates.
    • Run lights 18 hours on during veg to accelerate growth before pests can multiply.
    • Check PAR values weekly with a meter to ensure uniform coverage without hot spots.

    Advanced Techniques for Sustained Healthy Yields

    Integrating these methods requires ongoing system monitoring. pH and EC testing in hydroponic reservoirs prevents nutrient imbalances that weaken plants against pests. Automated sensors tracking temperature and humidity within tents enable rapid adjustments that disrupt pest life cycles.

    Periodic root zone treatments with organic enzymes further strengthen defenses in soilless media. Documenting each grow cycle helps refine protocols, turning experiential data into reliable prevention strategies for future harvests. For instance, noting that a 0.2 EC spike correlated with increased gnat activity allows preemptive reservoir flushes.

    Documentation and Continuous Improvement

    Maintain a simple spreadsheet tracking dates of scouting, treatments, and environmental readings. After three cycles, patterns emerge that let you predict and prevent 80 percent of issues before they start, turning experience into repeatable success.

    Conclusion

    Proactive, organic pest management empowers indoor cannabis growers to achieve robust yields in hydroponics and grow tents. By combining vigilant identification, natural controls, resistant seeds, and grow lights optimization, enthusiasts protect their crops sustainably. These techniques align with evolving best practices for 2026, emphasizing prevention and environmental harmony over reactive measures. For further guidance on integrated pest management, consult resources from ipm.ucanr.edu.

  • Harvest Timing for Feminized Photoperiod Cannabis 2026

    Harvest Timing for Feminized Photoperiod Cannabis 2026

    Introduction to Harvesting Feminized Photoperiod Cannabis

    Determining the ideal harvest window is critical for home growers cultivating feminized photoperiod cannabis strains. These genetics, which produce only female plants, respond to light cycle changes to initiate flowering, allowing precise control over bud development. In 2026, cultivators benefit from advanced observation techniques and environmental monitoring to maximize potency, flavor, and yields while minimizing issues like mold or nutrient lockout.

    Proper post-flowering management, including flushing, drying, and curing, directly impacts the final product quality. This guide outlines evidence-based practices tailored for female plants, helping enthusiasts achieve professional-grade results at home. For instance, a grower managing a small 4×4 tent can use digital microscopes weekly from week six of flower onward to track trichome shifts, avoiding guesswork that often leads to suboptimal harvests.

    Understanding Photoperiod Feminized Genetics

    Photoperiod feminized seeds eliminate male chromosomes through selective breeding, ensuring nearly 100% female plants that focus energy on resinous buds. Unlike autoflowers, these varieties require a shift from 18/6 to 12/12 light cycles to trigger flowering, typically lasting 8-10 weeks depending on the strain.

    Growers must monitor plant maturity closely because premature or delayed harvests can reduce THC levels and terpene profiles. Feminized plants often show uniform flowering patterns, making them ideal for consistent home setups. In practice, a cultivator might maintain 18 hours of light during vegetative growth for six weeks before switching, then observe how indica-dominant feminized lines finish closer to eight weeks while sativa-leaning ones extend to ten or eleven. This control lets home growers stagger multiple strains in one space for continuous harvests without introducing male plants that could pollinate the crop.

    Identifying the Ideal Harvest Window

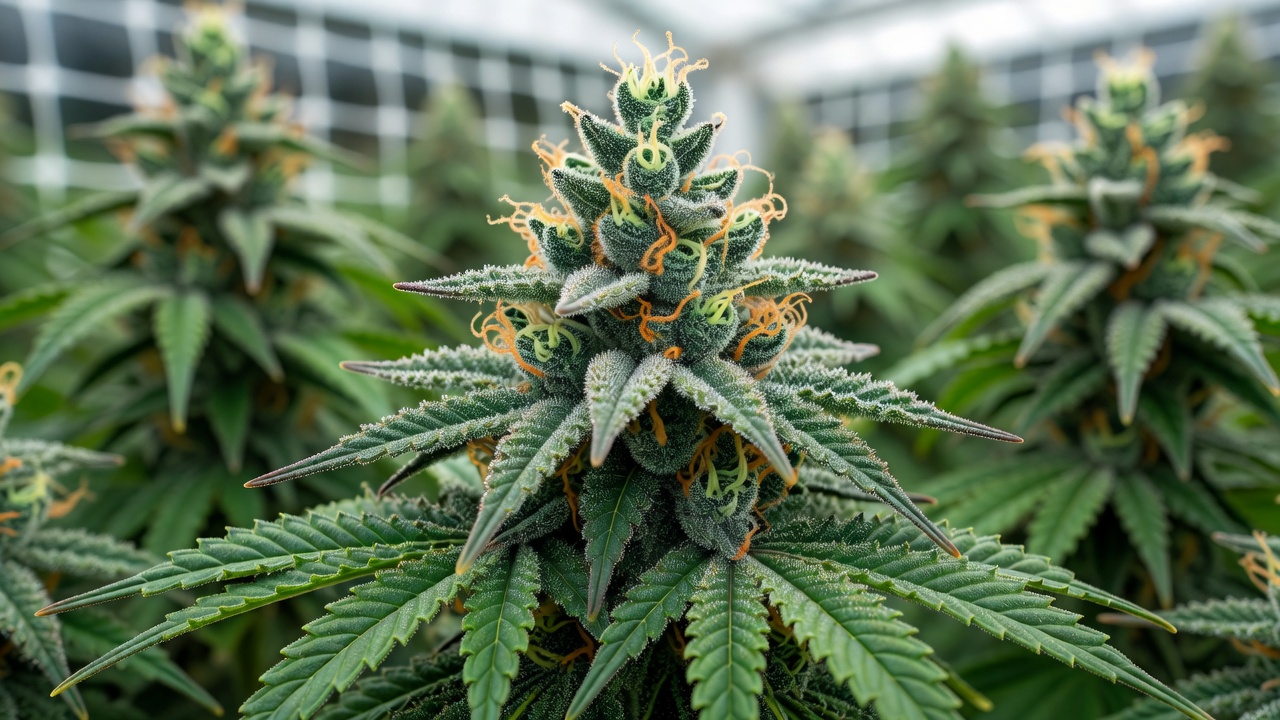
    The harvest window is best determined by examining trichomes under magnification. Clear trichomes indicate immaturity, while milky white ones signal peak potency and amber trichomes suggest a more sedative effect. Aim for 70-90% milky trichomes for balanced effects.

    Pistil color changes provide secondary cues, with 70-80% browning often aligning with optimal ripeness. Environmental factors like temperature drops in late flower can accelerate maturity in 2026 indoor grows. To apply this guidance, start checking trichomes with a 60-100x jeweler loupe or USB microscope at the beginning of week seven. For a strain like Northern Lights feminized, harvest when most heads turn milky with 10-20% amber for a relaxing yet functional effect. Pistils that have receded and turned orange-brown across 75% of the buds reinforce the decision. Temperature drops of 5-8Β°F at night in the final two weeks can speed resin maturation, but growers should avoid swings below 60Β°F to prevent stress.

    Practical Trichome Monitoring Schedule

    Establish a weekly checklist: day one of week seven, photograph ten bud sites; repeat every three days. Record percentages of clear, milky, and amber trichomes in a notebook. This data-driven approach prevents early cutting that leaves THC levels 15-20% below peak.

    Implementing Effective Flushing Schedules

    Flushing removes excess nutrients from the root zone, typically starting 10-14 days before harvest for photoperiod feminized plants. Use pH-balanced water without additives to leach soil or coco media, improving taste and smoothness.

    Monitor runoff EC levels dropping below 0.4 to confirm completion. Over-flushing risks stressing female plants, so observe leaf yellowing as a natural sign of nutrient depletion rather than deficiency. In a soil grow, begin flushing with 2-3 gallons of pH 6.0 water per plant when trichomes reach 50% milky. For coco coir, use 1.5 gallons per gallon of medium daily until EC readings stabilize under 0.4. Yellowing fan leaves during this period indicate successful nutrient drawdown; if leaves brown rapidly instead, reduce water volume slightly to avoid root shock.

    Proper Drying Techniques

    After harvest, hang branches upside down in a dark room at 60-70Β°F with 45-55% humidity for 7-14 days. Good airflow prevents mold without rapid drying that degrades cannabinoids.

    Stems should snap cleanly when ready, indicating internal moisture has equalized. For feminized grows, gentle handling preserves delicate trichomes during this stage. Trim large fan leaves before hanging to improve airflow, but leave sugar leaves intact until after drying. Position oscillating fans on low speed two feet from branches, ensuring no direct breeze hits buds. In a 70Β°F room with 50% humidity, most photoperiod harvests dry in 10-12 days; check small stems daily after day seven. When they snap with an audible crack rather than bend, move immediately to curing to lock in remaining moisture at 10-12%.

    Curing Processes for Enhanced Quality

    Transfer dried buds to airtight glass jars, filling them 75% full and burping daily for the first week. Maintain 58-62% humidity using packs if needed, allowing 2-4 weeks for flavors to develop fully.

    Longer cures up to 8 weeks enhance smoothness and aroma in photoperiod strains. Store away from light and heat to preserve potency for 2026 harvests. Fill quart jars three-quarters full, seal, and open once daily for five minutes during week one. After seven days, reduce burping to every other day. If humidity exceeds 65%, add a 58% pack; below 55%, include a small piece of fresh leaf from the same plant. By week four, terpene profiles deepen noticeably, producing smoother smoke with pronounced strain-specific aromas such as citrus or pine.

    Avoiding Common Post-Flowering Pitfalls

    Common errors include harvesting too early due to impatience or improper humidity causing bud rot. Always verify trichomes rather than relying on breeder timelines alone.

    Skipping flush or rushing dry can lead to harsh smoke and reduced yields. Use digital hygrometers and consistent environments to sidestep these issues in female plant cultivation. Set phone reminders for trichome checks and maintain two hygrometers per drying space to catch humidity spikes above 60% that invite mold. If rot appears, remove affected buds immediately and increase airflow rather than lowering temperature too far, which can slow drying unevenly.

    Conclusion

    Mastering these stages ensures superior results from feminized photoperiod cannabis. By focusing on observation and patience, home growers in 2026 can produce high-quality harvests consistently. For further reading on cultivation standards, consult resources from usda.gov and nih.gov.

  • Soil vs Coco Coir for Autoflowers: 2026 Indoor Guide

    Soil vs Coco Coir for Autoflowers: 2026 Indoor Guide

    Introduction to Growing Autoflowers in Soil or Coco

    Autoflowering cannabis strains have transformed home cultivation by offering fast cycles and compact growth, making them ideal for indoor growers in 2026. Choosing the right medium between traditional soil and coco coir is critical for success when starting from quality autoflower seeds. This guide examines the pros and cons of each option while providing practical autoflower tips on watering, nutrients, and pH management. Beginners benefit most from understanding how these media interact with autoflowers’ rapid development. Soil offers simplicity and forgiveness, whereas coco coir delivers superior aeration and control. Both can yield impressive results indoors when setups are optimized for the current year’s best practices and equipment. For instance, a first-time grower starting with three plants can expect harvest in as little as nine weeks from seed when the medium matches the strain’s quick pace.

    Expanding on these fundamentals helps new cultivators avoid common pitfalls. Soil’s natural buffering suits those who prefer minimal daily checks, while coco rewards attentive monitoring with faster root expansion. In practice, many 2026 indoor setups combine both media traits by adding perlite to either base for improved drainage. This balanced approach supports the compact stature of modern autoflowers without sacrificing yield potential.

    Understanding Soil and Coco Coir Basics

    Soil is a natural, organic medium composed of minerals, organic matter, and microorganisms. It supports autoflowers through slow-release nutrients and beneficial microbes that enhance root health. Many growers prefer amended soils with perlite or compost for better drainage when cultivating autoflower seeds indoors. A typical beginner mix might include equal parts high-quality potting soil, perlite, and worm castings to create a light, airy texture that prevents compaction around delicate autoflower roots.

    Coco coir, derived from coconut husks, is an inert growing medium prized for its water retention and air porosity. It requires precise nutrient delivery since it contains no inherent fertility. In 2026, premium buffered coco products reduce common issues like salt buildup, making it accessible for new autoflower enthusiasts. Growers often rinse and buffer new coco bricks with a calcium-magnesium solution before use to stabilize pH and prevent early deficiencies during the critical first three weeks of growth.

    Pros and Cons of Soil for Autoflowers

    Soil provides a forgiving environment that buffers pH fluctuations, reducing the risk of nutrient lockout in autoflowers. Its microbial life promotes robust root systems and can improve terpene profiles in the final harvest. Beginners often succeed faster with soil because it requires less frequent intervention. In a real-world example, an indoor grower using living soil amended with compost tea every two weeks can maintain healthy plants with only weekly pH checks, allowing more focus on training techniques like low-stress training during the short vegetative window.

    However, soil drains more slowly and can lead to overwatering if not managed carefully. It is heavier, complicating indoor setups, and may harbor pests if sourced poorly. Recovery from mistakes takes longer compared to inert media. To mitigate overwatering risks, experienced cultivators lift pots daily to gauge weight and water only when the container feels noticeably lighter, typically every three to four days in three-gallon fabric pots.

    • Pros: Natural nutrients, pH stability, microbial benefits
    • Cons: Slower drying, potential compaction, heavier containers

    Pros and Cons of Coco Coir for Autoflowers

    Coco coir excels in oxygenation and drainage, encouraging explosive root growth in autoflowers. It allows precise control over nutrients and pH, often resulting in faster vegetative development and higher yields. The medium is lightweight and reusable after proper sterilization. A practical demonstration involves transplanting seedlings directly into five-gallon fabric pots of buffered coco, where roots can fill the container within four weeks under 20 hours of daily light, leading to denser bud sites at harvest.

    Drawbacks include the need for constant nutrient feeding and vigilant pH monitoring. Unbuffered coco can bind calcium and magnesium, causing deficiencies. It also dries out quicker at the surface, demanding consistent watering schedules. Growers counter this by maintaining a reservoir of pre-mixed nutrient solution at the correct strength and checking runoff EC after each feed to ensure salts have not accumulated beyond 1.2 mS/cm during early flowering.

    1. Pros: Excellent aeration, fast growth, easy to flush
    2. Cons: Requires daily feeding, initial buffering needed

    Watering, Nutrients, and pH Management Tips

    Watering autoflowers in soil should follow a wet-dry cycle, allowing the top inch to dry between sessions to prevent root rot. Use pH-adjusted water between 6.0 and 7.0. In coco coir, maintain a tighter pH range of 5.8 to 6.2 and water more frequently with nutrient solution. A concrete example is using a moisture meter probe inserted four inches deep; when readings drop below 40 percent in soil, apply 20 percent of pot volume in water, ensuring even saturation without pooling at the base.

    Nutrient schedules differ significantly. Soil growers can rely on organic amendments like worm castings for autoflowers, applying liquid feeds only during flowering. Coco requires full hydro-style nutrients from week one, starting at half strength to avoid burn. Monitor EC levels closely in coco for optimal uptake. During the transition to flower around week four, soil growers might top-dress with a bloom booster containing higher phosphorus, while coco users increase potassium levels gradually to 1.0 EC, always flushing with plain pH-adjusted water every 10 to 14 days to reset the medium.

    Authoritative guidance on safe nutrient practices can be found at https://extension.psu.edu/. Always flush media periodically to prevent salt accumulation, especially in 2026’s advanced LED environments that accelerate transpiration. Consistent record-keeping of feed amounts and plant responses helps refine techniques across multiple grows.

    Recommended Indoor Setup for Beginners in 2026

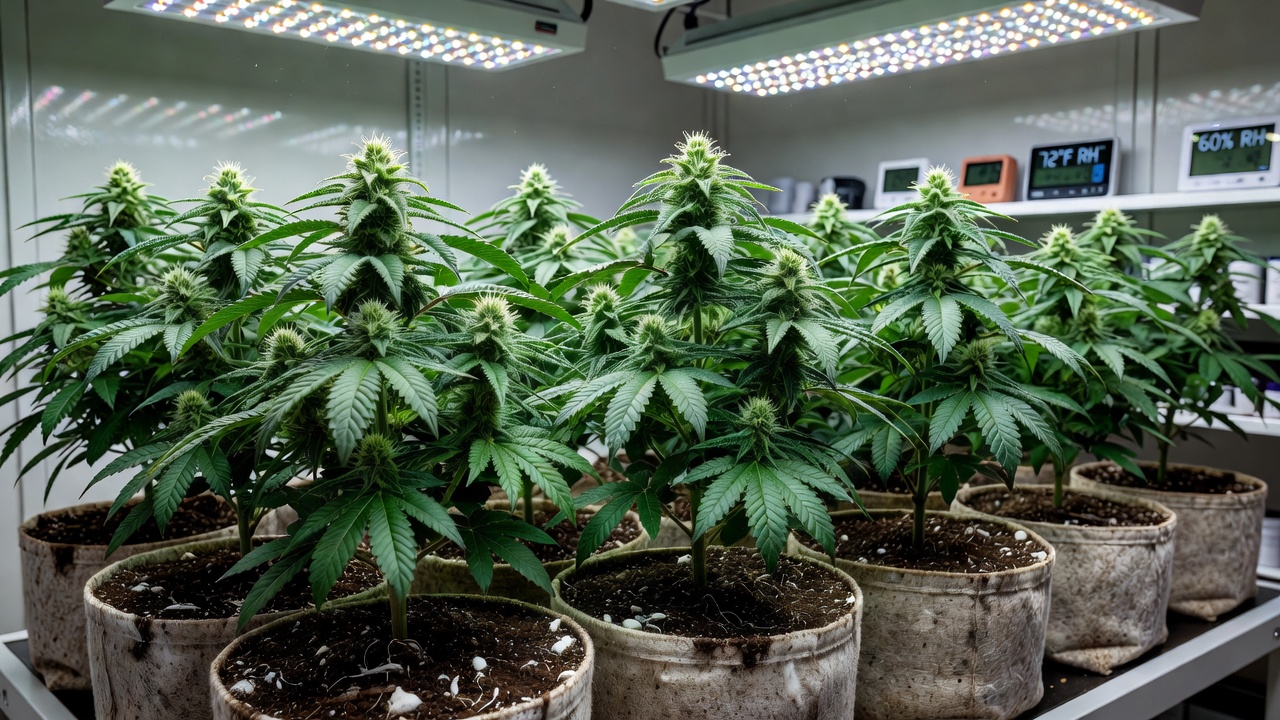
    Start with 3-5 gallon pots for soil or 5-gallon fabric pots for coco to accommodate autoflower root expansion. Pair with 18/6 or 20/4 lighting schedules using full-spectrum LEDs. Maintain temperatures at 68-77Β°F and humidity at 50-60% during vegetative stages. A practical beginner configuration includes two 100-watt quantum-board LEDs suspended 18 inches above three plants in a 2×2 foot tent, with an oscillating fan providing gentle airflow to strengthen stems without stressing the rapid autoflower cycle.

    Invest in a quality pH meter and EC pen regardless of medium. Beginners should begin with pre-buffered coco or living soil mixes to simplify the learning curve. Ventilation with carbon filters ensures odor control and fresh air exchange for healthy autoflower growth. Adding a small dehumidifier during the final two weeks helps maintain 45 percent humidity, reducing mold risk on dense colas while preserving the terpene quality developed throughout the grow.

    Conclusion and Final Recommendations

    Both soil and coco coir can produce outstanding autoflower harvests when matched to your experience level and setup. Soil suits those seeking simplicity, while coco rewards growers who enjoy precision. Apply the watering, nutrient, and pH strategies outlined here to maximize results from your autoflower seeds indoors throughout 2026 and beyond. Tracking environmental data across cycles and adjusting pot sizes or light intensity based on observed growth patterns will steadily improve outcomes for any dedicated cultivator.

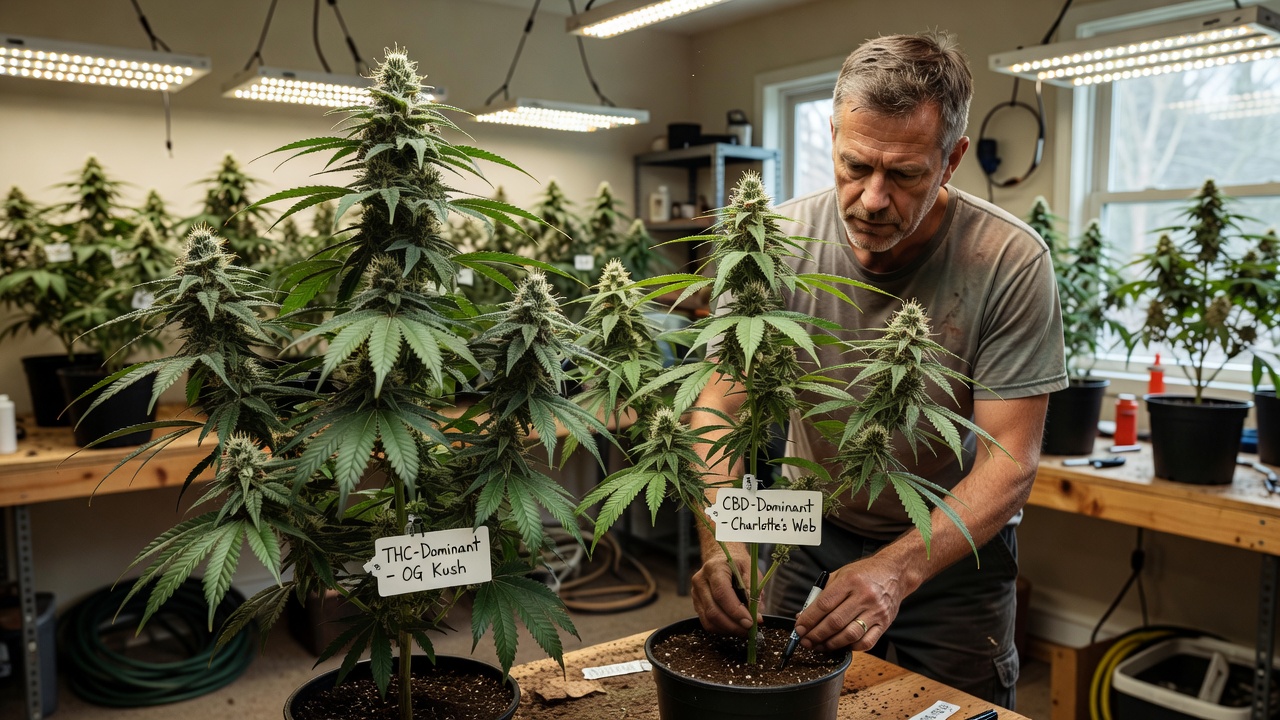
  • THC vs CBD Strains 2026: Effects Flavors & Grow Tips

    THC vs CBD Strains 2026: Effects Flavors & Grow Tips

    In 2026, selecting the right cannabis seeds requires a clear understanding of THC-dominant versus CBD-dominant strains. This cannabis strain review breaks down key differences in effects, flavor profiles, and cannabinoid concentrations to help home growers and enthusiasts make informed choices. Whether you seek potent psychoactive experiences or balanced therapeutic benefits, understanding these profiles supports better decisions when browsing the best cannabis strains available today.

    Understanding Cannabinoid Profiles in 2026

    THC-dominant strains typically feature THC levels between 18% and 28%, with CBD under 1%. These varieties drive the classic euphoric high associated with recreational use. In contrast, CBD-dominant strains maintain THC below 1% while CBD ranges from 10% to 20%, delivering non-intoxicating effects focused on relaxation and wellness. Recent lab data from 2025 harvests show stable ratios in modern hybrids, allowing precise seed selection based on desired outcomes.

    Home growers benefit from testing kits that verify these ratios early in the flowering stage. Cannabinoid levels influence everything from plant structure to resin production. Choosing seeds with verified genetics ensures consistent results across multiple grows.

    Effects Comparison: Psychoactive vs Therapeutic

    THC-dominant strains produce strong cerebral stimulation, increased appetite, and potential anxiety in high doses. Users report enhanced creativity and focus for daytime activities. CBD-dominant strains instead promote calm without impairment, aiding sleep and recovery after physical exertion. In 2026, many enthusiasts combine both types in micro-dosing routines for nuanced effects.

    Practical decision frameworks start with personal tolerance and goals. Beginners often prefer CBD-dominant options to avoid overwhelming psychoactivity. Experienced growers may select THC-dominant varieties for evening social sessions. Always consider set and setting when evaluating results from any cannabis strain review.

    Flavor Profiles and Terpene Differences

    Terpene content creates distinct aromas and tastes. THC-dominant strains frequently showcase myrcene and limonene, yielding earthy, citrus, or berry notes in strains like the updated Aether Haze 2026. CBD-dominant varieties lean toward pinene and caryophyllene, offering pine, spice, and herbal undertones found in Nova Relief 26.

    These flavor differences affect the overall consumption experience. Growers who cure properly preserve delicate terpenes, enhancing both taste and potential entourage effects. Selecting seeds based on preferred flavor families improves satisfaction with each harvest.

    Cultivation Impacts for Home Growers

    THC-dominant plants often demand higher light intensity and precise nutrient schedules to maximize resin glands. Flowering times average 8-10 weeks with careful humidity control to prevent mold. CBD-dominant strains tend to be more forgiving, showing resilience to minor pH fluctuations and completing cycles in 7-9 weeks.

    Both types respond well to organic soil and LED lighting in 2026 setups. Regular defoliation improves airflow and bud development. Tracking environmental data helps replicate successful grows and refine future seed choices.

    Decision Framework for Seed Selection

    Start by defining your primary goal: recreational potency or therapeutic balance. Review lab reports for exact THC and CBD percentages before purchase. Consider grow space limitations and experience level when evaluating the best cannabis strains for your environment.

    Next, factor in flavor preferences and flowering time. Cross-reference multiple 2026 cannabis strain reviews from trusted sources to confirm stability. Finally, purchase from reputable breeders offering germination guarantees. This structured approach reduces trial and error across seasons.

    2026 Strain Examples and Reviews

    Aether Haze 2026 stands out as a THC-dominant hybrid with 24% THC and bright citrus flavors. Growers praise its vigorous growth and heavy yields under 600W LEDs. Effects include uplifting euphoria suitable for creative projects.

    Nova Relief 26 offers 15% CBD with minimal THC, delivering smooth pine notes and deep relaxation. Its shorter flowering period makes it ideal for northern climates. Home cultivators report excellent resistance to pests and consistent potency across phenotypes.

    These examples illustrate how modern breeding refines both categories for specific user needs. Comparing real-world grow reports helps enthusiasts identify strains that match their setup and expectations.

    Final Considerations for Informed Choices

    Balancing THC and CBD profiles empowers growers to tailor each harvest. Documenting results from every cycle builds valuable personal data for future seed selection. Reliable sources such as pubmed.ncbi.nlm.nih.gov and who.int provide ongoing research into cannabinoid science.

    Apply these insights during your next seed order to achieve consistent, satisfying outcomes. Thoughtful selection based on effects, flavors, and cultivation traits leads to rewarding home grows in 2026 and beyond.

  • Cannabis Nutrient Deficiencies: Spot & Fix Guide 2026

    Introduction to Cannabis Nutrient Management

    Nutrient management is the foundation of successful cannabis cultivation. From seed germination through vegetative growth, flowering, and harvest, plants require precise balances of macro and micronutrients to thrive. In 2026, home growers using soil, coco coir, or hydroponic systems face evolving challenges including changing environmental regulations and advanced strain genetics that demand optimized feeding schedules. Spotting deficiencies early prevents stunted growth, reduced yields, and poor cannabinoid profiles. This guide provides actionable steps to diagnose issues visually and through plant response, then correct them effectively across all mediums.

    Understanding pH and Nutrient Availability

    Understanding nutrient uptake begins with pH monitoring. In soil, maintain 6.0-7.0; coco and hydro require 5.5-6.5. Imbalances lock out essential elements even when present in the medium. For example, a soil pH of 7.5 can lock out iron and manganese even if those nutrients are present in ample quantities. Regular observation of leaf color, growth patterns, and root health allows growers to intervene before problems escalate. Prevention through consistent EC/PPM testing and balanced feeds outperforms reactive corrections every time. A practical routine involves checking pH and EC of both the nutrient solution and the runoff water at least twice weekly during vegetative growth and daily during flowering when demands are highest.

    EC and PPM Testing in Practice

    Home growers should invest in a reliable EC meter and calibrate it monthly. Start seedlings at 0.4-0.6 mS/cm and gradually increase to 1.2-1.6 mS/cm by late vegetative stage. Documenting these readings alongside weekly photos of the plants creates a valuable reference log that reveals patterns over multiple grows.

    Essential Macro and Micronutrients for Cannabis

    Macronutrients form the core of plant nutrition. Nitrogen drives leafy vegetative growth, phosphorus supports root and flower development, and potassium regulates water uptake and disease resistance. Secondary macros like calcium, magnesium, and sulfur complete the picture. Micronutrients including iron, zinc, manganese, boron, copper, and molybdenum enable enzymatic processes critical for photosynthesis and resin production.

    Nutrient Interactions by Medium

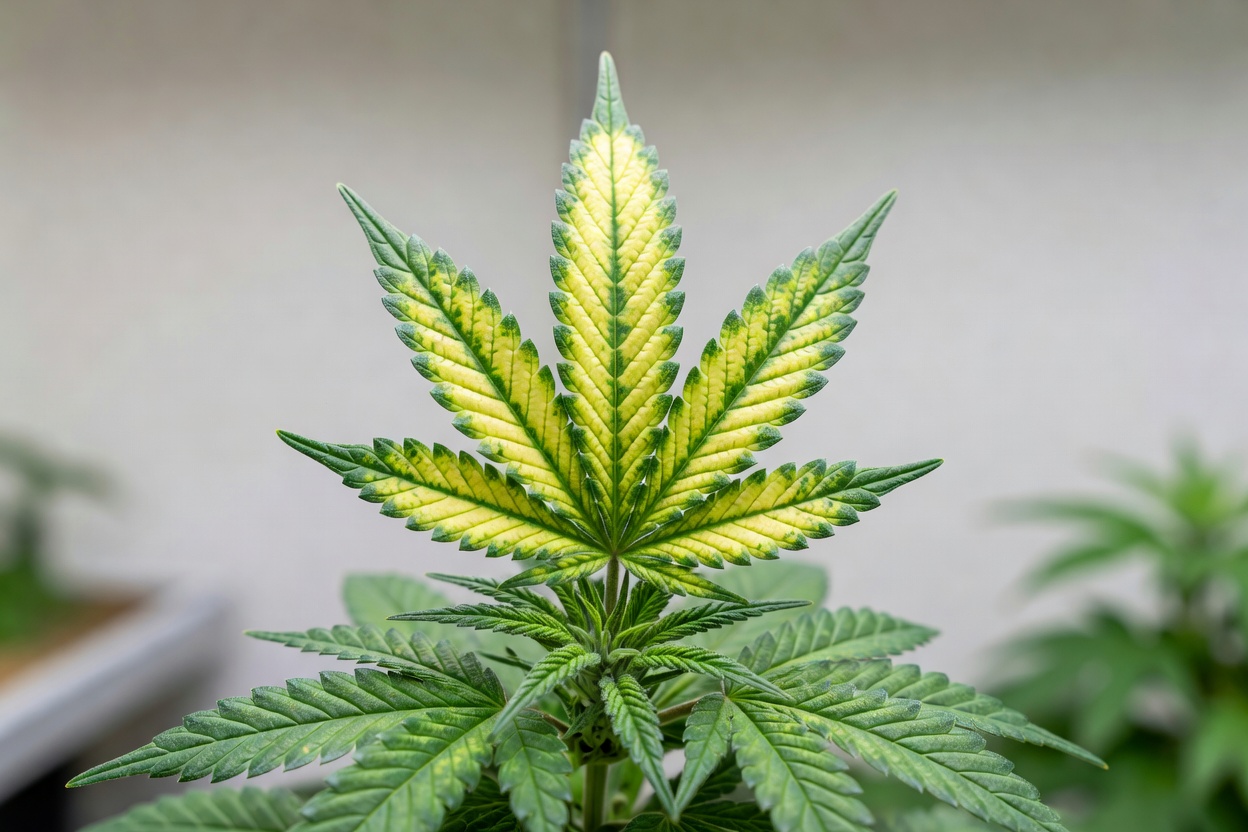
    Each nutrient interacts uniquely with growing mediums. Soil buffers nutrients naturally but can tie them up via compaction or microbial activity. A practical example is adding dolomite lime to soil three weeks before planting to stabilize pH and supply calcium and magnesium over time. Coco offers faster uptake with less buffering, while hydro demands exacting control since roots receive nutrients directly in solution. Deficiencies manifest differently: nitrogen shortage yellows lower leaves first, while iron issues affect new growth with interveinal chlorosis. In coco, magnesium deficiency often appears as yellowing between veins on middle leaves around week four of vegetative growth if Cal-Mag supplementation is neglected.

    Identifying Deficiencies Across Growth Stages

    Seedling and vegetative stages highlight nitrogen and magnesium shortages through pale or yellowing leaves. During flowering, phosphorus and potassium demands peak, often showing as purple stems or burnt leaf tips if overfed. Regular weekly inspections combined with growth charts help track progression.

    Visual Diagnosis and Root Inspection

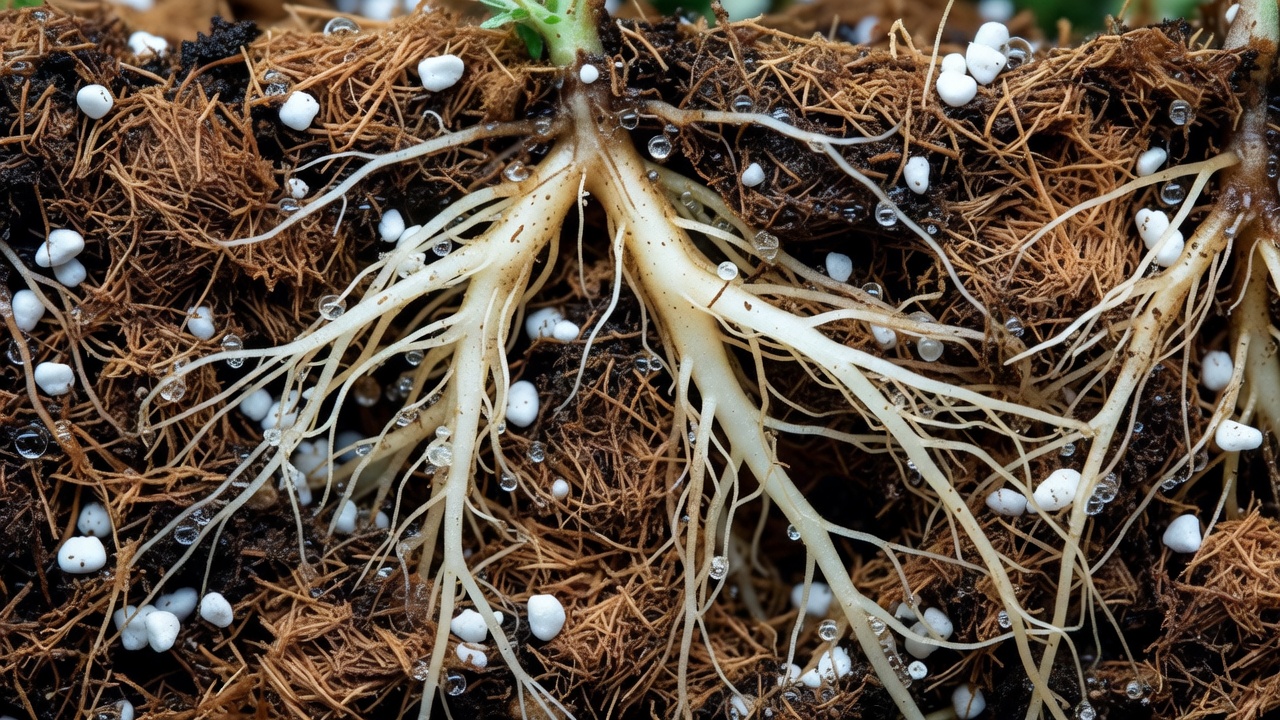
    Visual diagnosis remains the primary tool for home growers. Compare affected leaves to healthy ones under consistent lighting. Use magnification to check for pests mimicking symptoms. In hydro, root browning signals potential issues with oxygen or nutrient concentration before foliage changes appear. A concrete tip is to gently lift one plant from its container every ten days to inspect root color and smell; healthy roots should be white or cream-colored with a fresh earthy scent.

    Correcting Issues in Soil, Coco, and Hydro Setups

    Soil growers should flush with pH-balanced water then reintroduce nutrients at 50% strength, building up gradually. Add organic amendments like compost tea for slow-release correction. Coco requires more frequent feeding; switch to a complete base nutrient with added calcium and magnesium supplements. Hydro systems benefit from full reservoir changes and precise EC adjustments starting at 0.8-1.2 mS/cm for seedlings.

    • Flush medium thoroughly to remove salt buildup.
    • Adjust pH after every nutrient addition.
    • Monitor runoff EC to confirm uptake.
    • Reassess plant response after 3-5 days.

    Overcorrection risks further lockout. Always address one variable at a time and document changes for future reference. For instance, if lower leaves yellow rapidly after a heavy nitrogen feed, reduce concentration by 25% on the next application rather than switching products entirely.

    Medium-Specific Correction Examples

    In soil, top-dress with worm castings and a light layer of compost after flushing to restore microbial life. In coco, incorporate 5 ml per liter of Cal-Mag with every feeding until symptoms subside. Hydro growers should drain, clean the reservoir with 3% hydrogen peroxide, refill with fresh solution at 75% strength, and monitor for three days before returning to full strength.

    Prevention Strategies for Maximum Yields in 2026

    Start with quality genetics and tested water sources. Implement a feeding calendar tailored to your medium and strain. Incorporate beneficial microbes in soil and coco to enhance nutrient availability. For hydro, use UV sterilization and regular system cleaning to prevent algae and bacteria that interfere with absorption.

    Environmental and Seasonal Adjustments

    Environmental controls play a major role. Maintain 70-80Β°F daytime temps and 40-60% humidity during flower. Adequate airflow prevents humidity-related nutrient transport problems. Top-dress with organic matter mid-cycle for sustained release without shocking plants. In 2026, many regions require runoff collection; using a saucer system that captures and measures runoff helps both comply with regulations and track exactly how much nutrient the plants are using.

    Stay updated via resources from authoritative bodies such as https://www.epa.gov/ for regulatory changes impacting nutrient products. Additional guidance is available at https://extension.psu.edu/ on general plant nutrition principles adaptable to cannabis.

    Conclusion

    Mastering nutrient diagnosis and correction transforms average grows into exceptional harvests. By combining vigilant observation, medium-specific techniques, and proactive prevention, home cultivators achieve healthier plants and superior yields throughout 2026. Consistent application of these principles ensures robust development from the first sprout to final trim.

We use cookies to improve your experience and analyse site traffic. See our Privacy Policy and Cookie Policy for details.