
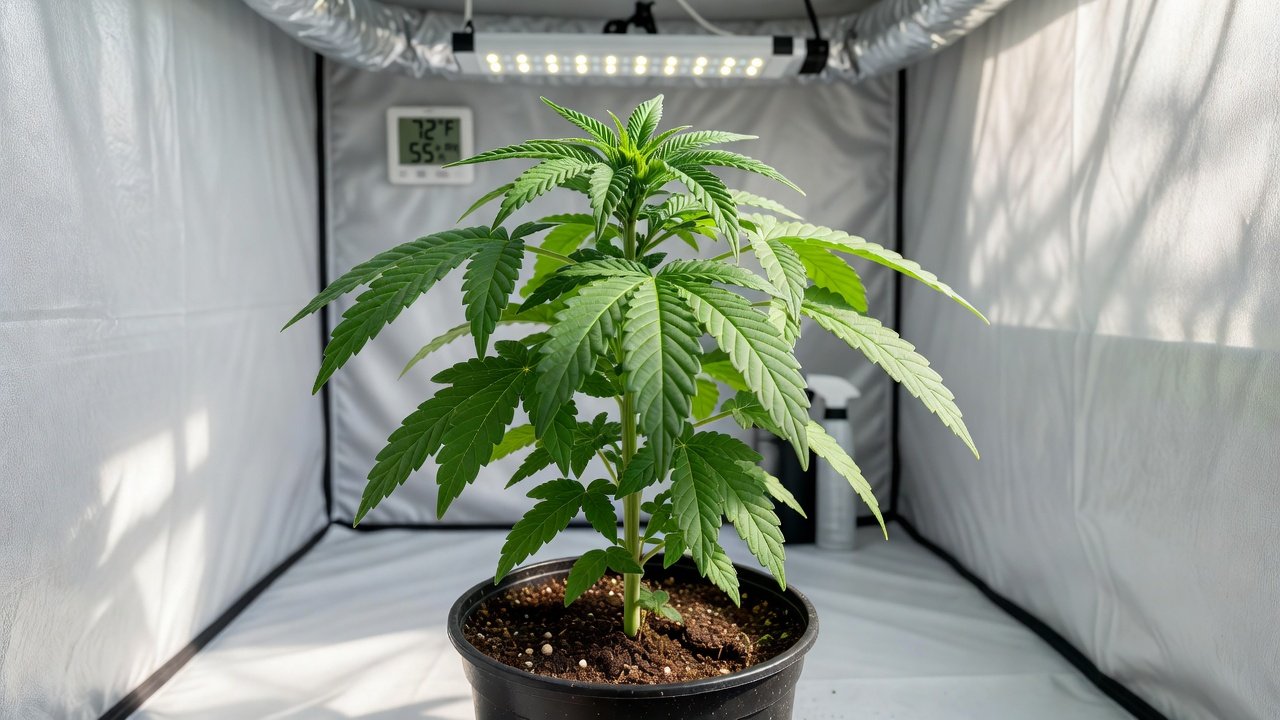
Growing cannabis from easy seeds as a beginner can be rewarding, but nutrient deficiencies often derail progress. In 2026, first-time home growers need reliable methods to spot issues early and apply targeted corrections whether cultivating indoors under lights or outdoors in soil. This guide walks through identification, pH management, and beginner-friendly solutions to maintain plant health through every stage. New cultivators quickly learn that healthy plants produce stronger yields and resist pests better when nutrients stay balanced from the first sprout.
Recognizing Nutrient Deficiency Signs Early
Early detection prevents minor issues from becoming harvest-threatening problems. Cannabis plants communicate deficiencies through leaf color changes, stunted growth, and spotting. Beginners should inspect plants daily, noting any shifts from vibrant green to yellow, purple, or brown hues. Consistent monitoring from the seedling stage onward allows quick intervention before yields suffer. A practical routine involves checking the lowest three or four sets of leaves each morning and comparing them to newer growth at the top. If lower leaves fade first, nitrogen is often the culprit, while problems on new shoots point toward calcium or iron. Keeping a simple notebook or phone photo log helps track changes over three to five days so you can confirm a trend rather than react to a single off day.
Understanding the plant’s lifecycle helps prioritize checks. Seedlings require gentle nutrients while vegetative plants demand higher nitrogen. Flowering shifts focus to phosphorus and potassium. Outdoor growers must also account for weather and soil variations that indoor setups control more easily. For example, a sudden cold snap can slow phosphorus uptake, causing temporary purpling that reverses once temperatures stabilize above 65 degrees Fahrenheit at night.
Common Deficiencies and Their Symptoms
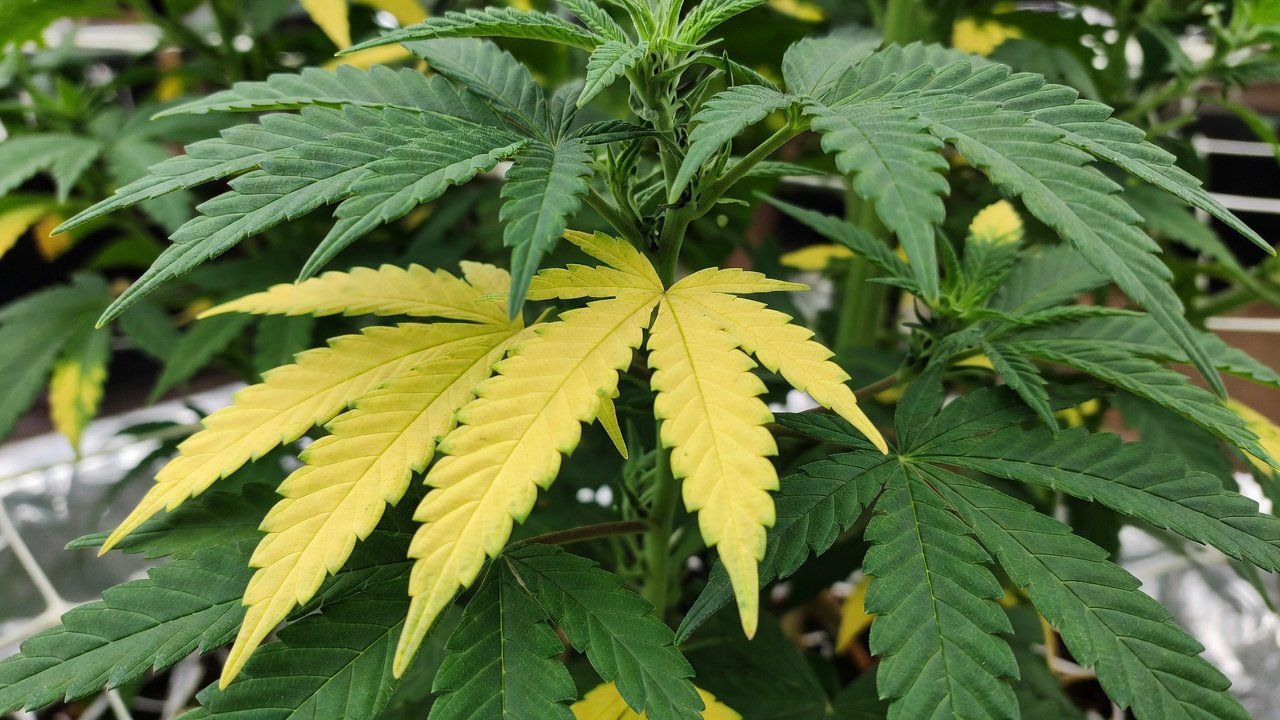
Nitrogen deficiency appears first in older leaves as yellowing starting at the tips and moving inward. Plants may stretch tall with weak stems. In practice, a vegetative plant showing uniform yellowing on the bottom third of the canopy usually rebounds within a week after a half-strength nitrogen feed. Phosphorus shortages show as dark green or purpling leaves with slow root development, especially in cooler conditions. Potassium issues cause brown leaf edges and weak flowering. When buds form loosely and leaves develop crispy margins, adding a bloom booster containing extra potassium often tightens flower structure within ten days.
Calcium and magnesium deficiencies often occur together in indoor grows under LED lights. Look for spotting between veins and curling leaf tips. A concrete example is an indoor grower using full-spectrum LEDs at 600 watts who notices brown spots on new leaves after week four of flower; adding 5 milliliters of calmag per gallon of water twice weekly resolves the spotting. Sulfur problems create uniform yellowing across new growth. Iron deficiency affects young leaves with interveinal chlorosis while roots remain healthy. Each symptom points to a specific imbalance that targeted fixes can resolve. The visual checklist below summarizes the most common signs for quick reference during daily inspections.
Key visual checklist:
- Yellow lower leaves: Likely nitrogen
- Purple stems and slow buds: Check phosphorus
- Brown leaf margins: Potassium shortage
- Spotting on new leaves: Magnesium or calcium
The Role of pH in Nutrient Uptake
Even with proper nutrients present, incorrect pH locks them out of roots. Cannabis prefers 6.0-7.0 in soil and 5.5-6.5 in hydro or coco. Beginners should test runoff water weekly using affordable digital meters. Adjust gradually with pH up or down solutions rather than large swings that stress plants. A typical soil grow might show runoff at 5.4 after three weeks of feeding; slowly raising it to 6.3 over two waterings prevents lockout without shocking the roots. Soil growers benefit from organic amendments like compost to buffer pH naturally. Indoor hydro systems require more frequent checks due to rapid changes. Always measure after adding nutrients since many formulas alter pH. Reliable sources such as the University of Minnesota Extension emphasize consistent testing as the foundation of healthy grows. In one documented case, a beginner using coco coir saw iron deficiency symptoms disappear simply by correcting pH from 5.2 to 6.0 without changing the nutrient recipe.
Correcting Deficiencies with Simple Fixes
Once identified, start with the least invasive solution. Flush plants with pH-balanced water to reset the root zone, then reintroduce nutrients at half strength. For nitrogen shortages, apply a gentle organic tea or balanced fertilizer. A practical recipe is one tablespoon of fish emulsion mixed into one gallon of water applied once per week during vegetative growth. Phosphorus boosts come from bone meal or bloom formulas during flowering. Magnesium issues respond well to Epsom salt foliar sprays diluted properly at one teaspoon per quart of water, applied in low light to avoid leaf burn. Calcium deficiencies need calmag supplements added to watering routines at the label rate of 5 milliliters per gallon. Always follow product labels for beginner doses and observe plants for 3-5 days before further adjustments. Outdoor growers can top-dress with compost or worm castings for slow-release nutrition. One outdoor gardener added a quarter-inch layer of worm castings around each plant base in early July and eliminated recurring potassium shortages through harvest.
Indoor vs Outdoor Growing Adjustments
Indoor setups allow precise control but risk salt buildup from synthetic nutrients. Use fabric pots for better drainage and flush monthly with three times the pot volume of plain pH-adjusted water. Outdoor plants face variable rainfall that can leach nutrients, so mulching helps retain balance. In 2026, many beginners combine both methods with portable pH meters for consistency. Lighting affects deficiencies too. High-intensity LEDs may increase magnesium demand compared to natural sunlight. Adjust feeding schedules seasonally for outdoor crops and monitor temperature swings that impact uptake. For instance, an outdoor grower in a hot climate waters every other evening during peak summer to reduce evaporation stress and maintain steady nutrient flow. Tailored approaches keep plants thriving regardless of location.
Preventive Care from Seedling to Harvest
Prevention starts with quality easy cannabis seeds and well-aerated growing medium. Begin with light feeding at one-quarter strength and increase gradually. Maintain proper watering to avoid over-saturation that causes root issues mimicking deficiencies. A simple test is to lift the pot; if it feels heavy two days after watering, wait another day before the next irrigation. Rotate nutrients according to growth phase and keep detailed grow journals. Test soil or medium before planting and amend as needed. Regular leaf inspections combined with stable environments reduce deficiency risks dramatically through harvest. The USDA Agricultural Research Service highlights balanced nutrition programs as essential for sustainable cultivation success. Following these steps, many first-time growers report zero major deficiencies across an entire season.
Conclusion
Mastering nutrient management transforms beginner cannabis grows into consistent successes. By learning symptoms, adjusting pH, and applying simple corrections, first-time cultivators protect their plants from seedling through harvest in 2026. Consistent observation and measured responses ensure healthy, productive results whether growing indoors or outdoors. With the added depth of weekly checks, gradual adjustments, and phase-specific feeding, new growers can confidently produce robust plants that reach full genetic potential.