🎁 Free bonus seeds with every pack 🚚 Discreet tracked shipping worldwide 🌱 Germination guarantee on every order

Author: buyweedseeds

  • Top Pitfalls for Beginner Cannabis Growers to Avoid

    Top Pitfalls for Beginner Cannabis Growers to Avoid

    Introduction to Common Beginner Cannabis Growing Pitfalls

    Growing cannabis at home can be an exciting and rewarding experience, especially in 2026 when access to high-quality, easy-to-grow seeds is more straightforward than ever. For first-time growers, starting with beginner-friendly feminized or autoflowering seeds simplifies the process, allowing you to focus on the joys of cultivation rather than constant troubleshooting. However, even with these user-friendly varieties, pitfalls like overwatering, incorrect pH levels, and nutrient burn can quickly derail your grow. These issues are widespread among novices because they often stem from enthusiasm outpacing knowledge.

    In this guide, we’ll break down the top three pitfalls that plague beginner grows. For each, we’ll explore the causes, recognizable symptoms, and straightforward fixes tailored to home setups. By understanding these, you’ll be better equipped to nurture your plants from seedling to harvest. Remember, patience and observation are key—cannabis plants are resilient, and most mistakes are fixable if caught early.

    Overwatering: The Silent Killer of Young Plants

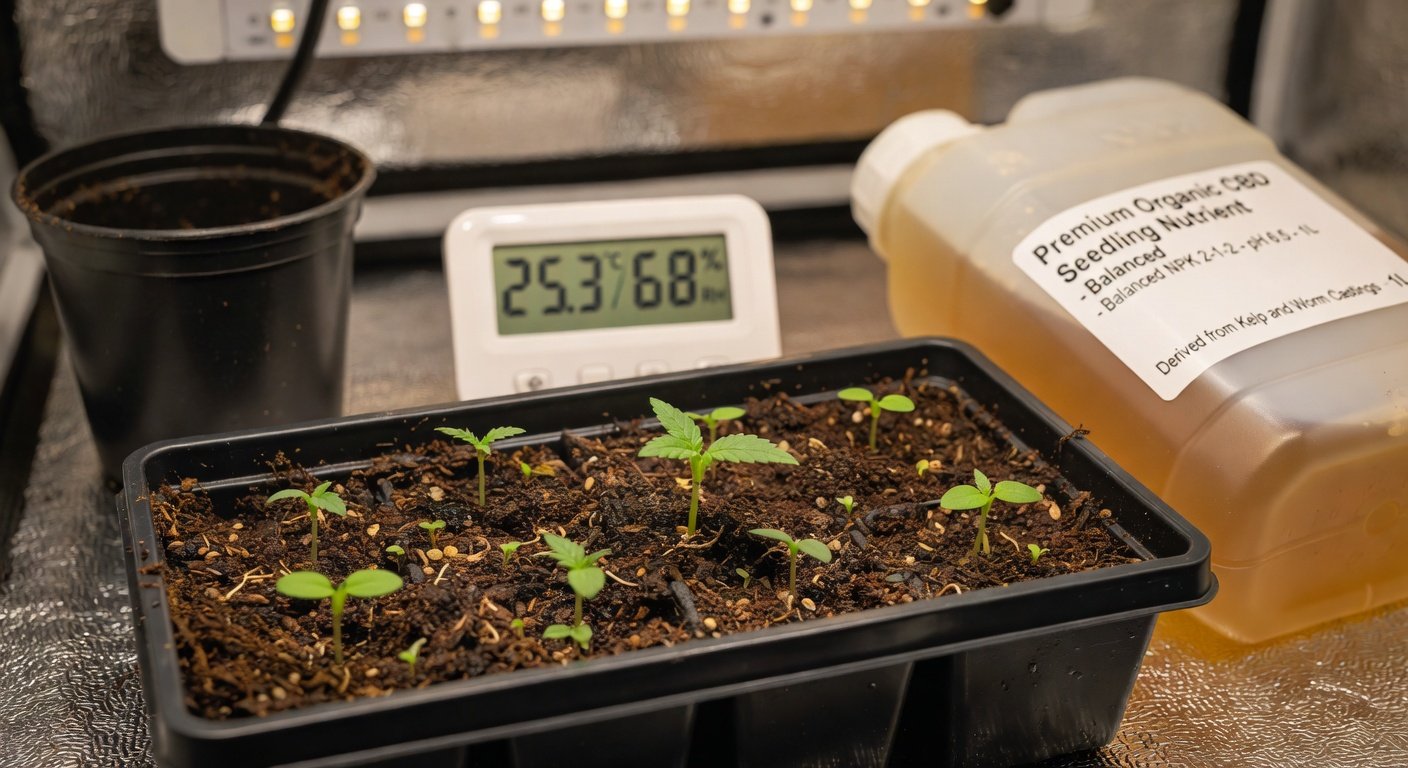
    Overwatering is arguably the most common mistake beginners make when starting with easy cannabis seeds. Eager to see their plants thrive, new growers often drench the soil, thinking more water equals faster growth. But cannabis roots need oxygen as much as they need moisture, and excess water suffocates them.

    Causes of Overwatering

    The root cause is usually a lack of understanding about soil moisture needs. Cannabis seedlings and young plants from easy seeds require less water than mature ones. Factors like poor drainage in pots, using heavy soils that retain too much water, or inconsistent watering schedules exacerbate the problem. In humid environments, common in many home grows, evaporation slows, leading to soggy conditions without realizing it.

    Symptoms to Watch For

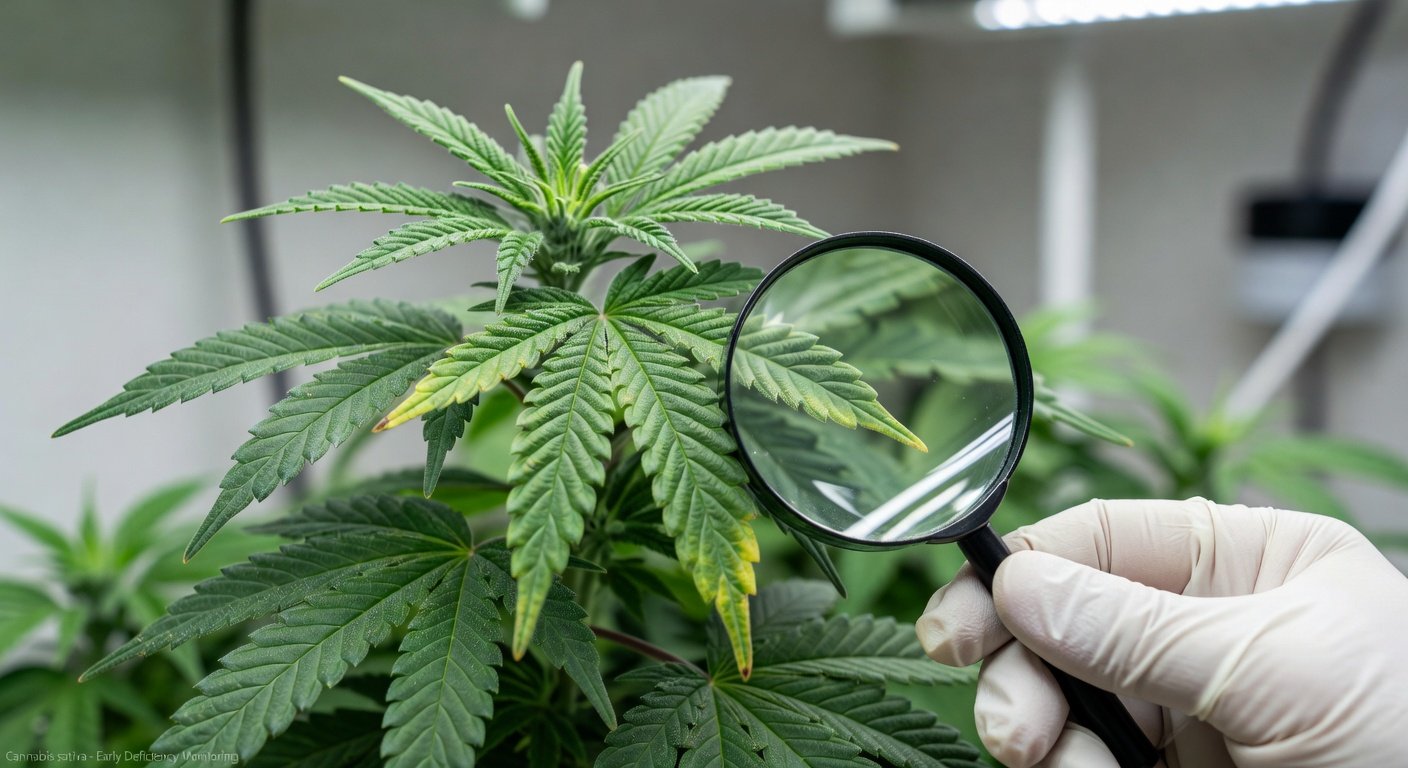
    Early signs include drooping leaves that feel limp, even after watering—unlike the healthy wilt from underwatering. Look for yellowing lower leaves, stunted growth, or a musty smell from the soil indicating root rot. In severe cases, stems may soften, and plants could collapse entirely. If you’re using autoflowering seeds, which have a short life cycle, these symptoms can appear quickly, within a week or two.

    Simple Fixes for Beginners

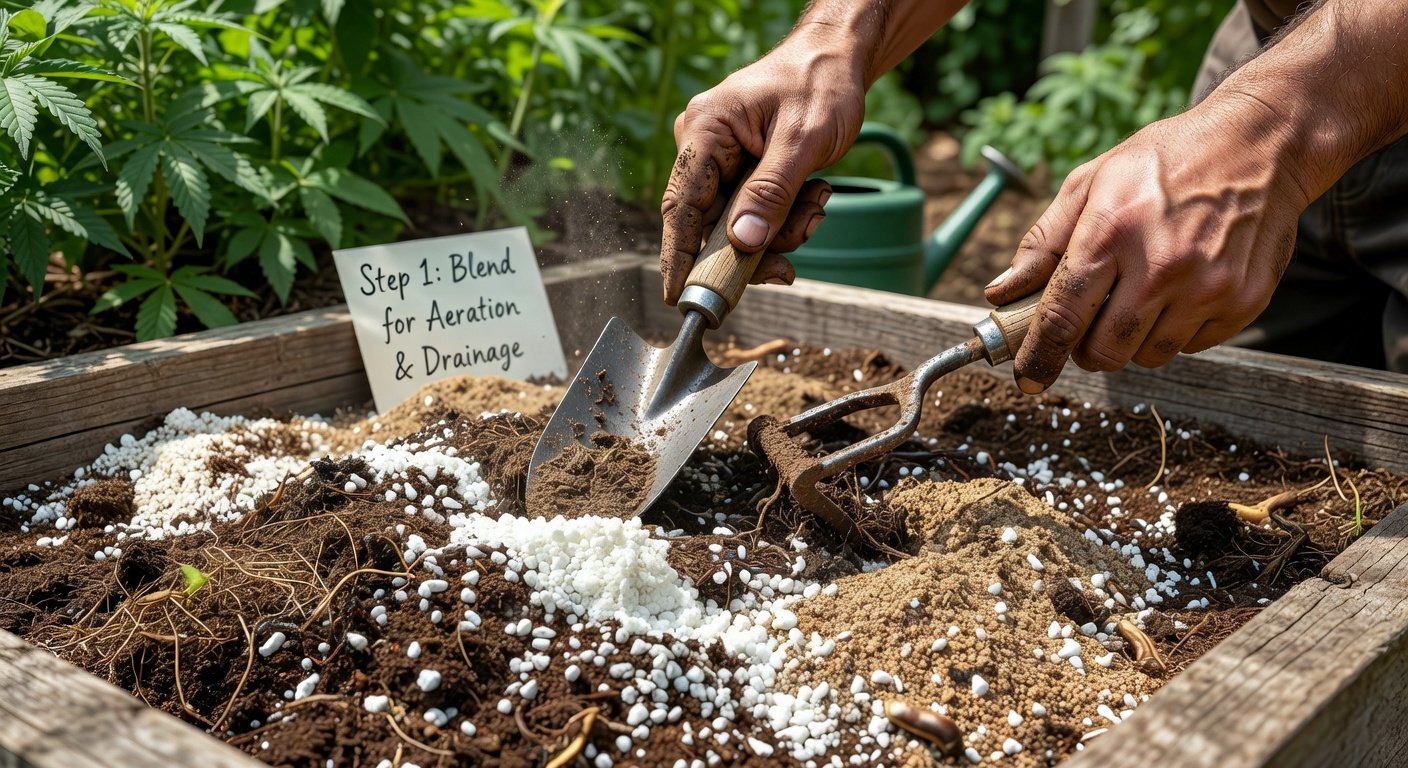
    Stop watering immediately and let the soil dry out naturally—stick your finger two inches into the soil; if it’s dry, it’s time to water again. Improve drainage by adding perlite or vermiculite to your soil mix, or switch to fabric pots that allow better airflow. For easy seeds, start with small pots to match the root size and water sparingly: about once every 2-3 days for seedlings, adjusting based on your setup. Use a moisture meter for precision if you’re tech-savvy, but your finger works fine for starters. With these tweaks, your plants should perk up in a few days.

    Wrong pH Levels: Disrupting Nutrient Uptake

    pH balance is crucial for cannabis because it affects how plants absorb nutrients from the soil or hydroponic solution. Beginners often overlook this, leading to locked-out nutrients even if you’re feeding correctly. Ideal pH for soil-grown cannabis is 6.0-7.0, while hydro setups prefer 5.5-6.5. Deviating from this range, especially with easy seeds that are sensitive in early stages, can stunt your entire grow.

    Causes of pH Imbalances

    Common culprits include tap water with high alkalinity, which raises pH over time, or acidic nutrients that drop it too low. Using unadjusted potting soil or forgetting to test runoff water contributes as well. For home growers starting with feminized seeds, the initial soil pH might seem fine, but as plants grow and release root exudates, levels shift without monitoring.

    Symptoms of pH Problems

    Yellowing leaves with green veins (chlorosis) is a classic sign, often starting at the tips or edges. In alkaline conditions (high pH), iron and manganese deficiencies show as pale new growth; acidic soil (low pH) causes burnt tips and dark green leaves. Plants may grow slowly, with twisted or spotted foliage. If ignored, it leads to overall weakness, making your easy seeds underperform despite their vigor.

    Easy Fixes Tailored for First-Timers

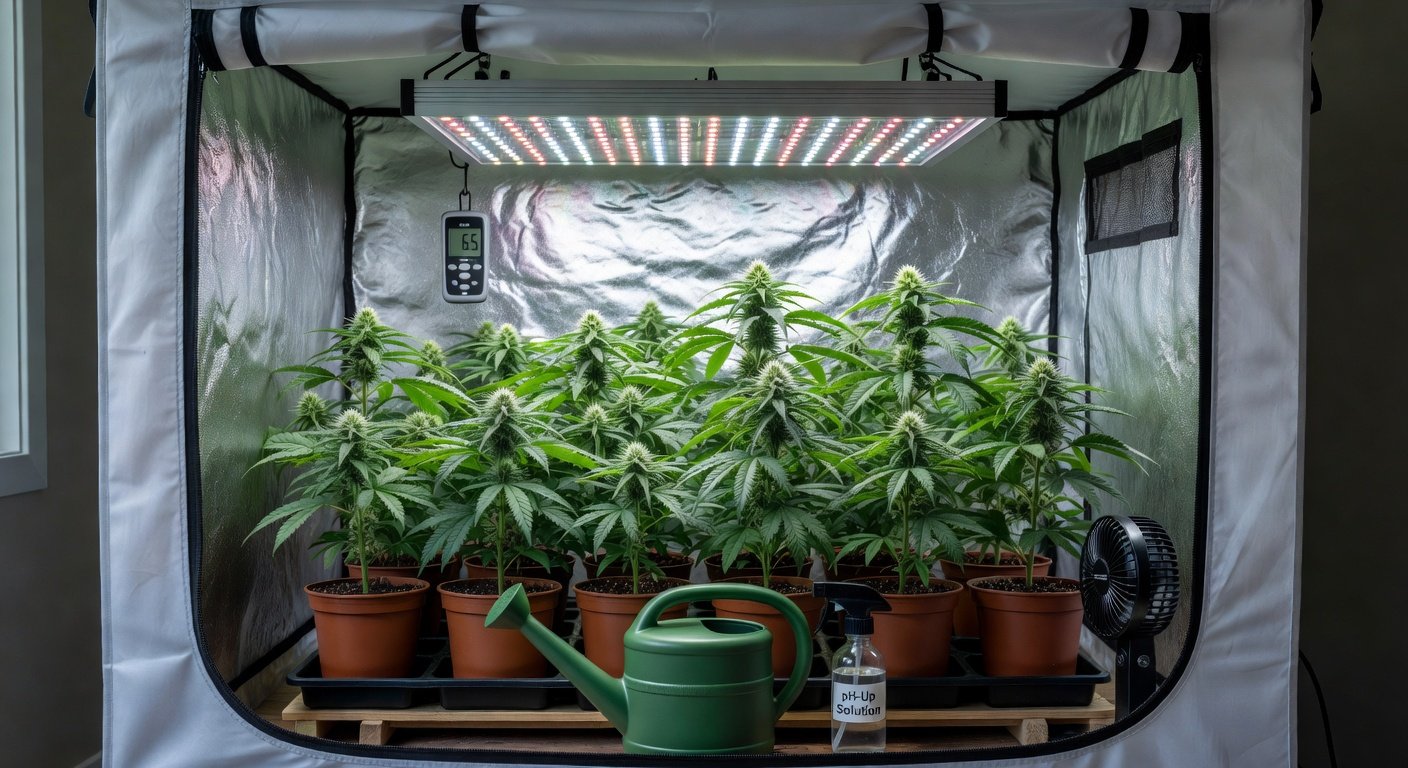
    Test your water and soil pH regularly using affordable strips or a digital meter—aim for the sweet spot mentioned earlier. Adjust with pH up/down solutions: a few drops in your watering can should suffice for small corrections. For soil, incorporate dolomite lime to buffer alkalinity or sulfur for acidity, but go slow to avoid overcorrecting. Flush the medium with pH-balanced water if symptoms are advanced, then resume feeding. Resources like the University of Minnesota Extension offer detailed guides on soil pH for plants like cannabis. With consistent checks, your beginner grow will absorb nutrients efficiently.

    Nutrient Burn: Overfeeding Your Greedy Plants

    Nutrient burn happens when you give too much fertilizer, essentially ‘burning’ the roots and leaves with excess salts. Beginners, excited about lush growth from easy cannabis seeds, often follow feeding schedules too aggressively, ignoring the plant’s actual needs.

    Causes of Nutrient Burn

    It’s typically from using full-strength nutrients too early or not diluting properly. Buildup in soil from repeated overfeedings, combined with poor flushing, worsens it. Autoflowering seeds, popular among novices for their speed, are particularly prone since their short vegetative phase limits recovery time. Hard water or inconsistent mixing also plays a role.

    Symptoms to Identify

    Brown or crispy leaf tips curling upward are the telltale signs, progressing to yellowing and necrosis between veins. The damage starts on older, lower leaves and moves up if unchecked. Plants may look dark green and overly vigorous before the burn sets in, a false sense of security for new growers. In hydro systems, you might notice foam or residue in the reservoir.

    Straightforward Fixes for Home Grows

    Flush immediately with plain, pH-balanced water—three times the pot volume—to wash out excess salts. Hold off on nutrients for a week, then reintroduce at half strength, gradually increasing as plants recover. For soil-based easy seeds, top-dress with plain compost to dilute. Always start with 1/4 to 1/2 the recommended dose for seedlings and veg stage. The Leafly guide on nutrient management is a great resource for dosing tips. Recovery takes 7-10 days, but early intervention prevents total loss.

    Prevention Checklist for a Smooth Cannabis Growing Experience

    To wrap up, preventing these pitfalls ensures your first grow with easy cannabis seeds is successful and stress-free. Use this checklist as your daily or weekly guide:

    • Water Wisely: Check soil moisture before watering; aim for dry top inch. Use well-draining pots and medium.
    • Monitor pH: Test water and runoff weekly. Adjust to 6.0-7.0 for soil. Keep a log of readings.
    • Feed Conservatively: Start nutrients at low doses. Flush monthly and watch for tip burn. Use cannabis-specific formulas.
    • Observe Daily: Inspect leaves for color changes, wilting, or spots. Adjust light, temp (70-85°F), and humidity (40-60%) accordingly.
    • Start Small: Begin with 2-3 plants using autoflower or feminized seeds to learn without overwhelm.
    • Research Your Setup: Join online communities or read up on your strain’s needs. Tools like timers and meters make life easier.

    By steering clear of overwatering, pH mishaps, and nutrient burn, you’ll cultivate healthy plants and a bountiful harvest. Growing cannabis is a learning curve, but with these insights, your beginner journey in 2026 will be smoother and more enjoyable. Happy growing!

  • Indica vs Sativa for Guerrilla Outdoor Growing

    Indica vs Sativa for Guerrilla Outdoor Growing

    Introduction to Guerrilla Outdoor Cannabis Growing

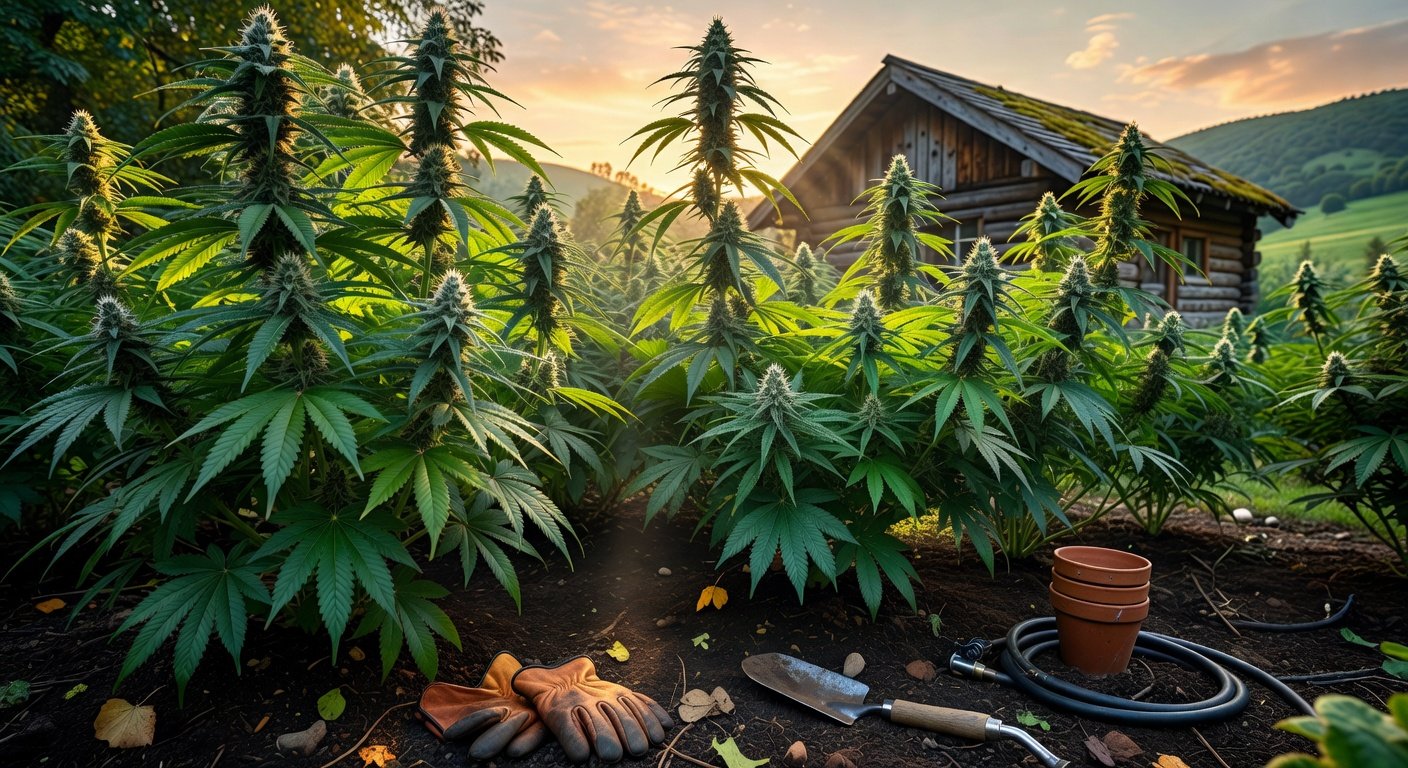
    Guerrilla growing has become a popular method for home cultivators seeking discreet, low-maintenance ways to produce high-quality cannabis outdoors. In 2026, with evolving legalization trends, more enthusiasts are turning to hidden spots like forests, abandoned lots, or remote fields to cultivate without drawing attention. Choosing the right seeds is crucial, especially when comparing indica and sativa strains. Indicas offer bushy, compact growth ideal for stealth, while sativas provide taller, airier plants suited to expansive areas. This guide compares these types for guerrilla setups, focusing on stealth, yield, maturation time, and climate resilience, with top seed recommendations and buying tips.

    Understanding Indica and Sativa Strains

    Indica and sativa are the two primary subspecies of cannabis, each with distinct characteristics that influence their performance in outdoor environments. Indica plants typically originate from cooler, mountainous regions like Afghanistan and exhibit shorter, denser structures with broad leaves. They produce relaxing effects and are known for faster flowering times. Sativa strains, hailing from equatorial climates such as Thailand or Colombia, grow tall and slender with narrower leaves, offering uplifting highs and longer vegetative phases.

    For guerrilla growing, where plants must evade detection and thrive in uncontrolled settings, these traits play a pivotal role. Indicas’ compact size aids in concealment, while sativas’ height can be a liability in tight spaces but an asset in yield potential under ideal conditions.

    Stealth Comparison: Hiding Your Guerrilla Grow

    Stealth is paramount in guerrilla cultivation, as plants in public or semi-public areas risk discovery by hikers, authorities, or animals. Indica strains excel here due to their bushy, low-profile growth—often staying under 4-5 feet tall. This makes them easier to tuck under foliage or in rocky outcrops without standing out. For instance, their dense canopy blends seamlessly with surrounding shrubs, reducing visibility from afar.

    Sativas, conversely, can stretch to 10 feet or more, posing challenges in confined guerrilla spots. They’re better for open, forested areas where height mimics local trees, but pruning is often necessary to maintain discretion. In urban guerrilla grows, like rooftop edges or alley planters, indicas’ subtlety wins out, minimizing the need for frequent visits that could expose your operation.

    Top Stealth Recommendations

    • Indica: Northern Lights Auto – Compact at 3-4 feet, auto-flowering for quick, inconspicuous cycles.
    • Sativa: Durban Poison – Manageable height with fast veg, but best in taller cover like pine understories.

    Yield Potential in Outdoor Guerrilla Setups

    Yield is a key motivator for guerrilla growers, balancing harvest size against the risks of larger plants. Indicas generally produce moderate yields of 300-500 grams per plant outdoors, thanks to their resinous buds that pack dense THC and terpenes into a smaller frame. This efficiency suits limited-space guerrilla sites, where multiple small plants can yield comparably to fewer large ones without increasing detection risk.

    Sativas shine in yield for expansive guerrilla plots, potentially hitting 500-800 grams per plant due to their lanky branches laden with airy flowers. However, this requires nutrient-rich soil and ample sunlight, which may not always be available in hidden spots. In nutrient-poor guerrilla environments, sativas might underperform compared to hardy indicas.

    For more on cannabis yields, check out Leafly’s strain database, a trusted resource for growers.

    Top Yield Recommendations

    • Indica: Granddaddy Purple – Up to 500g/plant, with purple hues that camouflage in fall foliage.
    • Sativa: Jack Herer – High yields in sunny clearings, around 600g/plant for patient cultivators.

    Maturation Time: Speed vs Patience in Guerrilla Grows

    Time to harvest is critical for guerrilla operations, as longer cycles increase exposure risks. Indicas mature faster, often in 8-10 weeks of flowering after a short 4-6 week veg phase, allowing harvests before peak detection seasons like summer tourism. Autoflowering indica hybrids cut this even shorter, ideal for quick guerrilla flips in one growing season.

    Sativas demand more patience, with flowering times of 10-16 weeks and extended veg periods, pushing total cycles to 4-6 months. This suits growers in mild climates with year-round access but can be risky in areas with early frosts or heavy patrols. For hit-and-run guerrilla tactics, indicas’ speed ensures you can plant, monitor minimally, and harvest swiftly.

    Scenarios Where One Outperforms

    1. Short Seasons or High-Risk Areas: Indicas outperform sativas in northern latitudes or urban fringes where quick maturation dodges weather and human interference.
    2. Extended Sunny Climates: Sativas thrive in Mediterranean or tropical guerrilla spots, like southern U.S. forests, maximizing yield over time.

    Climate Resilience: Adapting to Guerrilla Environments

    Guerrilla grows face unpredictable weather, from droughts to downpours, so resilience is non-negotiable. Indicas are tougher in cooler, wetter climates, resisting mold and pests better due to their sturdy structure and shorter exposure periods. They’re resilient to temperature swings, making them perfect for high-altitude or coastal hidden spots.

    Sativas handle heat and humidity well, originating from hot equatorial zones, but they falter in cold snaps or excessive rain, which can cause bud rot on their loose flowers. In resilient terms, indicas edge out for variable guerrilla climates, while sativas excel in consistently warm, dry areas like desert fringes.

    For climate data tailored to growing, refer to the USDA’s plant hardiness zone map to match strains to your region.

    Top Resilience Recommendations

    • Indica: Afghan Kush – Mold-resistant and cold-tolerant for rugged mountain guerrilla sites.
    • Sativa: Malawi Gold – Drought-hardy for arid, sunny hidden valleys.

    Seed Buying Tips for Guerrilla Success

    Selecting quality seeds maximizes your guerrilla grow’s potential. In 2026, reputable banks like ILGM or Seedsman offer feminized and auto strains bred for outdoor resilience. Prioritize:

    • Genetics: Opt for landrace hybrids—pure indicas from Hindu Kush for stealth, equatorial sativas for yield.
    • Germination Guarantee: Choose sellers with 99% success rates and free replacements.
    • Discreet Shipping: Ensure stealth packaging to avoid legal issues in restricted areas.
    • Soil Testing: Buy seeds suited to native soils; test pH (6.0-7.0) in your spot beforehand.
    • Quantity: Start with 10-20 seeds for a guerrilla plot, accounting for 20-30% loss to elements.

    Always verify local laws, as guerrilla growing remains gray in many places. Store seeds in cool, dark spots pre-planting to maintain viability.

    Conclusion: Choosing Your Guerrilla Strategy

    Indicas and sativas each bring strengths to guerrilla outdoor growing—indicas for stealthy, resilient quick wins in challenging spots, and sativas for bountiful yields in favorable climates. Assess your site’s size, weather, and risk level: go indica for urban hides or short summers, sativa for remote sunny expanses. With top picks like Northern Lights or Durban Poison, and smart buying, your 2026 harvest can be both abundant and invisible. Happy growing!

  • Build a Custom Hydro Grow Tent: 2026 Step-by-Step Guide

    Build a Custom Hydro Grow Tent: 2026 Step-by-Step Guide

    Introduction to Custom Hydroponic Grow Tents

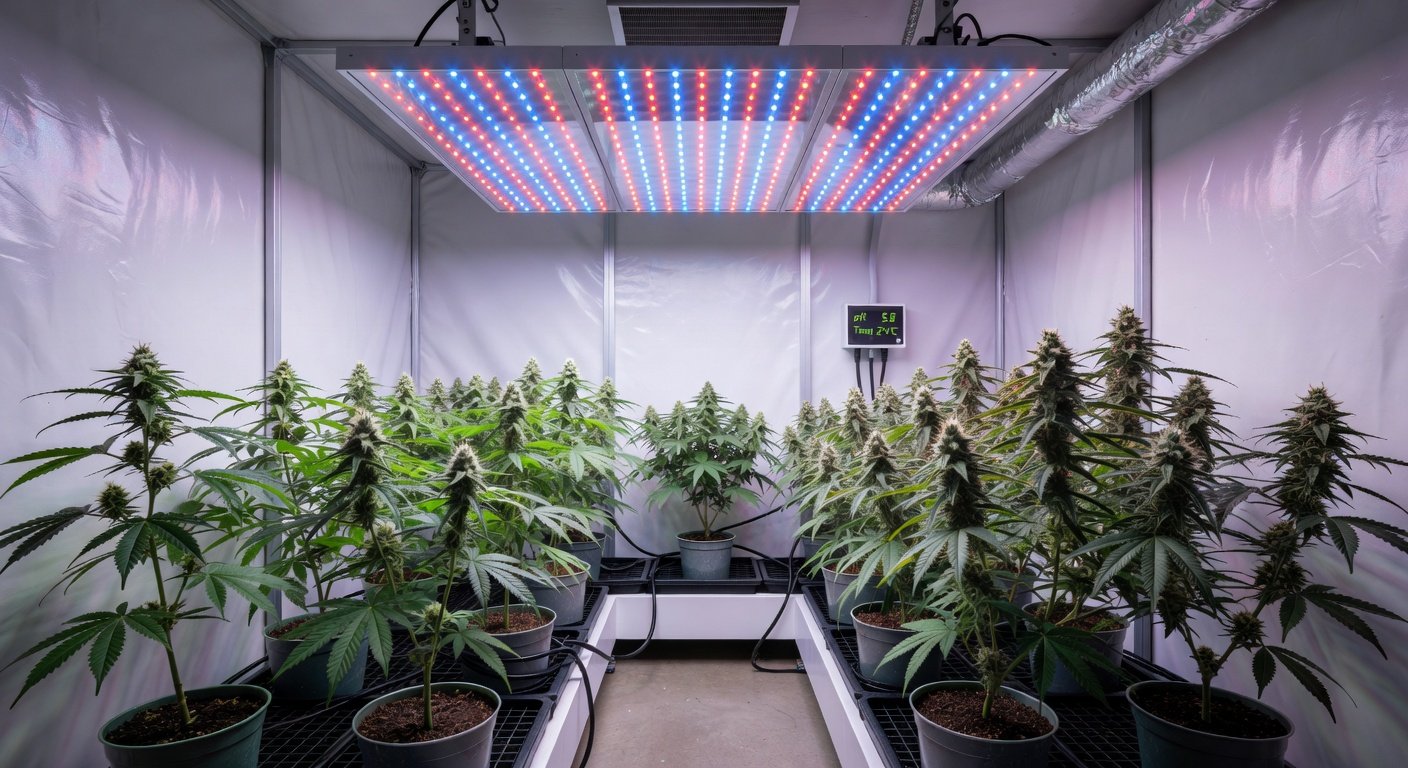
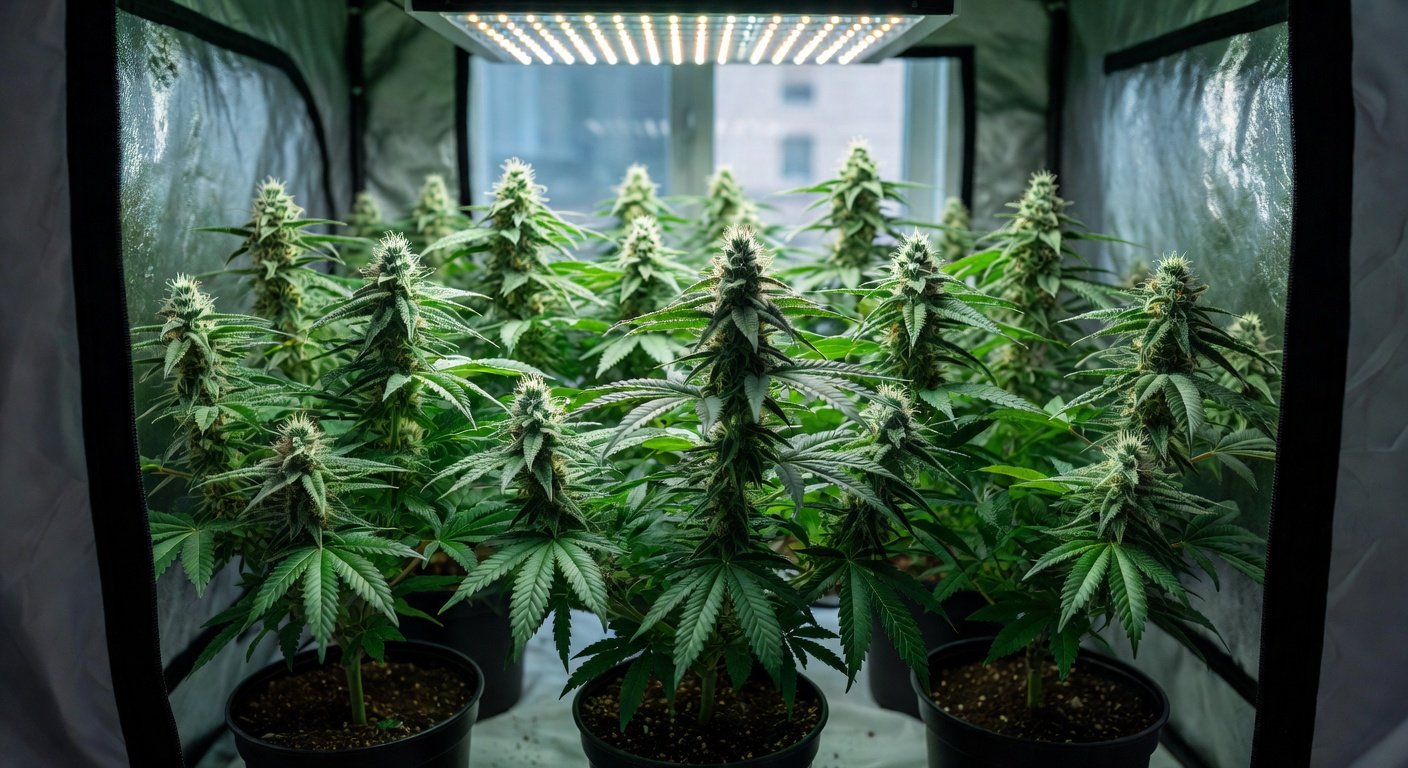
    In 2026, indoor cannabis cultivation has reached new heights of efficiency, especially with hydroponic systems that deliver faster growth and higher yields without soil. For home growers and enthusiasts, building a custom grow tent tailored for hydroponics offers complete control over your environment. This guide walks you through every step, from selecting components like reflective walls, ventilation, and reservoirs to integrating cutting-edge grow lights and choosing seeds optimized for hydro setups. Whether you’re a beginner or seasoned cultivator, you’ll learn troubleshooting tips and yield-boosting hacks to maximize your 2026 harvest.

    Planning Your Grow Tent Setup

    Before diving into construction, assess your space and goals. A standard hydroponic grow tent ranges from 4×4 feet for small operations to 8×8 feet for larger yields. Consider your local climate—indoor setups thrive in controlled environments, but electricity costs and noise from fans are key factors. Budget-wise, expect $500–$2,000 for a basic custom build, scaling up for premium features.

    Key considerations include light-proofing to prevent mold, scalability for multiple plants, and compliance with local regulations. For authoritative guidance on safe indoor growing, check resources from the Leafly Growing Guide.

    Essential Components for Your Hydro Grow Tent

    Reflective Walls for Maximum Light Efficiency

    Reflective walls are the backbone of light optimization in hydroponic tents. They bounce photons back to your plants, increasing photosynthetic efficiency by up to 30%. Opt for Mylar or diamond reflector material—it’s durable, lightweight, and achieves 95–98% reflectivity. Avoid cheap foils that degrade quickly.

    To install: Measure your tent frame (PVC pipes or metal poles work best), cut Mylar sheets to fit, and secure with adhesive tape or Velcro. For hydro setups, ensure walls are waterproof to handle potential spills from reservoirs. Pro tip: Panda film (black/white plastic) on the exterior blocks light leaks while the interior Mylar maximizes reflection.

    Ventilation System: Airflow and Odor Control

    Proper ventilation prevents heat buildup, controls humidity (ideal 40–60% for veg, 40–50% for flower), and exchanges CO2 for optimal growth. In hydroponics, where roots are submerged, stale air can lead to root rot.

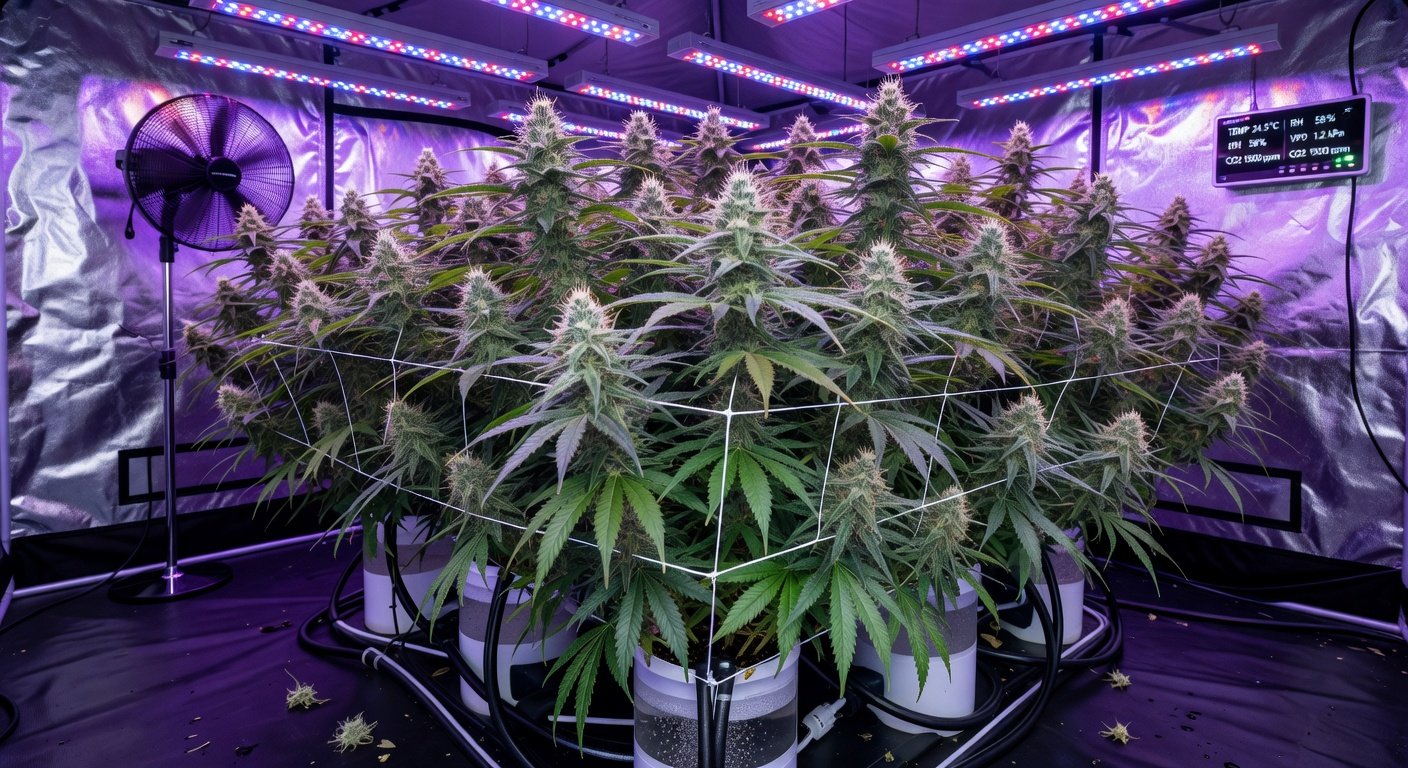
    Core elements: Inline fans (6–8 inch for small tents), carbon filters for odor scrubbing, and oscillating fans for circulation. Calculate CFM (cubic feet per minute) based on tent volume—aim for 1 CFM per square foot. Ducting routes exhaust outside or through a window. In 2026, smart vents with app controls monitor VPD (vapor pressure deficit) automatically.

    • Exhaust fan: Pulls hot air out.
    • Intake fan: Brings fresh air in.
    • Filter: Neutralizes cannabis aromas.

    Install by mounting the fan at the top, filter inline, and seal all connections to avoid leaks.

    Hydroponic Reservoirs and Nutrient Delivery

    The heart of hydroponics is the reservoir—a 20–50 gallon tote or custom tank holding nutrient-rich water. For cannabis, use Deep Water Culture (DWC) or Nutrient Film Technique (NFT) systems suited to tents.

    Select food-grade plastic reservoirs with lids to minimize algae. Integrate submersible pumps (200–400 GPH) for circulation and air stones for oxygenation—roots need dissolved oxygen above 6 ppm. pH balance (5.5–6.5) and EC (electrical conductivity) monitoring tools are essential. Add reservoirs under the tent floor, elevated for easy access, and use black tubing to prevent light exposure.

    For multi-plant setups, consider automated dosers that adjust nutrients via sensors, a 2026 staple for precision growing.

    Integrating Top Grow Lights for Efficiency

    Lighting is crucial in hydroponic tents, where plants rely on artificial spectra for 18/6 (veg) or 12/12 (flower) cycles. In 2026, LED lights dominate for their low heat and full-spectrum output, mimicking sunlight.

    Recommended: Full-spectrum LEDs like Mars Hydro TS series or Spider Farmer SF models—400–600W for a 4×4 tent, delivering 2.5–3 µmol/J efficiency. Hang lights 18–24 inches above canopy, adjustable via ratchet cords. UV and IR diodes enhance resin production and terpenes.

    1. Calculate wattage: 30–50W per square foot.
    2. Mount centrally for even coverage.
    3. Use timers for photoperiod control.
    4. Monitor heat—pair with ventilation to keep temps 70–85°F.

    Integrate dimmable drivers for seedling stages. For energy savings, explore quantum board LEDs certified by ENERGY STAR.

    Selecting High-Performing Indoor Seeds for Hydro Systems

    Choose feminized or autoflowering seeds bred for hydroponics—fast-rooting, disease-resistant strains like Gorilla Glue or Blue Dream hybrids. In 2026, look for THC/CBD profiles suited to your market, with compact structures for tents.

    Top picks: From reputable banks like ILGM or Seedsman, select hydro-optimized genetics with high yields (1–2g/watt). Germinate in rockwool cubes, transplant to net pots. Ensure seeds are EU/US compliant; for more on strain selection, visit the Royal Queen Seeds Hydro Guide.

    Plant 4–9 per tent, spacing 12–18 inches. Hydro seeds thrive on rapid nutrient uptake, yielding 20–30% more than soil.

    Step-by-Step Guide to Building Your Tent

    Now, let’s assemble:

    1. Frame Assembly: Connect poles into a cube, securing corners with connectors. Cover floor with waterproof tray.
    2. Wall Installation: Attach Mylar to interior, seal seams.
    3. Ventilation Setup: Install exhaust at top, intake at bottom, run ducting.
    4. Lighting Rig: Suspend LEDs, wire to outlet with surge protector.
    5. Hydro System: Place reservoir, connect pumps and tubing to buckets or trays.
    6. Monitoring: Add hygrometer, thermometer, and pH meter.
    7. Sealing and Testing: Check for light leaks, run systems dry.

    Power with a dedicated circuit to avoid overloads. Total build time: 4–6 hours.

    Troubleshooting Common Issues

    Hydroponics can hit snags—here’s how to fix them:

    • Nutrient Burn: Yellow tips? Flush reservoir, lower EC to 1.0–1.8. Use calmag supplements for deficiencies.
    • Root Rot: Brown roots? Increase aeration, add beneficial bacteria like Hydroguard. Maintain water temps below 72°F.
    • pH Drift: Test daily; adjust with pH up/down solutions. Stabilize with RO water.
    • Light Burn: Bleached tops? Raise lights 6 inches or dim.
    • Pests: Spider mites love hydro—use neem oil or IPM sprays early. Quarantine new plants.

    Log data with apps like GrowBuddy for patterns. In 2026, AI sensors from companies like Argus Controls predict issues preemptively.

    Yield-Boosting Hacks for 2026 Indoor Setups

    Elevate your harvest with these tips:

    • CO2 Enrichment: Add bags or generators to hit 800–1200 ppm, boosting growth 20–30%.
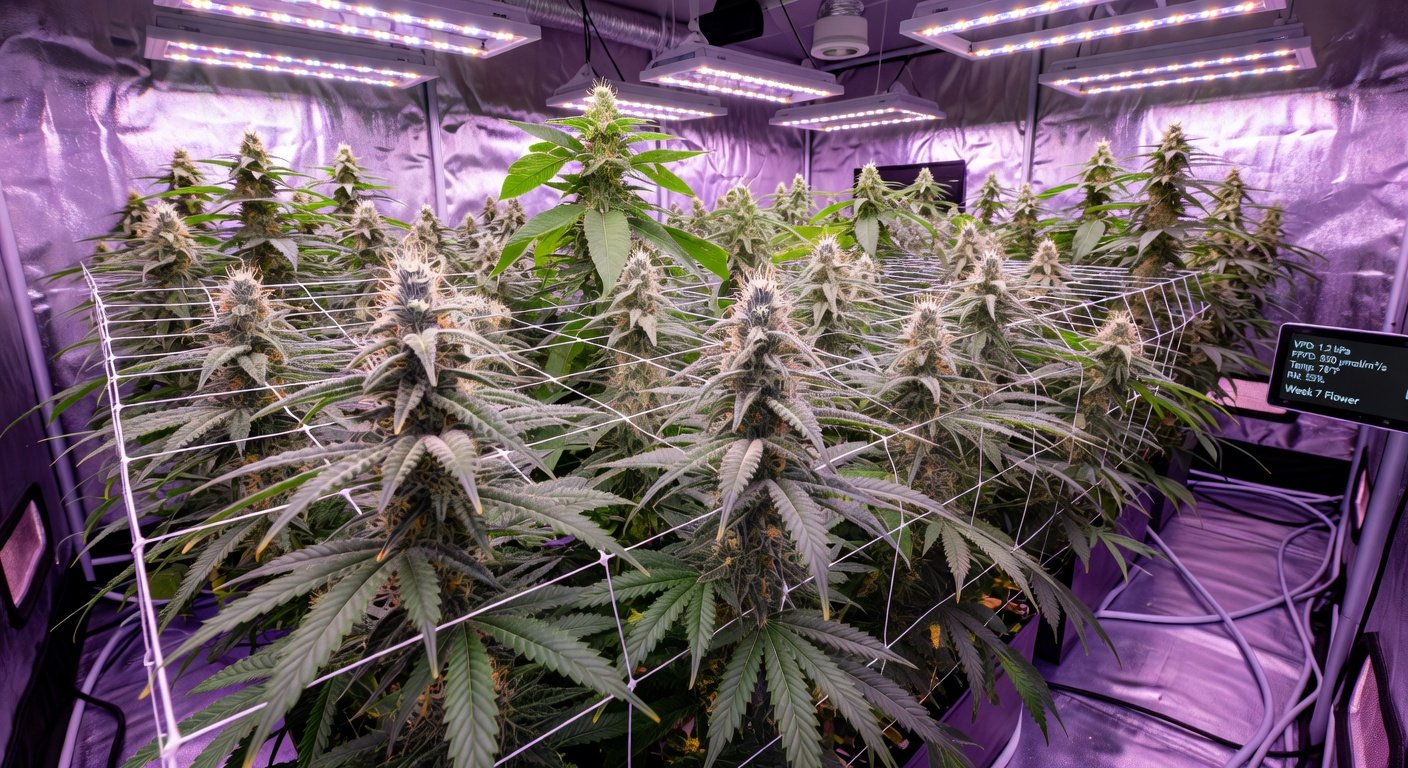
    • SCROG Training: Use nets to create even canopy, increasing light penetration in hydro.
    • Supplemental UV: 2–4 hours daily in flower for denser buds and higher potency.
    • Automated Nutrients: pH/EC auto-adjusters save time and prevent errors.
    • LED Upgrades: Switch to phosphor-converted LEDs for better PAR output.

    Harvest when 70% trichomes are cloudy—expect 1–1.5 lbs from a 4×4 tent with optimized hydro. Dry and cure in the tent’s veg space for quality.

    Building your custom hydro grow tent empowers you to cultivate premium cannabis at home. With these steps, components, and hacks, your 2026 setup will yield exceptional results. Happy growing!

  • Indica vs Sativa Feminized Seeds: Growth, Yields & 2026 Tips

    Indica vs Sativa Feminized Seeds: Growth, Yields & 2026 Tips

    Understanding Indica and Sativa Feminized Photoperiod Seeds

    In the evolving world of cannabis cultivation, feminized photoperiod seeds remain a cornerstone for home growers seeking reliable, high-quality harvests. As we enter 2026, advancements in breeding have made these seeds more accessible and potent than ever. But what sets indica and sativa feminized seeds apart? Indica strains, originating from the Hindu Kush region, are known for their bushy structure and relaxing effects, while sativas, hailing from equatorial climates, offer uplifting highs and taller growth. Both types are feminized to eliminate male plants, ensuring a crop of bud-producing females, and photoperiod means they flower based on light cycles rather than automatically.

    For home growers and enthusiasts, choosing between indica and sativa feminized seeds boils down to your goals—whether it’s medicinal relief, recreational buzz, or maximizing yield in limited space. This guide compares their growth patterns, yields, effects, and suitability for indoor versus outdoor grows, while providing practical tips for selection and spotting quality from top breeders.

    Growth Patterns: Indica vs Sativa

    One of the most noticeable differences between indica and sativa feminized seeds lies in their growth habits, which directly impact your cultivation strategy.

    Indica plants typically develop a compact, bushy structure with short, thick internodes and broad leaves. They reach heights of 3-6 feet, making them ideal for discreet grows or space-constrained environments. Their vegetative phase is shorter, often 6-8 weeks, and they flower in 8-10 weeks under 12/12 light cycles. This rapid growth suits beginners who want quicker results without excessive stretching.

    Sativa feminized seeds, on the other hand, produce tall, lanky plants with narrow leaves and longer internodes, often soaring to 6-12 feet or more. Their vegetative stage can last 8-12 weeks, with flowering extending to 10-16 weeks. This extended timeline demands patience but rewards with vigorous growth in open spaces. Sativas are prone to stretching during the flowering transition, so techniques like topping or low-stress training (LST) are essential to manage height.

    In hybrid strains—common in modern feminized seeds—these traits blend, offering balanced growth. For instance, a 70/30 indica-dominant hybrid might combine sativa vigor with indica compactness.

    Environmental Influences on Growth

    Climate plays a pivotal role. Indicas thrive in cooler, shorter-season areas, mimicking their Afghan origins, while sativas prefer warm, sunny conditions akin to Thai or Colombian highlands. For indoor growers, both can be optimized with controlled humidity (40-60% veg, 30-50% flower) and temperatures (70-85°F veg, 65-80°F flower). Outdoors, plant indicas in northern latitudes for fall harvests, and sativas in southern regions to avoid frost.

    Yields: Comparing Indica and Sativa Outputs

    Yields are a major consideration for any grower, and feminized photoperiod seeds from reputable breeders can deliver impressive results with proper care.

    Indica strains often yield 400-600 grams per square meter indoors, thanks to their dense buds and multiple colas from bushy branching. Outdoors, a single plant might produce 500-800 grams in optimal conditions. Their shorter stature allows for sea-of-green (SOG) setups, maximizing space efficiency.

    Sativas, with their airy buds, typically yield 300-500 grams per square meter indoors but can explode to 800-1500 grams per plant outdoors in sunny climates. Their longer flowering period means higher potential cannabinoid development, but lower bud density requires good airflow to prevent mold.

    Hybrids often strike a middle ground, with yields around 450-700 grams/m². Factors like lighting (LEDs for efficiency in 2026 setups), nutrients, and pruning significantly boost outputs. For example, using organic fertilizers high in phosphorus during flowering can enhance bud size across both types.

    Effects and User Experiences

    Beyond cultivation, the effects of indica and sativa feminized seeds define their appeal to enthusiasts.

    Indicas deliver a body-high experience—sedative, pain-relieving, and sleep-inducing—ideal for evening use or medical applications like insomnia and chronic pain. THC levels range from 15-25%, with higher CBD in some strains for balanced effects.

    Sativas provide cerebral, energizing effects that boost creativity, focus, and mood, perfect for daytime activities. They often have higher THC (18-30%) and terpenes like limonene for uplifting vibes, though some users report anxiety if overconsumed.

    Modern 2026 hybrids offer tailored effects, such as indica-leaning for relaxation with sativa clarity. Always start low and go slow, especially with potent feminized strains. For more on cannabinoid profiles, check out Leafly’s strain database, a trusted resource for enthusiasts.

    Suitability for Indoor and Outdoor Grows

    Selecting indica or sativa feminized seeds depends on your setup.

    Indoor Grows: Indicas shine here due to their compact size, fitting tents or closets easily. They require less vertical space and handle high-density planting well. Sativas work indoors with height control techniques like SCROG (screen of green) but demand taller setups and more light penetration.

    Outdoor Grows: Sativas excel in expansive gardens, leveraging natural sunlight for massive yields. Indicas suit smaller plots or cooler climates, harvesting earlier to beat autumn rains. In 2026, with legalization expanding, consider local regulations—resources like the Cannabis Business College offer legal insights for compliant growing.

    • Indica: Best for beginners, limited space, or cold climates.
    • Sativa: Ideal for experienced growers with ample room and warm weather.
    • Hybrid: Versatile for mixed conditions.

    Practical Tips for Selecting Strains

    Choosing the right feminized photoperiod seeds starts with your goals, space, and climate.

    1. Assess Space: Measure your grow area. Under 4 feet tall? Go indica or dwarf hybrids. Ample height? Experiment with sativas.
    2. Consider Climate: In temperate zones, opt for indicas or fast-finishing sativas. Tropical areas favor pure sativas. Use greenhouse covers for protection.
    3. Define Goals: Relaxation? Indica. Energy? Sativa. Medical needs? Look for lab-tested strains with specific cannabinoid ratios.
    4. Breeder Reputation: In 2026, top breeders like Dutch Passion, Sensi Seeds, and Royal Queen Seeds dominate with stable genetics. Read reviews on forums or seed banks.
    5. Germination and Veg Tips: Soak seeds in water for 24 hours, then plant in starter plugs. Maintain 18/6 light for veg, transitioning to 12/12 for flower.

    Budget-wise, expect $5-15 per seed from premium lines. Start with 5-10 seeds for a test run.

    Spotting Quality Feminized Seeds from Top 2026 Breeders

    Not all feminized seeds are created equal. In 2026, the market is flooded, so discerning quality is key for home growers.

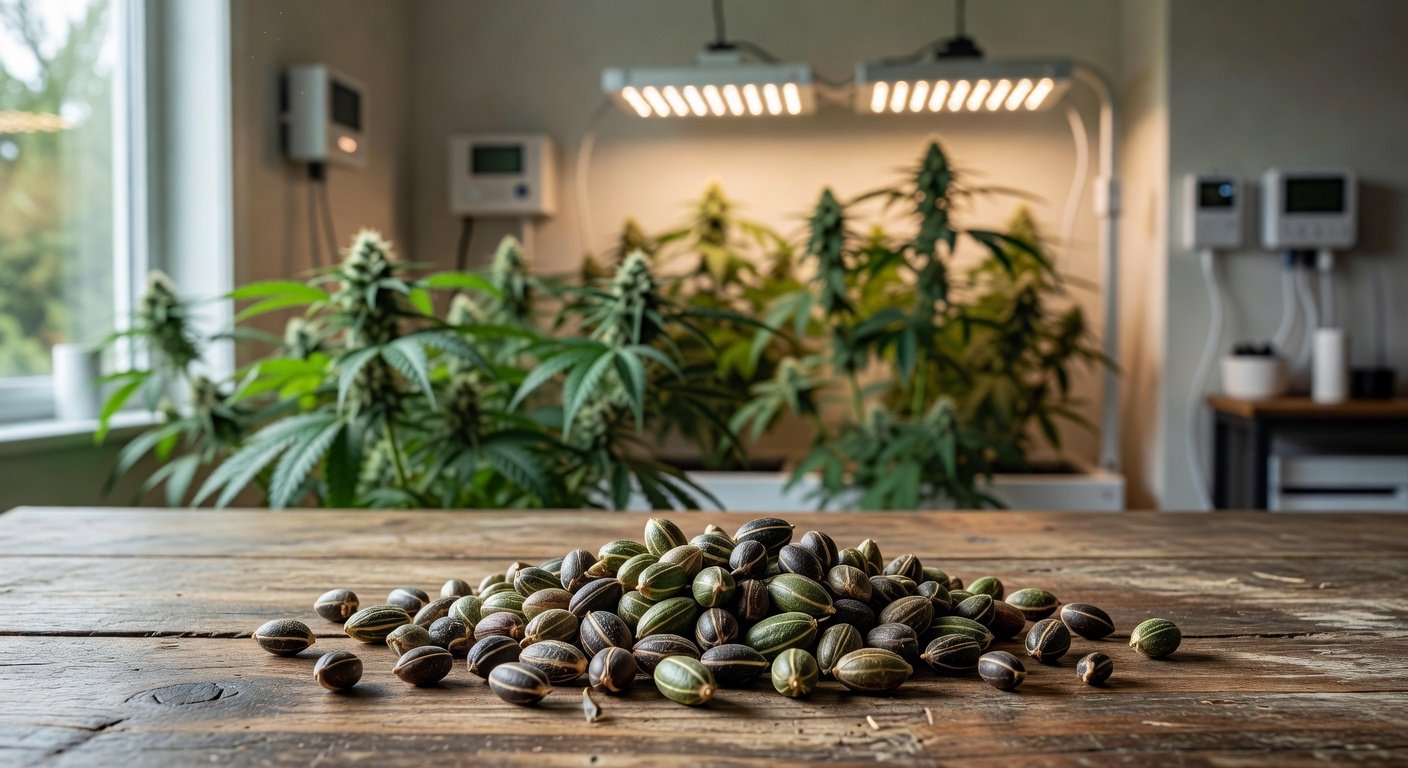
    Look for dark, tiger-striped shells—healthy seeds are firm, not cracked or pale. Top breeders provide detailed specs: germination rates above 95%, THC/CBD percentages, and grow times. Avoid cheap imports; stick to EU or US-based companies with lab certifications.

    Key 2026 breeders include:

    • Dutch Passion: Pioneers in feminized tech, offering stable indicas like Blueberry for indoor yields.
    • Sensi Seeds: Legendary sativas like Jack Herer, perfect for outdoor enthusiasts.
    • Royal Queen Seeds: Hybrids like Critical Kush, blending effects and ease.
    • Barney’s Farm: Innovative strains with high resin for extracts.

    Buy from authorized seed banks like Seedsman or ILGM for guarantees. Check for stress-tested genetics—seeds that perform under varied conditions. Steer clear of hermaphroditic risks by choosing self-pollination-free lines.

    Finally, store seeds in a cool, dark place to maintain viability for years. With these insights, you’re equipped to cultivate a thriving crop tailored to your needs.

  • Hydroponic Autoflower Guide: Fast 2026 Harvests

    Hydroponic Autoflower Guide: Fast 2026 Harvests

    Why Hydroponics for Autoflowering Cannabis in 2026?

    In 2026, home growers are turning to hydroponics for autoflowering cannabis strains to achieve faster, more efficient harvests. Autoflowers, derived from Cannabis ruderalis genetics, don’t rely on light cycles to flower, completing their lifecycle in just 8-10 weeks. Pairing this with hydroponics—a soilless method using nutrient-rich water—supercharges growth by delivering precise nutrients directly to roots. This setup is ideal for space-limited enthusiasts seeking high yields without the wait. Expect up to 20-30% faster cycles compared to soil, making it perfect for multiple harvests per year.

    Hydroponics minimizes soil-borne issues like pests and diseases, while allowing fine-tuned control over environmental factors. For 2026 growers, with advancing LED tech and automated systems, this method aligns with sustainability goals, using less water and space. Whether you’re a novice or seasoned cultivator, this guide walks you through optimizing hydro for autos.

    Essential Equipment for Your Hydroponic Autoflower Setup

    Starting with the right gear ensures success. For a basic deep water culture (DWC) system—popular for beginners—focus on reliability and scalability. Here’s what you’ll need:

    • Reservoir and Pump: A 5-10 gallon food-grade bucket or tote serves as the reservoir. Pair it with a submersible air pump (like a Hailea ACO-9601) for oxygenation and a small water pump for circulation if upgrading to an active system.
    • Grow Medium: Autoflowers thrive in inert mediums like clay pebbles (hydroton) or rockwool cubes. These provide support without competing nutrients.
    • Lighting: Full-spectrum LEDs (e.g., 200-400W for a 2×2 tent) mimic sunlight. In 2026, quantum board LEDs from brands like Mars Hydro offer energy efficiency.
    • Monitoring Tools: pH meter (digital, like Bluelab pH Pen), EC/TDS meter, and thermometer/hygrometer combo. Temperature should stay 68-77°F (20-25°C).
    • Nutrient Line: Autoflower-specific formulas from General Hydroponics or Advanced Nutrients, designed for short cycles.
    • Grow Tent and Ventilation: A 2×2 or 4×4 tent with inline fan and carbon filter for odor control.

    Budget around $200-500 for a starter setup. Source equipment from reputable suppliers to avoid cheap knockoffs that fail mid-grow.

    Selecting the Best Autoflower Seeds

    Choose feminized autoflower seeds from trusted breeders like FastBuds or ILGM for genetics optimized for hydro. Strains such as Gorilla Glue Auto or Blueberry Auto yield 400-600g/m² in hydro systems. Look for high-THC, mold-resistant varieties suited to your climate—indoors, humidity control is key. In 2026, lab-tested seeds ensure purity and vigor, reducing failure rates.

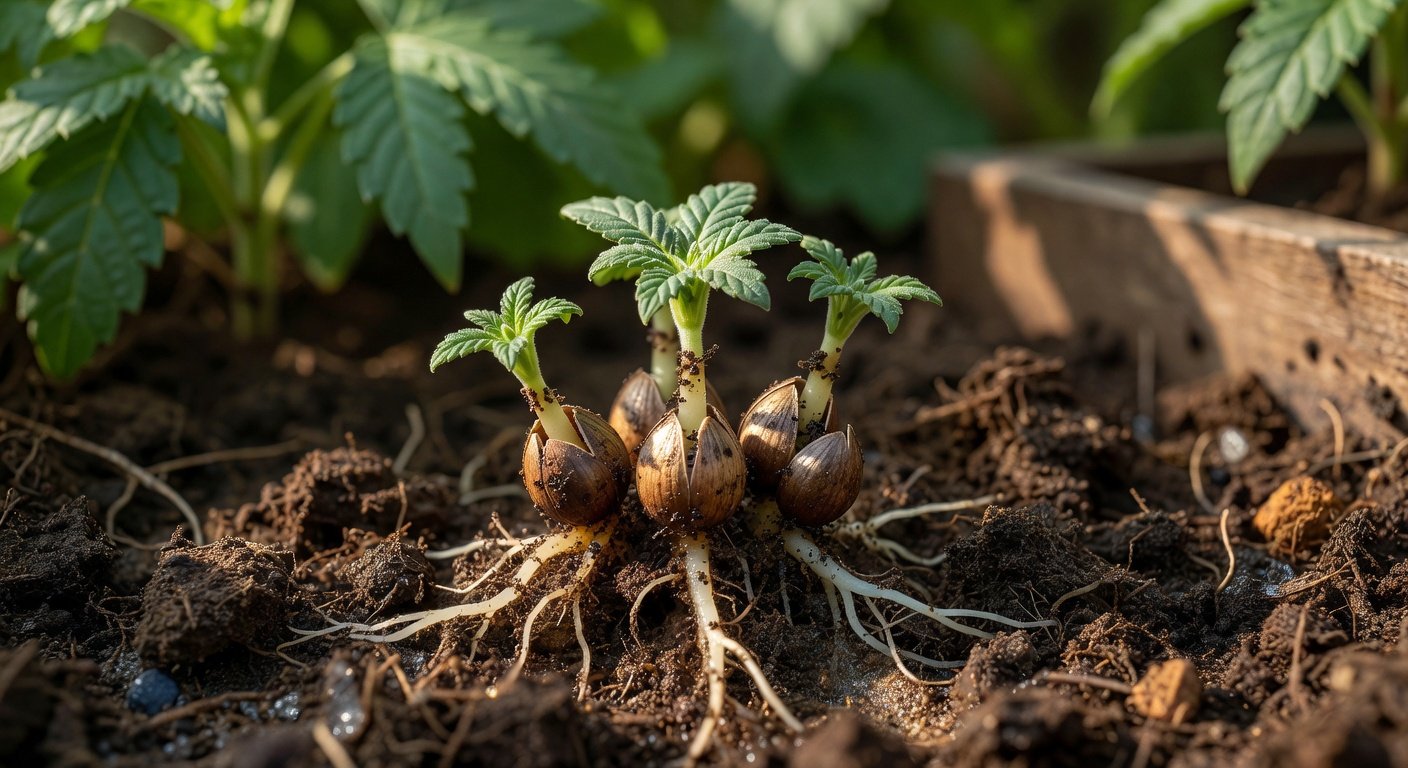
    Germinate seeds using the paper towel method: Place between damp towels in a dark, warm spot (75°F/24°C) for 24-72 hours until taproots emerge. Transfer to rockwool cubes soaked in pH-balanced water.

    Step-by-Step Hydroponic Setup for Autoflowers

    Setting up your system takes about 2-4 hours. Follow these steps for a DWC hydroponic rig:

    1. Prepare the Reservoir: Clean your bucket with a 10% bleach solution, rinse thoroughly. Fill with reverse osmosis (RO) water to avoid chlorine buildup. Aim for 65-70°F (18-21°C) water temp.
    2. Install Aeration: Connect air stones to the pump and submerge in the reservoir. Bubbles should vigorously oxygenate the water—crucial for root health in autos’ short veg phase.
    3. Net Pots and Medium: Place 2-3 inch net pots filled with hydroton into the lid. Insert rockwool cubes with sprouted seeds into the medium.
    4. Nutrient Mixing: Start with ¼ strength vegetative nutrients (EC 0.8-1.2 mS/cm). Adjust pH to 5.5-6.2 for hydro.
    5. Position Under Lights: Hang LEDs 18-24 inches above. Use an 18/6 light schedule for veg, switching to 20/4 for flower as autos transition naturally.
    6. Secure and Monitor: Place the lid on, ensuring roots dangle into the oxygenated water. Check pH/EC daily.

    Transplant to larger pots if scaling up after week 2. For ebb-and-flow systems, add timers for automated flooding every 4-6 hours.

    Tailored Nutrient Solutions for Autoflowering Cannabis

    Autoflowers demand a balanced, low-stress nutrient regimen due to their compact lifecycle. Use a three-part hydroponic formula: base nutrients plus bloom boosters. Vegetative stage (weeks 1-3): High nitrogen (N-P-K 3-1-2) at EC 1.0-1.4. Flowering (weeks 4-8): Shift to phosphorus-rich (1-3-4) at EC 1.4-1.8, adding cal-mag supplements to prevent deficiencies in RO water.

    Organic options like Fox Farm Hydro series work, but synthetic lines offer precision. Change reservoir every 7-10 days to prevent salt buildup. For 2026 efficiency, integrate automated dosers that maintain levels via app control. Always follow manufacturer dilution rates—overfeeding stunts autos quickly.

    Pro tip: Incorporate beneficial microbes (e.g., Hydroguard) to enhance root uptake and fend off pathogens.

    pH and EC Management in Hydroponic Autoflowers

    Maintaining optimal pH and EC is non-negotiable in hydroponics. Roots absorb nutrients best at pH 5.5-6.5; below 5.0, micronutrients lock out; above 7.0, macros become unavailable. Test twice daily—pH drifts with CO2 absorption.

    EC measures nutrient strength: Start low (0.5 mS/cm) for seedlings, peak at 2.0 for mature plants, then taper for flush. Use pH up/down solutions (phosphoric/nitric acid-based) sparingly. In 2026, smart meters like those from Bluelab sync to phones for alerts.

    For accurate info on nutrient interactions, refer to the NCBI study on cannabis hydroponics.

    Common Challenges: Root Oxygenation and Solutions

    Root oxygenation tops the list of hydro pitfalls for autoflowers. Poor aeration leads to root rot, stunting growth in their brief cycle. Symptoms: Wilting, yellowing leaves, or slimy roots.

    Solutions:

    • Boost Aeration: Use multiple air stones and a powerful pump (0.05 L/min per gallon). Keep water below 72°F to hold more dissolved oxygen (DO)—aim for 6-8 ppm DO.
    • Monitor Temps: Chillers or frozen water bottles prevent overheating in summer grows.
    • Prevent Pathogens: UV sterilizers or hydrogen peroxide (3ml/gallon weekly) keep water clean. Avoid overpopulating reservoirs.
    • Root Zone Health: Trim dead roots weekly and ensure good circulation in active systems.

    Another issue: pH swings from inconsistent mixing. Calibrate meters monthly. If roots brown, flush with pH’d water and restart nutrients.

    Tips for Maximizing Growth Cycles with Autoflower Seeds

    To squeeze every gram from your 2026 hydro setup:

    • Light Optimization: Use UV-supplemented LEDs in late flower for resin boost. Maintain 40-50% RH in veg, dropping to 30-40% in bloom.
    • Training Techniques: Low-stress training (LST) like tying branches encourages bushy growth without delaying autos’ timer.
    • Harvest Timing: Check trichomes at weeks 8-10—milky/cloudy for peak potency. Dry and cure in glass jars for 2-4 weeks.
    • Succession Planting: Stagger starts every 2 weeks for continuous harvests, leveraging hydro’s quick turnaround.
    • Sustainability: Recycle water with proper filtration; integrate solar-powered pumps for eco-friendly grows.

    For ventilation standards, check the EPA’s IAQ guidelines.

    With these strategies, expect 1-2 oz per plant in small setups, scaling to pounds in optimized tents. Hydroponic autoflowers aren’t just faster—they’re smarter for the modern grower.

    Embrace this method to stay ahead in 2026’s evolving cannabis scene, yielding potent buds with minimal effort.

    Strains like our Banana Punch Autoflower perform exceptionally in hydroponic systems.

  • Top Cannabis Strains for 2026: Reviews for Seed Buyers & Growers

    Top Cannabis Strains for 2026: Reviews for Seed Buyers & Growers

    Introduction to Top Cannabis Strains for 2026

    In 2026, cannabis cultivation has evolved with advanced breeding techniques, focusing on unique hybrids that balance potent effects, rich flavors, and therapeutic benefits. As a home grower or seed buyer, selecting the right strain is crucial for your setup—whether you’re dealing with limited indoor space or outdoor plots. This review spotlights seven top strains, detailing their flavor profiles driven by standout terpenes, effects, THC and CBD levels, grow difficulty, yield expectations, and seed sourcing tips. We’ll emphasize hybrids with exceptional terpene profiles for enhanced taste and wellness.

    These selections are based on current trends from breeders and user feedback, prioritizing resilience against pests and climate variability. For reliable info on strain genetics, check out Leafly, a trusted resource for cannabis enthusiasts.

    1. Blue Dream: The Classic Hybrid Revival

    Blue Dream remains a staple in 2026, but new pheno-hunts have amplified its blueberry terpenes for a sweeter profile. This sativa-dominant hybrid (Blueberry x Haze) offers uplifting cerebral effects perfect for daytime use, easing stress without heavy sedation.

    Flavor Profile and Terpenes

    Dominant terpenes like myrcene and pinene deliver sweet berry notes with earthy undertones. The enhanced 2026 versions boast a candy-like finish, making it a favorite for flavor chasers.

    Effects and Cannabinoid Levels

    Expect euphoric, focused highs ideal for creativity. THC averages 18-24%, with CBD under 1%, suiting recreational growers seeking potency over balance.

    Grow Difficulty and Yield Expectations

    Easy to moderate difficulty; it’s forgiving for beginners with strong vegetative growth. Indoors, yields reach 18-21 oz per square meter after 9-10 weeks of flowering. Outdoors, harvest in late September with up to 22 oz per plant. It thrives in hydroponics or soil, resisting mold in humid setups.

    Seed Sourcing Tips

    Opt for feminized seeds from reputable banks like ILGM or Seedsman to ensure stability. Look for lab-tested batches to avoid hermaphrodites—prices hover around $50-80 for 10 seeds.

    2. Gelato 33: Creamy Indica-Dominant Delight

    Gelato 33, a 2026 standout hybrid (Sunset Sherbet x Thin Mint Girl Scout Cookies), shines with its dessert-like terpenes, offering relaxation for evening unwinds.

    Flavor Profile and Terpenes

    Limonene and caryophyllene dominate, yielding creamy vanilla and citrus flavors with a spicy kick. Its unique terpene blend enhances anti-inflammatory benefits, making it therapeutic for chronic pain.

    Effects and Cannabinoid Levels

    Body-focused calm with mild euphoria; great for anxiety relief. THC 20-25%, CBD 0.5-1%, providing potent relief without overwhelming psychoactivity.

    Grow Difficulty and Yield Expectations

    Moderate difficulty due to its bushy structure—requires pruning for light penetration. Flowering takes 8-9 weeks, yielding 19-22 oz/m² indoors. Outdoor plants produce 20 oz each in Mediterranean climates, ready by mid-October.

    Seed Sourcing Tips

    Source auto-flowering variants from Dutch Passion for faster cycles. Verify EU-compliant genetics if importing; expect $60-90 per pack.

    3. Wedding Cake: Sweet and Potent Hybrid

    This indica-leaning hybrid (Triangle Kush x Animal Mints) has seen 2026 updates with amplified terpenes for a cake-like aroma, ideal for social smokers.

    Flavor Profile and Terpenes

    Humulene and linalool create tangy, earthy sweetness reminiscent of vanilla frosting. Standout for mood enhancement via its calming terpenes.

    Effects and Cannabinoid Levels

    Relaxing body high with giggly cerebral effects; excellent for insomnia. THC 23-27%, trace CBD, delivering strong euphoria.

    Grow Difficulty and Yield Expectations

    Moderate; sensitive to overfeeding, so monitor nutrients. 8-9 week flower, 20-24 oz/m² indoors. Outdoors, yields 21 oz/plant in warm zones.

    Seed Sourcing Tips

    Choose regular seeds from Barney’s Farm for breeding potential. Budget $70-100, and store in cool, dark places for viability.

    4. Gorilla Glue #4: Sticky Resin King

    A balanced hybrid (Chem’s Sis x Sour Dubb x Chocolate Diesel), GG#4 in 2026 features resin-heavy buds with piney terpenes for robust growth.

    Flavor Profile and Terpenes

    Pinene and myrcene offer diesel-pine flavors with chocolate hints. Its terpenes support respiratory health, a boon for medical users.

    Effects and Cannabinoid Levels

    Full-body couch-lock with euphoria; potent for pain management. THC 25-30%, CBD <1%, one of the strongest for experienced growers.

    Grow Difficulty and Yield Expectations

    Easy for veterans; high resin can clog filters, so use screens. 8-9 weeks to flower, 22-25 oz/m² indoors. Massive outdoor yields of 24 oz/plant.

    Seed Sourcing Tips

    Feminized from Original Sensible Seeds; $50-80. Test for potency certificates from sellers.

    5. Sour Diesel: Energizing Sativa Classic

    Revamped for 2026 with Chemdawg heritage, this sativa (Chemdawg x Super Skunk) energizes with fuel-like terpenes.

    Flavor Profile and Terpenes

    Caryophyllene and limonene provide pungent diesel and lemon zest. Unique for focus-boosting terpenes, aiding productivity.

    Effects and Cannabinoid Levels

    Invigorating head high for depression relief. THC 19-25%, low CBD, fast-acting.

    Grow Difficulty and Yield Expectations

    Moderate; stretches tall, needs support. 10-11 weeks flower, 18-20 oz/m² indoors. Outdoors, 22 oz/plant by early October.

    Seed Sourcing Tips

    Greenhouse Seeds for authentic lineage; $60-90. Avoid unverified street sources.

    6. Terpzilla: The 2026 Terpene Monster Hybrid

    A new unique hybrid (Zkittlez x Unknown #1), Terpzilla spotlights exotic terpenes for unparalleled taste and therapy.

    Flavor Profile and Terpenes

    Exotic mix of humulene, ocimene, and valencene yields tropical fruit punch with herbal depth. Standout for anti-anxiety benefits from its diverse profile.

    Effects and Cannabinoid Levels

    Balanced relaxation and uplift; versatile for all-day use. THC 22-26%, CBD 1-2%, ideal for balanced therapy.

    Grow Difficulty and Yield Expectations

    Moderate to advanced; terpene-rich buds demand low heat. 9 weeks flower, 21-23 oz/m² indoors. Outdoors, 23 oz/plant.

    Seed Sourcing Tips

    Limited release from Humboldt Seed Company; $80-120. Join waitlists for fresh stock.

    7. Purple Punch: Indica Hybrid with Berry Blast

    (Granddaddy Purple x Larry OG) in 2026 offers vibrant colors and sedative effects via berry terpenes.

    Flavor Profile and Terpenes

    Myrcene and linalool for grape candy flavors. Therapeutic for sleep with its soothing terpenes.

    Effects and Cannabinoid Levels

    Deep relaxation for nighttime. THC 18-22%, CBD 0.5%, gentle potency.

    Grow Difficulty and Yield Expectations

    Easy; compact plants suit small spaces. 8 weeks flower, 19-21 oz/m² indoors. 20 oz/plant outdoors.

    Seed Sourcing Tips

    FastBuds autos for quick harvests; $50-70.

    General Seed Sourcing and Growing Tips for 2026

    When buying seeds, prioritize breeders with third-party testing for purity—avoid scams by checking reviews on forums like GrowWeedEasy. For legal compliance, refer to your local regulations; in the US, see USDA guidelines for hemp-related info, though recreational seeds vary by state.

    • Start with 5-10 feminized seeds to minimize males.
    • Use organic soil for terpene preservation; pH 6.0-7.0.
    • Expect climate-resilient strains due to 2026 breeding—focus on humidity control for yields.
    • Harvest when 70% trichomes are cloudy for peak potency.

    For home setups, LED lights boost efficiency, and companion planting with basil deters pests. Yields vary by experience: beginners hit 70% of max, pros exceed it.

    Conclusion: Choosing Your 2026 Strains

    These top strains offer something for every grower— from Blue Dream’s ease to Terpzilla’s terpene innovation. Factor in your space, desired effects, and local climate to select winners. With proper sourcing and care, 2026 harvests will be bountiful and flavorful. Happy growing!

  • Master LST, Topping & SCROG: Boost Cannabis Yields in 2026

    Master LST, Topping & SCROG: Boost Cannabis Yields in 2026

    Master LST, Topping & SCROG: Boost Cannabis Yields in 2026

    In the evolving world of cannabis cultivation, 2026 brings exciting opportunities for home growers to maximize their harvests. With legalization expanding across many regions, enthusiasts are turning to proven techniques like low-stress training (LST), topping, and the Screen of Green (SCROG) method to optimize space and boost yields. These methods manipulate plant structure during the vegetative stage, encouraging bushier growth and more bud sites without overwhelming stress. Whether you’re growing indoors under LEDs or outdoors in a sunny garden, mastering these techniques can double your production while keeping plants healthy.

    This guide dives deep into each method, providing step-by-step instructions, ideal timing in the vegetative phase, strain recommendations, and troubleshooting for common pitfalls like uneven growth. By the end, you’ll be equipped to integrate these into your setup for bountiful results.

    Understanding Low-Stress Training (LST) for Cannabis

    Low-stress training (LST) is a gentle technique that involves bending and tying down branches to create an even canopy. Unlike high-stress methods, LST promotes horizontal growth, exposing more bud sites to light and improving airflow. It’s perfect for small spaces and helps prevent tall, lanky plants that stretch toward lights.

    LST is best applied early in the vegetative stage, around 2-3 weeks after germination when the plant has 4-6 nodes. This timing allows the plant to recover quickly without stunting growth. For indoor grows, use soft plant ties or yo-yos; outdoors, natural elements like wind can assist, but manual intervention ensures control.

    Step-by-Step Guide to LST

    1. Prepare your tools: Gather garden wire, soft ties, and scissors. Ensure your grow space has adjustable lights to maintain 18-24 inches above the canopy.
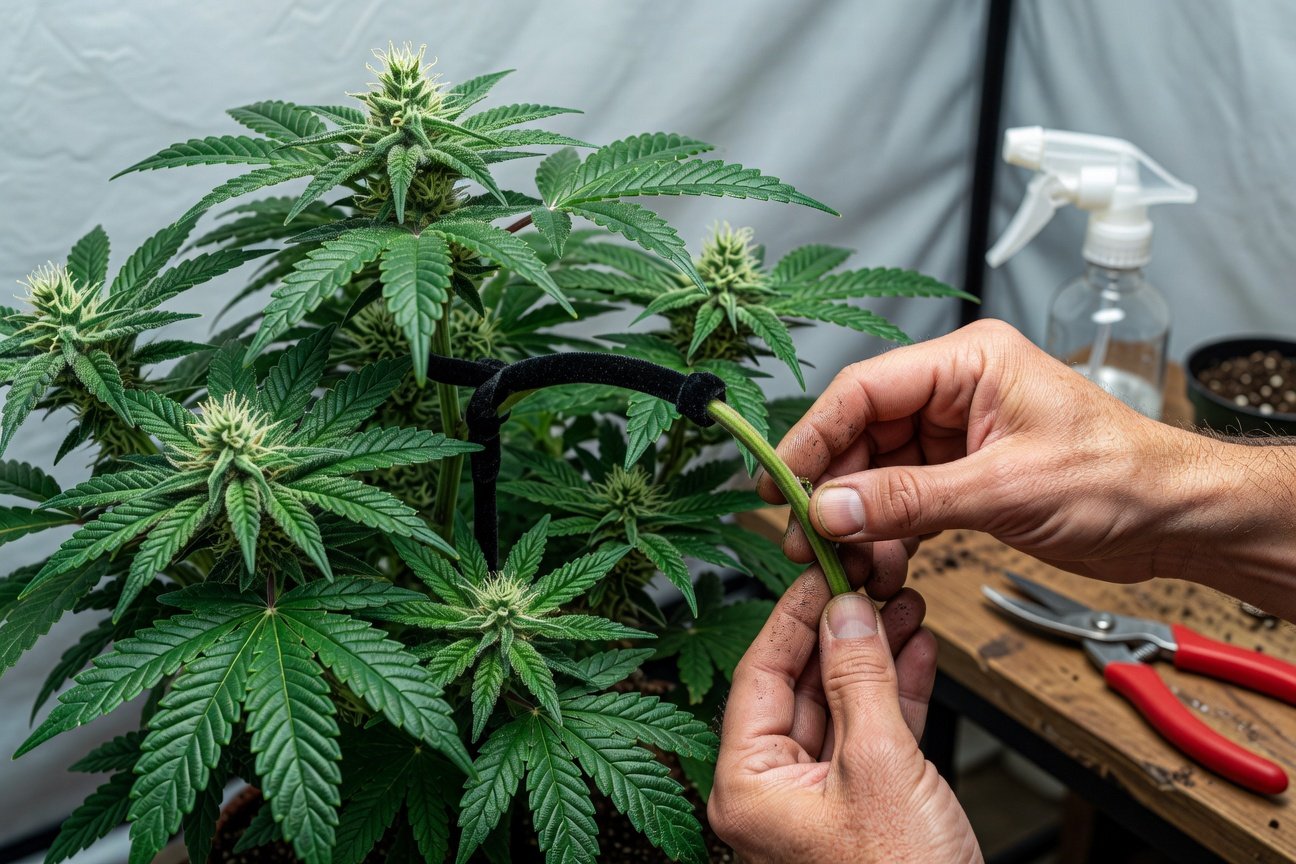
    2. Identify the main stem: Gently bend the tallest stem downward toward the pot’s edge. Avoid snapping it—cannabis stems are flexible in veg.
    3. Secure the bend: Tie the stem loosely to the pot edge or a stake. Aim for a 90-degree angle to flatten the growth.
    4. Train side branches: As new growth emerges, repeat on lateral branches, creating a star-shaped canopy. Check daily and adjust ties to prevent constriction.
    5. Maintain during veg: Continue for 4-6 weeks until the plant fills the space. Transition to flower when ready, removing ties gradually.

    Expect a 20-50% yield increase with LST, as it distributes light evenly. For best results, pair with autoflowering strains that have short veg periods.

    Topping: A High-Impact Technique for Bushier Plants

    Topping involves cutting the main stem’s tip to force the plant into a bushy structure with multiple colas. This high-stress method (though less so than defoliation) redirects energy from vertical height to lateral branches, ideal for maximizing yields in limited vertical space like tents or closets.

    Apply topping during the vegetative stage, specifically after the plant develops 4-6 nodes (around 3-4 weeks from seed). Wait until nodes are strong to minimize shock. It’s versatile for both indoor hydroponics and outdoor soil beds, but indoor growers benefit most from the controlled environment.

    Step-by-Step Guide to Topping

    1. Select the plant: Choose healthy seedlings past the seedling stage. Use sterilized scissors to avoid infection.
    2. Locate the top: Find the newest growth tip above the 3rd or 4th node pair. This is where you’ll cut.
    3. Make the cut: Snip just above the nodes at a 45-degree angle. Remove about 1/4 inch of the stem tip.
    4. Recovery period: The plant may pause growth for 3-7 days. Provide optimal conditions: 18/6 light cycle, 70-80°F temps, and high humidity.
    5. Encourage branching: Once recovery starts, new tops will emerge from the cut nodes. You can top again after 2 weeks for even more colas, up to 4-8 tops total.

    Topping can increase yields by 30-100%, but it shortens the main cola. Combine with LST for hybrid results. According to experts at Leafly, topping works wonders on photoperiod strains with vigorous veg growth.

    SCROG: The Screen of Green Method Explained

    The Screen of Green (SCROG) uses a horizontal net to train branches, creating a flat, light-maximizing canopy. This technique is a game-changer for indoor setups with low ceilings, turning one plant into a sea of buds. Outdoors, it adapts well to trellises in gardens, protecting from wind while optimizing sun exposure.

    Introduce SCROG in mid-vegetative stage, about 3-4 weeks in, once the plant reaches 8-12 inches. The net should be installed 6-12 inches above the pots, with 2-4 inch squares for weaving.

    Step-by-Step Guide to SCROG

    1. Install the screen: Use a SCROG net or chicken wire frame. Secure it firmly to your grow tent or frame.
    2. Start training: As shoots grow, gently weave them horizontally through the net holes. Bend resistant branches slowly.
    3. Fill the canopy: Aim to cover 70-80% of the screen before flipping to flower. This may take 4-6 weeks in veg.
    4. Vegetative maintenance: Tuck new growth daily. Prune lower leaves for airflow, but avoid over-defoliating.
    5. Flowering transition: Once full, switch to 12/12 light. Buds will develop evenly across the screen, harvesting in 8-10 weeks.

    SCROG can boost yields up to 2x by ensuring every bud site gets light. It’s labor-intensive but rewarding for sea-of-green style grows.

    Best Strains for LST, Topping, and SCROG Success

    Not all strains respond equally. Indica-dominant hybrids like Northern Lights or Blue Dream excel in LST due to their compact structure and quick recovery. For topping, vigorous sativas like Jack Herer thrive, producing multiple strong colas. SCROG shines with balanced strains such as Girl Scout Cookies, which bush out naturally.

    Autoflowers like Auto AK-47 are forgiving for beginners, as their fixed veg cycle (3-4 weeks) aligns perfectly with these methods. Always source seeds from reputable banks; photoperiods offer more control for advanced growers. In 2026, look for strains bred for resilience against pests, enhancing technique efficacy.

    When to Apply These Techniques in the Vegetative Stage

    The vegetative stage is crucial, lasting 4-8 weeks under 18/6 lighting. LST starts earliest (week 2) for subtle shaping. Topping follows in weeks 3-4 to build structure. SCROG integrates both, beginning in week 3 to weave growth.

    Monitor plant health: Apply when stems are pliable and nodes are defined. For outdoors, align with spring growth spurts, using natural light cycles. Indoors, consistent LEDs (300-600 PPFD) support recovery. Avoid techniques during early seedling or late veg to prevent stress before flower.

    Troubleshooting Common Issues: Uneven Growth and More

    Uneven growth is a frequent headache. For LST, if one side lags, adjust light distance or add supplemental LEDs. In topping, slow recovery signals overwatering—dial back to let soil dry between feeds. SCROG imbalances occur from poor weaving; rotate the net periodically for even exposure.

    • Stem breakage: Use softer ties and bend gradually. If snapped, apply honey as a natural seal.
    • Pest interference: Inspect ties for hiding spots; neem oil helps without stressing plants.
    • Light burn in dense canopies: Raise lights or prune selectively. For outdoors, shade cloth prevents sun scorch.
    • Nutrient lockout post-training: Flush with pH-balanced water (6.0-6.5 soil, 5.5-6.0 hydro) and resume feeding at half strength.

    Integrate with setups: Indoors, these methods pair with hydro or coco for faster veg; outdoors, they enhance trellis systems per USDA guidelines on sustainable gardening at USDA.gov. Track pH, EC, and humidity (40-60% veg) to avoid compounded issues.

    Indoor vs. Outdoor Integration for Optimal Yields

    Indoors, LST, topping, and SCROG control height in 4×4 tents, yielding 1-2 grams per watt. Use reflective walls and oscillating fans for airflow. Outdoors, these techniques mimic natural bushiness, protecting from elements in 2026’s variable climates. Space plants 2-3 feet apart; LST secures against storms.

    Hybrid approaches work too: Start indoors for precision training, then transplant outdoors for natural boosting. Always comply with local laws—resources like NORML.org offer state-specific advice.

    In conclusion, incorporating LST, topping, and SCROG into your 2026 grow routine empowers you to harvest denser, healthier buds. Start small, observe your plants, and scale up. With practice, these techniques will transform your home cultivation into a high-yield success story.

  • 7 Essential Tips for Buying Cannabis Seeds in 2026

    7 Essential Tips for Buying Cannabis Seeds in 2026

    7 Essential Tips for Buying Cannabis Seeds in 2026

    As cannabis cultivation continues to evolve in 2026, home growers and enthusiasts face a booming market flooded with seed options. With legalization expanding across more regions, selecting high-quality seeds with stable genetics is crucial for successful breeding and bountiful harvests. Unstable genetics can lead to inconsistent yields, poor potency, or even failed grows, wasting time and money. This guide outlines seven essential tips to help you identify reliable seeds from reputable seed banks, focusing on breeder verification, reviews, lab testing, guarantees, and shipping. By following these, you’ll ensure your 2026 grow is off to a strong start.

    1. Research Breeder Lineage and Reputation

    The foundation of stable genetics lies in the breeder’s lineage. Reputable breeders invest years in stabilizing strains through selective breeding, resulting in predictable traits like growth patterns, THC/CBD levels, and resistance to pests. Start by verifying the breeder’s history—look for those with documented parent strains and breeding programs dating back at least a decade.

    For example, breeders like Dutch Passion or Sensi Seeds have lineages tracing to the 1980s, known for classics like White Widow. In 2026, check seed bank websites for breeder bios and cross-reference with independent forums. A red flag? Anonymous breeders or vague origins, which often signal unstable hybrids prone to hermaphroditism.

    To dig deeper, visit authoritative sources like Leafly, where strain databases detail breeder contributions and user-verified stability.

    2. Prioritize Customer Reviews and Community Feedback

    Don’t rely solely on seed bank marketing—real grower experiences reveal genetic stability. In 2026, platforms like GrowDiaries and Reddit’s r/microgrowery host thousands of reviews on seed performance, from germination rates to final bud quality.

    Look for patterns: Seeds from banks like Seedsman or ILGM often score high for consistency, with users reporting 90%+ feminized success rates. A real-world example is the 2025 backlash against a lesser-known bank selling ‘auto-flowering’ seeds that reverted to photoperiod, leading to stunted plants. Red flags include sparse reviews, overly glowing testimonials without photos, or complaints about variability in terpene profiles.

    Aim for banks with verified buyer photos and long-term follow-ups to confirm multi-generation stability for breeding projects.

    3. Seek Lab-Tested Stability and Genetic Purity

    Lab testing has become standard in 2026, with many seed banks providing certificates for genetic purity and stability. Tests confirm traits like cannabinoid ratios and absence of contaminants, ensuring your seeds produce uniform plants.

    Reputable banks like Barney’s Farm offer third-party lab results showing low hermie rates under stress. For instance, their Gorilla Zkittlez strain has been lab-verified for 95% stability across phenotypes. Avoid banks without COAs (Certificates of Analysis)—a major red flag for unstable genetics that could introduce mold-resistant but low-yield traits unexpectedly.

    Pro tip: Cross-check with organizations like the National Organization for the Reform of Marijuana Laws (NORML) for guidelines on what to look for in tested seeds.

    4. Demand Germination Guarantees and Support

    A solid germination guarantee is non-negotiable for 2026 buyers. Top seed banks replace failed seeds free of charge, often with rates above 95%. This backs their claim of stable genetics, as poor germination signals weak viability.

    Take Royal Queen Seeds—they guarantee 90% germination and provide detailed guides. In a 2026 case, a grower in California reported 100% success with their Critical Kush, crediting the bank’s responsive support. Red flags? No-reshipment policies or excuses like ‘user error’ without proof. For breeding, guarantees extend to F1 stability, ensuring offspring match parent traits.

    Always read the fine print: Some banks require photo evidence, which is fair for verifying your setup.

    5. Evaluate Shipping Reliability and Discretion

    With global shipping tightened in 2026 due to regulations, reliable delivery is key to getting your seeds intact. Reputable banks use stealth packaging and trackable methods to navigate customs, especially for international orders.

    Banks like Crop King Seeds excel here, with 99% on-time delivery reported in user reviews, even to restrictive areas. A real example: A European grower received Amsterdam-sourced seeds in under a week via USPS, with no issues. Red flags include frequent delays, lost packages without refunds, or non-discreet envelopes that scream ‘cannabis seeds’—risking seizures and unstable stock from stressed plants.

    Opt for banks with multiple shipping options and insurance for peace of mind in your cultivation journey.

    6. Check for Strain-Specific Documentation and Phenotype Consistency

    Stable genetics shine through detailed strain docs, including grow journals, phenotype ratios, and expected yields. In 2026, banks provide apps or PDFs with data from hundreds of grows, helping you select for your setup—indoor LED or outdoor hydro.

    For instance, FastBuds’ autoflowers come with phenotype maps showing 80% uniformity in height and potency. Growers breeding for medical strains praise this for predictable CBD inheritance. Avoid vague descriptions like ‘up to 20% THC’ without ranges, a red flag for genetic roulette leading to uneven crops.

    This documentation is vital for enthusiasts experimenting with crosses, ensuring stable F2 generations.

    7. Consider Certifications and Ethical Sourcing

    Finally, look for certifications like organic breeding or fair-trade sourcing, which indicate commitment to stable, high-quality genetics. In 2026, banks certified by bodies like the Hemp Trades Association prioritize ethical practices, reducing risks of adulterated seeds.

    An example is Paradise Seeds, certified for sustainable breeding, yielding stable sativas with consistent effects. Red flags? Banks ignoring pesticide residues or sourcing from unregulated regions, potentially introducing unstable traits from stressed mother plants.

    By choosing certified options, you support the industry while securing reliable seeds for long-term cultivation success.

    In summary, arming yourself with these seven tips will guide your 2026 seed purchases toward stable genetics and thriving grows. Whether you’re a novice home grower or a seasoned breeder, reputable seed banks are your best bet for quality and reliability. Start researching today and watch your garden flourish.

  • Indoor vs Outdoor Cannabis Growing: Best for Beginners 2026

    Indoor vs Outdoor Cannabis Growing: Best for Beginners 2026

    Indoor vs Outdoor Cannabis Growing: Best for Beginners in 2026

    For first-time cannabis growers, deciding between indoor and outdoor cultivation can feel overwhelming. Both methods have unique advantages and challenges, especially when you’re just starting out. In this guide, we’ll break down the pros and cons of each approach, focusing on key factors like environmental control, yield potential, and overall ease for beginners. Whether you’re a home grower in a small apartment or someone with access to a sunny backyard, understanding these differences will help you choose the right path. We’ll also cover how to get started with easy-to-grow cannabis seeds in each setup, making your first harvest a success in 2026.

    What is Indoor Cannabis Growing?

    Indoor growing involves cultivating cannabis plants inside a controlled environment, such as a grow tent, closet, or dedicated room. This method uses artificial lighting, ventilation systems, and climate control tools to mimic ideal outdoor conditions year-round.

    Pros of Indoor Growing for Beginners

    • Full Environmental Control: You can regulate temperature, humidity, light cycles, and nutrients precisely, reducing the impact of external factors like weather or pests.
    • Year-Round Harvests: No dependence on seasons means multiple grows per year, ideal for learning without long waits.
    • Discretion and Security: Growing indoors keeps your operation private, which is crucial in areas where cannabis laws are still evolving in 2026.
    • Higher Quality Control: Easier to prevent mold, pests, and diseases with proper setup, leading to potent, consistent buds.

    Cons of Indoor Growing

    • Higher Startup Costs: Lights (like LED or HID), fans, timers, and tents can cost $200–$1,000 initially.
    • Space and Energy Demands: Requires a dedicated area and increases electricity bills—up to $50–$100 monthly for a small setup.
    • Learning Curve for Equipment: Beginners must master pH balances, watering schedules, and light distances to avoid issues like nutrient burn.

    Overall, indoor growing suits urban beginners who prioritize control over cost. For more on equipment basics, check out Leafly’s growing guide.

    What is Outdoor Cannabis Growing?

    Outdoor growing takes advantage of natural sunlight and space, planting cannabis in gardens, pots, or greenhouses. This method aligns with the plant’s natural lifecycle, typically from spring to fall harvest.

    Pros of Outdoor Growing for Beginners

    • Lower Costs: Minimal equipment needed—just quality seeds, soil, and basic tools. Sunlight is free, keeping expenses under $100 for a first grow.
    • Larger Yields: Plants can grow bigger in open air, potentially yielding 1–2 pounds per plant versus 1–4 ounces indoors.
    • Natural and Organic: Easier to use organic methods, resulting in robust plants with terpene-rich flavors.
    • Simpler Maintenance: Less daily intervention; nature handles much of the work once established.

    Cons of Outdoor Growing

    • Weather Dependency: Rain, frost, or extreme heat can ruin crops—especially risky in unpredictable 2026 climates.
    • Pest and Disease Risks: Exposure to insects, mold, and animals without barriers means more vigilance.
    • Seasonal Limitations: Only one or two harvests per year, delaying your learning process.
    • Legal and Privacy Issues: Visible plants may attract unwanted attention in non-legal areas.

    Outdoor growing is perfect for rural or suburban beginners with yard space and mild weather. For climate considerations, refer to resources from USDA Natural Resources Conservation Service on regional growing zones.

    Key Factors to Compare: Control, Yield, and Ease for Beginners

    When evaluating indoor versus outdoor for first-timers, three main factors stand out: environmental control, yield potential, and overall ease.

    Environmental Control

    Indoor setups offer unparalleled control. You can maintain 70–85°F temperatures, 40–60% humidity, and 18/6 light cycles during veg stage—essential for preventing stress. Outdoors, you’re at mercy of nature; a sudden heatwave in summer 2026 could stunt growth, while indoor AC or heaters mitigate this. For beginners, this control means fewer surprises and faster troubleshooting.

    Yield Potential

    Outdoor plants often produce higher yields due to unlimited vertical growth and natural sunlight intensity (up to 12 hours daily in summer). A single outdoor autoflower can yield 200–500 grams, compared to 50–150 grams indoors from the same seed. However, indoor growing allows for denser, more potent buds through optimized CO2 and nutrients. Beginners might see better results indoors initially, as outdoor variables can halve expected yields.

    Ease for Beginners

    Outdoor is generally easier for absolute novices—no need to learn complex systems. Plant seeds in spring, water regularly, and prune as needed. Indoor requires more upfront knowledge of hydroponics or soil mediums, but apps and timers simplify it in 2026. If you’re tech-savvy, indoor feels intuitive; otherwise, outdoor’s hands-off approach wins.

    Which Method is Easier for Beginners?

    For most first-time growers, outdoor growing edges out as easier due to its simplicity and low barrier to entry. You don’t need to invest in gear or monitor daily metrics; the sun and soil do the heavy lifting. However, if you live in a cold or urban area, indoor is more forgiving long-term, offering consistent results despite the initial setup hassle. In 2026, with climate change bringing erratic weather, indoor’s control might tip the scales for reliability. Ultimately, assess your space, budget, and local laws—outdoor for budget-conscious gardeners, indoor for precision seekers.

    Starting with Easy Cannabis Seeds Indoors: A Beginner’s Guide

    Choosing beginner-friendly seeds is key to success. Opt for autoflowering or feminized strains like Northern Lights Auto or Blue Dream—resilient, fast-growing (8–10 weeks), and forgiving of errors.

    1. Gather Supplies: Get a 2×2 ft grow tent ($50), LED light (100W, $80), fan, soil or coco coir, and pH-balanced water.
    2. Germinate Seeds: Soak seeds in water for 24 hours until they sink, then plant in damp starter plugs. Keep at 75°F under a humidity dome.
    3. Vegetative Stage (3–4 Weeks): Provide 18 hours light/6 dark. Water when top soil dries; use half-strength nutrients to avoid burn.
    4. Flowering Stage (5–7 Weeks): Switch to 12/12 light cycle. Monitor for pests with neem oil sprays.
    5. Harvest and Cure: When 70% trichomes are cloudy, trim and dry buds for 5–7 days, then cure in jars.

    Start small with 2–4 plants to learn without overwhelm. Expect 1–2 ounces per plant your first time.

    Starting with Easy Cannabis Seeds Outdoors: A Beginner’s Guide

    For outdoor, select photoperiod or auto strains suited to your climate, like Durban Poison (thrives in sun) or Lowryder (quick autos for short seasons). These are pest-resistant and yield well naturally.

    1. Prepare Site: Choose a sunny spot (6–8 hours direct light) with well-draining soil (pH 6.0–7.0). Amend with compost for nutrients.
    2. Germinate and Plant: Germinate indoors in early spring, transplant seedlings after last frost (around April in most zones). Space plants 3–5 ft apart.
    3. Vegetative Care (Spring–Summer): Water deeply 2–3 times weekly; mulch to retain moisture. Prune lower leaves for airflow.
    4. Flowering (Late Summer–Fall): Natural light triggers bloom. Use organic fertilizers like worm castings; scout for aphids daily.
    5. Harvest and Dry: Cut when pistils brown (September–October). Hang dry in a shaded, ventilated area.

    Protect from animals with fencing. Yields can reach 300 grams per plant in ideal conditions.

    Choosing the Right Approach for Your First Grow

    Consider your goals: If maximizing yield on a budget, go outdoor. For stealthy, controlled experiments, choose indoor. Hybrid options like greenhouses blend benefits, offering shelter outdoors. In 2026, with advanced seeds available, both methods are more accessible than ever. Research local regulations—many U.S. states allow home grows up to 6 plants. Start with reputable seed sources for genetics that match your setup.

    Whichever you pick, patience is your best tool. Track progress in a journal, join online communities, and scale up gradually. Your first grow might have hiccups, but it’ll teach you volumes for future seasons.

    Ready to plant? Both indoor and outdoor paths lead to rewarding harvests—pick what fits your lifestyle and watch your cannabis thrive.

  • Guerrilla Growing: Stealth Cannabis Cultivation Secrets

    Guerrilla Growing: Stealth Cannabis Cultivation Secrets

    Introduction to Guerrilla Growing in 2026

    Guerrilla growing has evolved into a sophisticated art form for experienced cannabis cultivators seeking to produce high-quality yields without drawing attention. In 2026, with increasing legalization in many regions but persistent regulatory scrutiny in others, this method allows home growers and enthusiasts to harness the power of nature’s untamed spaces. By focusing on stealth, sustainability, and security, you can cultivate potent cannabis plants in remote outdoor environments, minimizing risks while maximizing returns.

    This guide delves into advanced techniques tailored for seasoned growers. We’ll cover site selection, camouflage strategies, security measures, organic pest control, and harvesting tactics. Whether you’re in a forested wilderness or arid backcountry, these methods ensure your operation remains undetected, producing buds that rival indoor setups in quality and potency.

    Stealthy Site Selection: Finding the Perfect Hidden Spot

    Choosing the right location is the cornerstone of successful guerrilla growing. In 2026, satellite imagery and drone surveillance have made urban edges riskier, so prioritize remote, low-traffic areas. Look for sites with natural barriers like dense foliage, rocky terrain, or water features that obscure visibility from trails or roads.

    Key factors for site selection include:

    • Sunlight Exposure: Cannabis thrives with 6-8 hours of direct sun. Scout south-facing slopes in the Northern Hemisphere for optimal light without excessive exposure.
    • Water Access: Proximity to streams or natural springs reduces maintenance trips. In drier climates, select spots near seasonal runoff to avoid hauling water.
    • Soil Quality: Test for pH between 6.0-7.0 and good drainage. Amend with compost if needed, but avoid over-fertilizing to prevent nutrient runoff that could alert authorities.
    • Accessibility: The site should be reachable via off-road paths, but not too close to public lands patrolled by rangers. Use GPS apps with offline maps for discreet navigation.

    For advanced growers, consider microclimates influenced by elevation and wind patterns. Higher altitudes offer cooler temps ideal for sativas, while valleys protect against frost. Always rotate sites yearly to prevent soil depletion and detection patterns.

    Assessing Risks with Modern Tools

    In 2026, leverage free tools like Google Earth Pro for virtual scouting. Overlay trail maps from sources like the U.S. Forest Service website (fs.usda.gov) to identify low-use zones. Avoid areas near hunting grounds or popular hiking spots, especially during peak seasons.

    Natural Camouflage: Blending Your Plants into the Wild

    Camouflage is about more than hiding plants—it’s integrating them seamlessly into the ecosystem. Start with companion planting: surround cannabis with native species like ferns, wildflowers, or berry bushes that match growth cycles and deter herbivores.

    Advanced techniques include:

    1. Strategic Planting: Stagger plants in irregular clusters mimicking natural vegetation. Use taller perennials to shield shorter cannabis from ground view.
    2. Netting and Foliage: Employ UV-resistant deer netting draped with local leaves or vines. Avoid synthetic materials that reflect light unnaturally.
    3. Color Adaptation: Select strains with foliage that blends—deep greens for forests, silvery hues for deserts. In 2026, new hybrid seeds from reputable banks offer stealthier phenotypes.

    For extra stealth, train plants low and bushy using LST (Low-Stress Training) methods adapted outdoors. This keeps canopies below eye level, reducing silhouette risks. Remember, over-camouflage can look suspicious; aim for organic integration.

    Security Measures: Protecting Your Remote Operation

    Security in guerrilla growing means layered defenses against humans, animals, and elements. Install motion-activated trail cams powered by solar batteries to monitor without frequent visits. In 2026, affordable AI cams from brands like Reolink can send alerts to your phone via encrypted apps.

    Human deterrence includes:

    • Perimeter Alarms: DIY tripwires with bells or battery-operated sensors around the site perimeter.
    • False Trails: Create decoy paths leading away from your plants to mislead intruders.
    • Odor Control: Plant aromatic companions like mint or lavender to mask cannabis scents during flowering.

    Against wildlife, use non-toxic repellents and fencing. For extreme security, employ scent-neutralizing sprays on access routes. Visit sites at dawn or dusk to avoid patterns, and always carry a cover story—like foraging or surveying—for plausible deniability.

    Digital Security for Growers

    Protect your data with VPNs when researching or mapping. Avoid social media posts about outdoor adventures near your sites. In an era of widespread surveillance, compartmentalize knowledge—don’t share coordinates even with trusted friends.

    Organic Pest Control: Sustainable Defense in the Wild

    Pests are inevitable outdoors, but organic methods preserve your plants’ quality and avoid chemical traces. Integrated Pest Management (IPM) combines prevention, monitoring, and targeted treatments.

    Prevention starts with healthy soil: Incorporate neem cake or mycorrhizal fungi at planting to boost resilience. Monitor weekly for signs like aphids or spider mites using a hand lens.

    Effective organic controls include:

    • Neem Oil Sprays: Dilute with water and a drop of dish soap; apply at dusk to avoid leaf burn. Safe for beneficial insects if used sparingly.
    • Beneficial Insects: Release ladybugs or predatory nematodes early in the season. Source from organic suppliers.
    • Homemade Remedies: Garlic-chili sprays for caterpillars or diatomaceous earth for crawling pests. Rotate applications to prevent resistance.

    For fungal issues like powdery mildew, use milk dilutions (1:9 with water) as a natural fungicide. Consult resources from the USDA’s Organic Agriculture page (usda.gov/topics/organic) for compliant practices. In remote areas, brew compost teas on-site to minimize transport.

    Harvesting Strategies: Discreet and Efficient Yields

    Timing is critical for potency and stealth. Harvest when 70% of pistils are brown and trichomes are mostly cloudy, typically late September to October in temperate zones. Scout with a jeweler’s loupe during low-light hours.

    Discreet harvesting techniques:

    1. Staged Collection: Harvest in phases over days, starting with lower branches to reduce visibility.
    2. Transport Prep: Trim on-site using portable tools, storing buds in odor-proof vacuum bags. Backpack out small loads to avoid bulk.
    3. Post-Harvest Cleanup: Remove all debris, roots, and tags. Scatter mulch to restore the site naturally.

    For drying, hang in shaded, ventilated wild spots or transport to a secure home setup. Cure in glass jars for 2-4 weeks to enhance flavor. Advanced growers track terpene profiles with portable testers available in 2026 for strain optimization.

    Yield expectations: In ideal guerrilla setups, expect 0.5-1 pound per plant, depending on strain and conditions. Focus on quality over quantity—stealth ensures sustainability for future seasons.

    Conclusion: Thriving Undetected in Nature

    Guerrilla growing in 2026 demands respect for the environment, meticulous planning, and adaptive skills. By mastering site selection, camouflage, security, pest control, and harvesting, experienced cultivators can achieve bountiful, high-quality cannabis harvests while staying under the radar. Embrace the wild’s challenges for rewarding results that connect you deeply with the plant’s natural roots.

    For faster cycles and easier management in remote spots, try autoflower cannabis seeds.

We use cookies to improve your experience and analyse site traffic. See our Privacy Policy and Cookie Policy for details.