🎁 Free bonus seeds with every pack 🚚 Discreet tracked shipping worldwide 🌱 Germination guarantee on every order

Author: buyweedseeds

  • Harvest Ready Cannabis: Trichomes & Pistils for Beginners

    Harvest Ready Cannabis: Trichomes & Pistils for Beginners

    Harvesting cannabis at the right moment is one of the most important skills for new growers. Visual cues such as trichome color shifts and pistil browning provide reliable signals that help avoid both premature and delayed cuts. This guide focuses on these observable indicators while recommending fast-finishing strains suited to beginners. New cultivators often discover that mastering these cues transforms an unpredictable first harvest into a repeatable process that consistently delivers higher-quality flowers.

    Why Precise Harvest Timing Improves Yields

    Harvesting too early can result in lower potency and reduced overall weight, while waiting too long may lead to degraded cannabinoids and harsher flavors. Beginners benefit from learning these visual markers early because they directly influence the final quality of the flowers. Fast-maturing varieties allow new cultivators to practice these techniques within shorter cycles, building confidence for future grows. For example, cutting a plant just one week before peak maturity can reduce total bud weight by 15 to 20 percent and leave THC levels noticeably lower than their maximum potential.

    Understanding the plant’s natural progression from flowering to maturity helps maximize resin production. Observing daily changes over the final weeks reveals patterns that guide decisions without guesswork. This approach keeps the focus on plant signals rather than external variables. Growers who photograph the same bud every other day during the last three weeks often notice subtle swelling and resin buildup that confirms the visual markers they are tracking.

    Real-World Timing Examples

    Consider a Northern Lights plant that begins flowering on schedule. By day 45, most pistils remain white. By day 55, roughly half have turned amber. Waiting until day 60 typically produces noticeably heavier colas with a richer aroma. Documenting these milestones in a grow journal helps beginners recognize the same progression in subsequent runs.

    Pistil Color Changes as Reliable Indicators

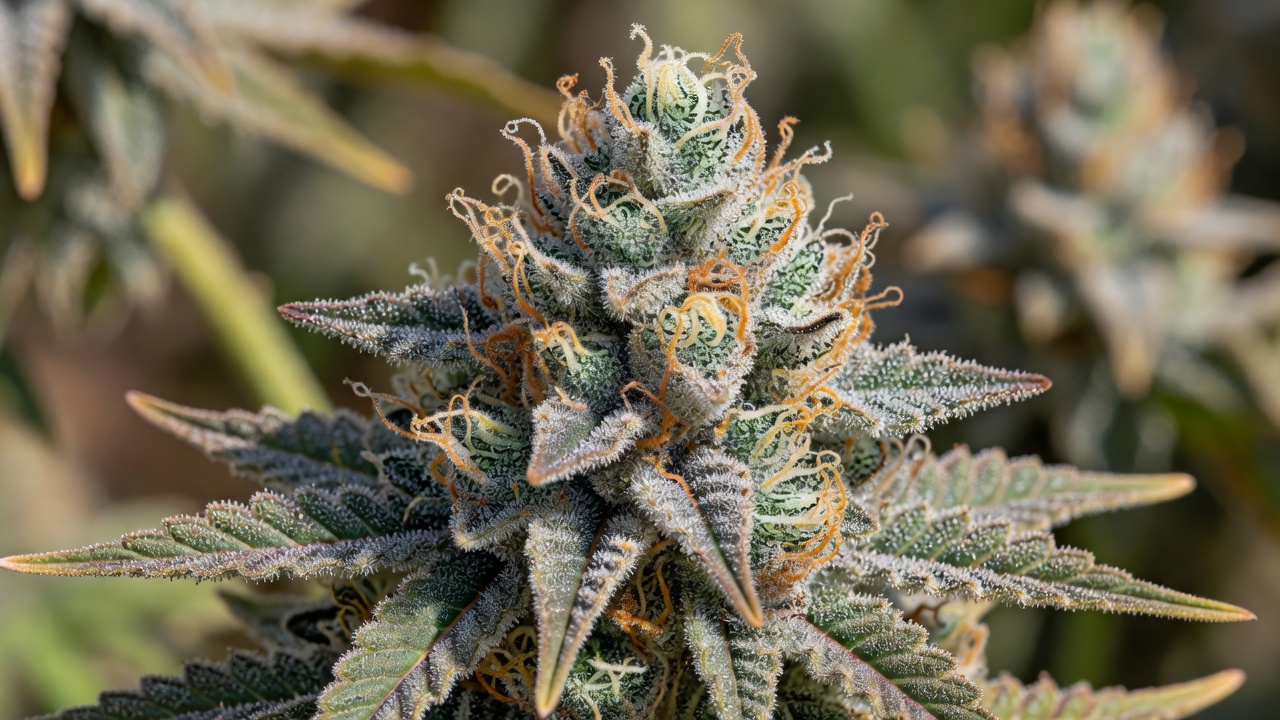
    Pistils, the hair-like structures on female flowers, start white and gradually turn orange, brown, or red as maturity approaches. When approximately 70 percent of pistils have darkened and curled inward, the plant is often nearing peak ripeness. This visual transition typically occurs over several days and offers an accessible first check for novice growers. In practice, growers examine the upper colas first because they mature slightly ahead of lower branches.

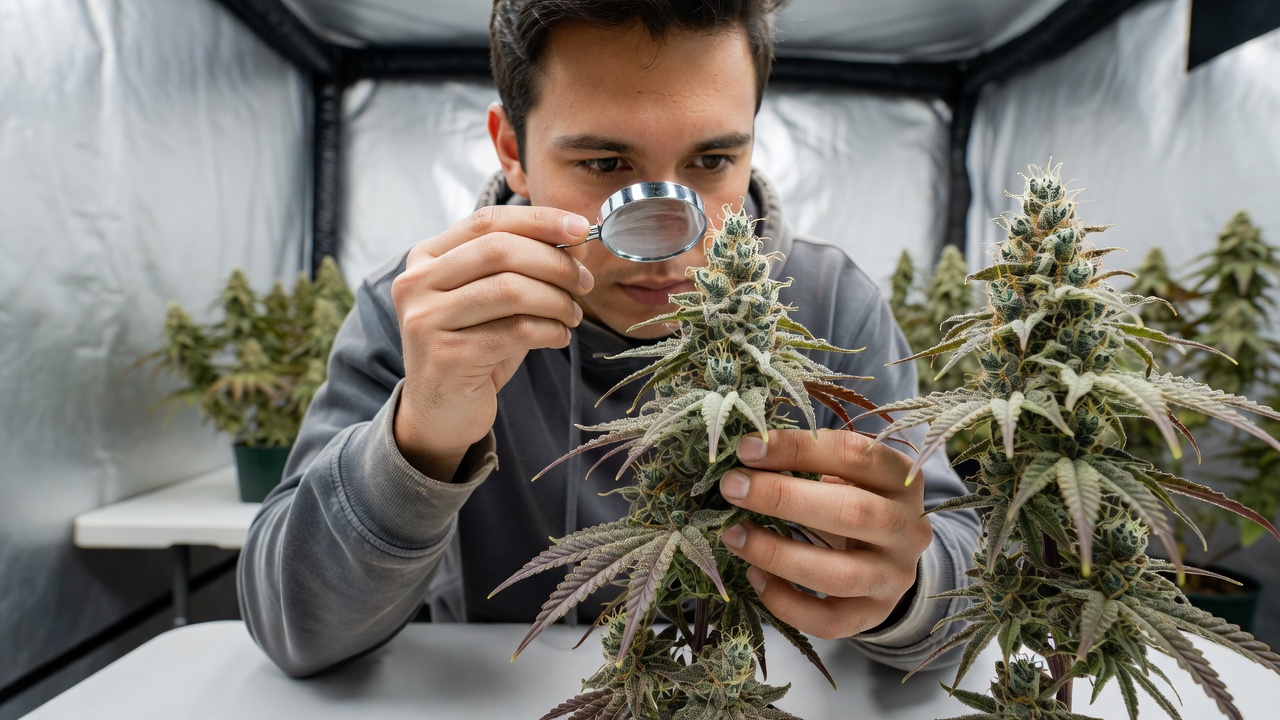
    Monitoring pistils requires only good lighting and regular observation. Different strains display varying rates of color change, so tracking multiple buds on the same plant provides a clearer picture. Fast-finishing seeds often show these shifts within eight to nine weeks of flowering, making them ideal practice material. A simple hand lens held at arm’s length lets growers count darkened pistils without disturbing the plant.

    Lighting and Observation Tips

    Use neutral white LED or natural daylight when checking pistils. Warm grow lights can make white hairs appear yellowish, leading to early cuts. Checking the same three or four buds each session eliminates guesswork and reveals the steady progression from 30 percent to 70 percent darkened pistils over roughly five days.

    Trichome Color Examination Step by Step

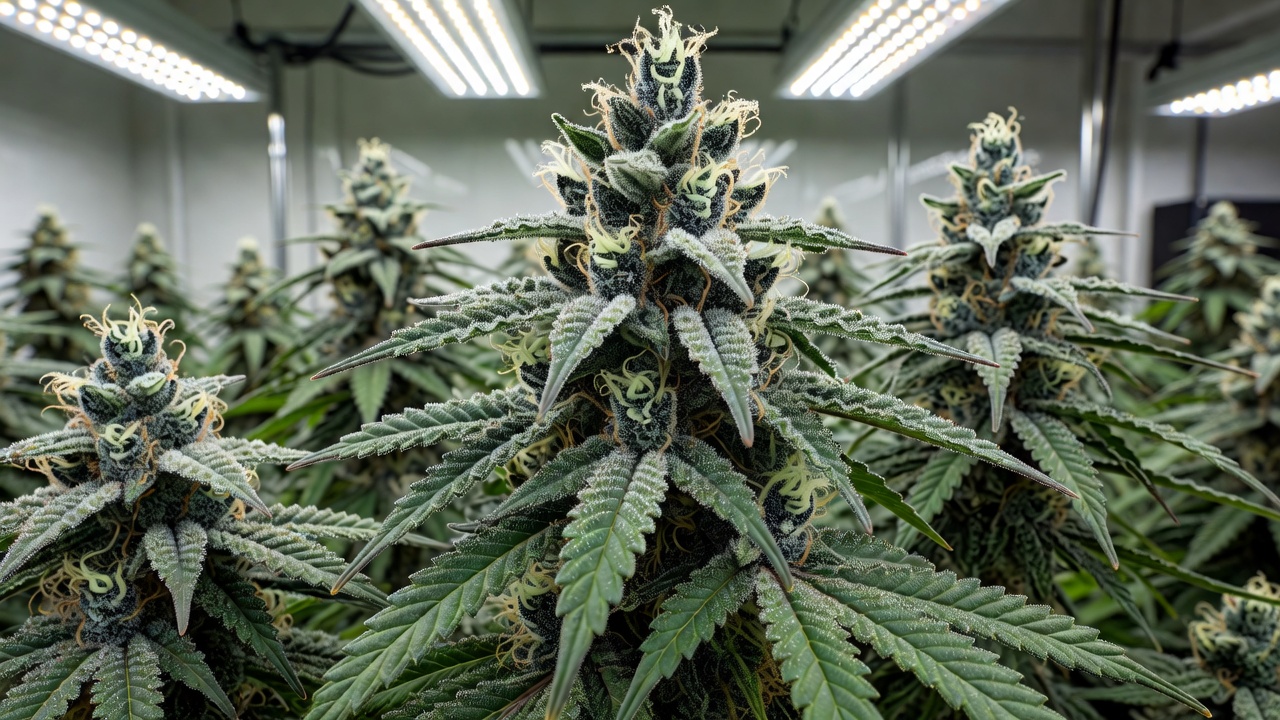
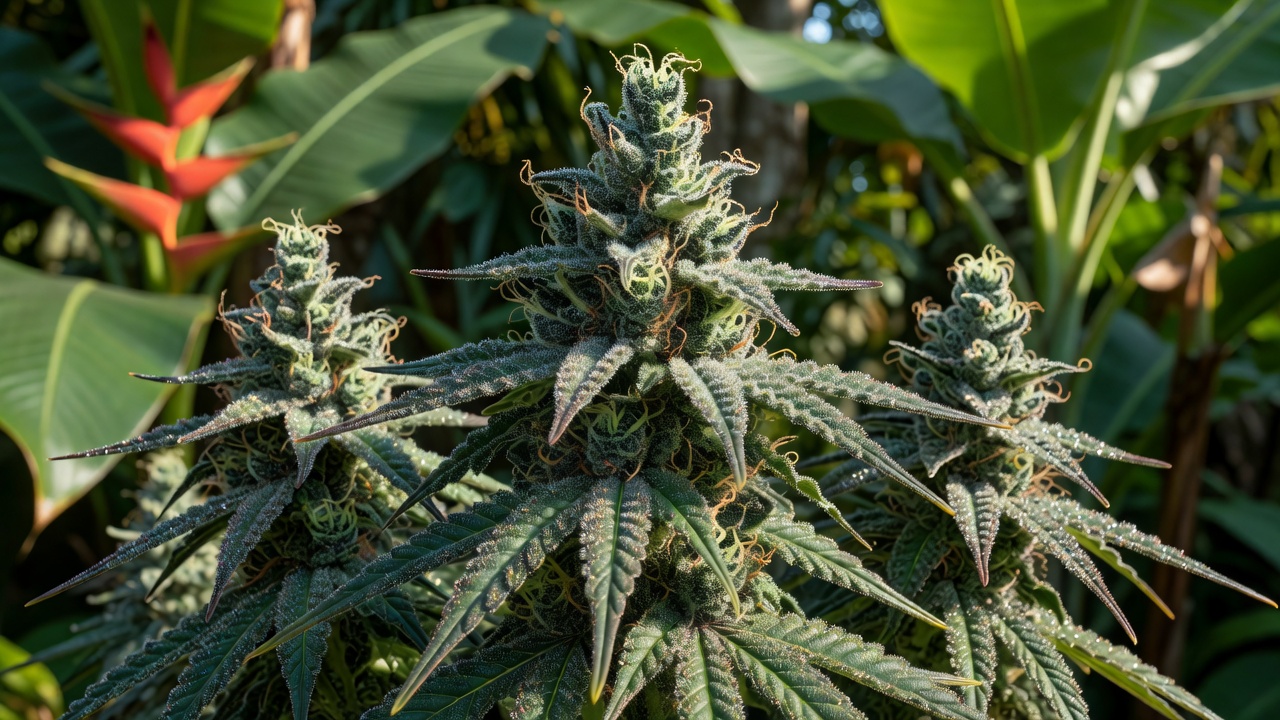
    Trichomes are the tiny resin glands covering the buds and leaves. Their color progression from clear to milky white and finally amber signals the ideal harvest window. Clear trichomes indicate ongoing cannabinoid development, while cloudy ones suggest peak THC levels. Amber trichomes point to more sedative effects as THC begins converting to CBN.

    Use a jeweler’s loupe or digital microscope at 30x to 60x magnification for accurate viewing. Check several buds from different parts of the plant, focusing on the calyxes rather than sugar leaves. Aim for a mix of 70-80 percent milky trichomes with 10-20 percent amber for balanced effects. This method works consistently across quick-finishing strains popular with beginners. Many first-time growers start by examining the largest top bud, then move to mid-plant sites to confirm uniformity before deciding on harvest day.

    Practical Microscope Technique

    1. Hold the loupe steady against your cheek and bring the bud into focus slowly.
    2. Look for the mushroom-shaped heads rather than the stalks.
    3. Count 100 trichomes in a small field of view and note the percentages.
    4. Repeat on at least three separate buds to average results.

    Recording these counts in a notebook creates a personal reference that improves accuracy with each harvest.
    Recommended Fast-Finishing Strains for New Growers

    Selecting strains that complete flowering in 7 to 9 weeks reduces the learning curve. Varieties such as Northern Lights, Blue Dream, and certain autoflowering hybrids finish quickly while displaying clear trichome and pistil changes. These options allow beginners to observe full cycles multiple times per year and refine timing skills rapidly. Northern Lights typically shows 70 percent browned pistils by week eight, while Blue Dream often requires an extra four or five days for the same visual milestone.

    Fast genetics also tend to produce dense buds with visible resin early, making visual assessment straightforward. Beginners should source reputable seed banks offering germination guarantees to ensure reliable starts. Pairing these strains with basic observation routines supports steady progress toward higher yields. Autoflowering versions of these genetics further shorten the timeline, letting new growers complete two or three practice cycles in a single growing season.

    Strain-Specific Observation Notes

    • Northern Lights: Pistils darken uniformly; trichomes reach 70 percent milky around day 56.
    • Blue Dream: Lower branches lag behind tops by three to four days; check multiple sites.
    • Autoflowering hybrids: Begin daily checks at week six because the window closes quickly.

    Creating a Simple Timing Checklist

    Begin the final phase by noting the start of flowering and counting forward based on the strain’s expected duration. From week six onward, inspect pistils twice weekly. Once pistil browning reaches 50 percent, begin daily trichome checks. Record observations in a notebook to spot trends across multiple plants. This systematic approach prevents the common beginner mistake of harvesting on a fixed calendar date rather than plant signals.

    • Week 7-8: Majority of pistils darkened; begin trichome monitoring.
    • 70 percent milky trichomes: Target window for most effects.
    • Additional 5-7 days for higher amber content if desired.
    • Final confirmation: Average trichome counts from three different buds match target ratios.

    This checklist prevents rushed decisions and encourages patience until visual cues align. Quick-finishing seeds make the entire process more manageable for first-time cultivators. Adding a simple calendar reminder every other day after week six ensures no observation is missed during the critical final stretch.

    Conclusion

    Mastering trichome and pistil observation equips beginners with a dependable system for determining harvest readiness. By choosing fast-maturing strains and following structured visual checks, new growers can achieve better yields and consistent quality. Regular practice with these techniques builds expertise that carries forward into every subsequent grow. Over time, the same observational habits become second nature, allowing cultivators to harvest at peak potency without relying on guesswork or external calendars.
  • Guerrilla Cannabis Irrigation: Rainwater Collection for Remote Sites

    Guerrilla Cannabis Irrigation: Rainwater Collection for Remote Sites

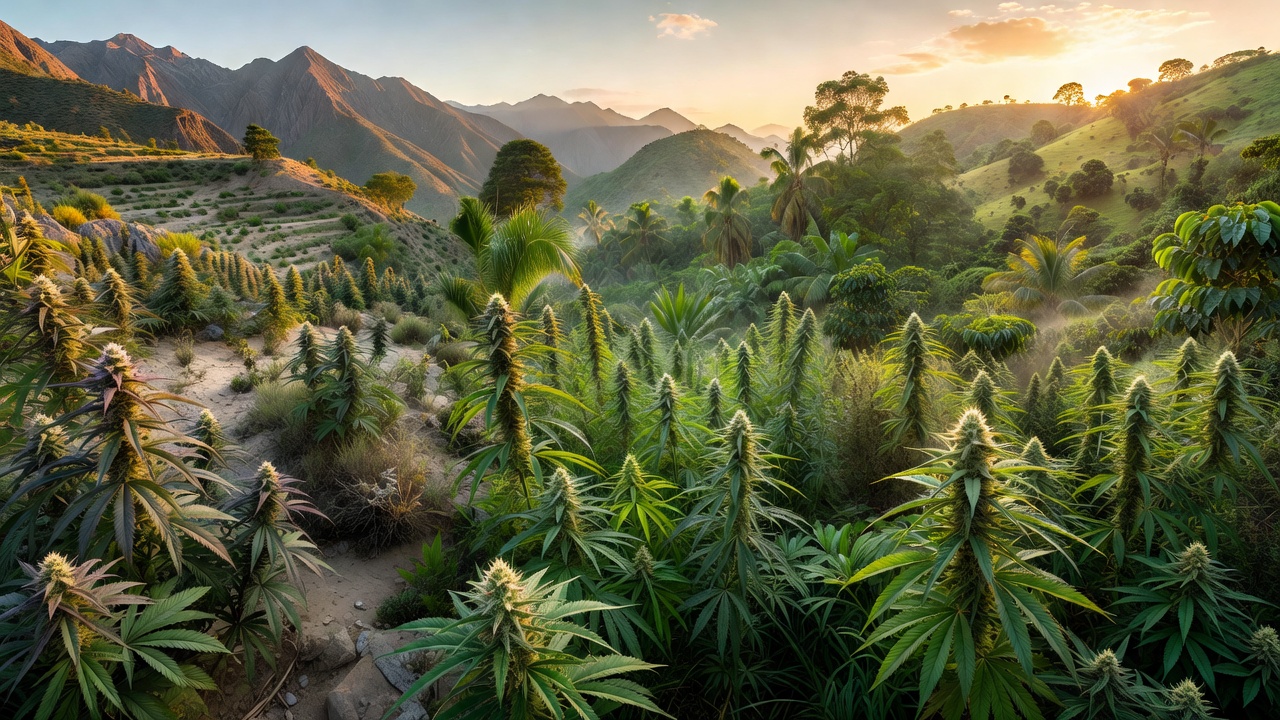
    Guerrilla cannabis cultivation in remote outdoor locations demands careful planning to balance water needs with the risks of detection. In 2026, growers face increasing scrutiny in wild areas, making low-profile irrigation systems essential. This guide explores proven methods for collecting and distributing rainwater efficiently while selecting seeds that thrive in unpredictable conditions. Success hinges on understanding local microclimates and preparing for both drought and sudden downpours that can either nourish or damage plants.

    Understanding Guerrilla Growing Challenges

    Remote sites often lack reliable water sources, forcing cultivators to rely on natural rainfall or carried supplies. Detection risks rise with visible equipment, so setups must blend into the environment. Variable weather patterns in 2026 further complicate matters, requiring adaptable strategies that conserve every drop. For instance, a site in a forested valley might receive 30 percent more rain than an exposed ridge just two miles away, so mapping these differences before planting prevents wasted effort.

    Successful guerrilla operations prioritize sustainability to avoid depleting local resources, which could draw attention from authorities or landowners. Integrating rainwater systems reduces trips to the site and maintains plant health during dry spells. A practical example involves pre-positioning 55-gallon barrels at the start of the season so that a single storm can supply enough water for two weeks of growth without return visits. This approach also limits soil compaction from repeated foot traffic that might otherwise create visible paths.

    Selecting Resilient Outdoor Cannabis Seeds

    Choosing the right genetics forms the foundation of any remote grow. Opt for strains bred for outdoor resilience, such as those with strong resistance to mold, pests, and fluctuating temperatures. Autoflowering varieties often perform well in guerrilla settings due to their rapid cycles and compact size. Growers in northern latitudes have reported success with autoflowers that finish in 70 to 85 days, allowing harvest before late-season patrols intensify.

    Look for landrace-influenced hybrids that tolerate drought once established. These seeds develop deep root systems capable of accessing groundwater, minimizing supplemental irrigation needs. Always source from reputable breeders offering detailed growing information tailored to variable climates. Testing a small number of seeds indoors first lets cultivators verify germination rates and early vigor before committing an entire remote plot to unproven stock.

    Key Traits for Guerrilla Seeds

    • Fast flowering times to evade seasonal patrols.
    • High resistance to common outdoor pathogens.
    • Adaptability to poor soil and irregular watering.
    • Discreet growth patterns that avoid tall, obvious stalks.

    Setting Up Rainwater Collection Systems

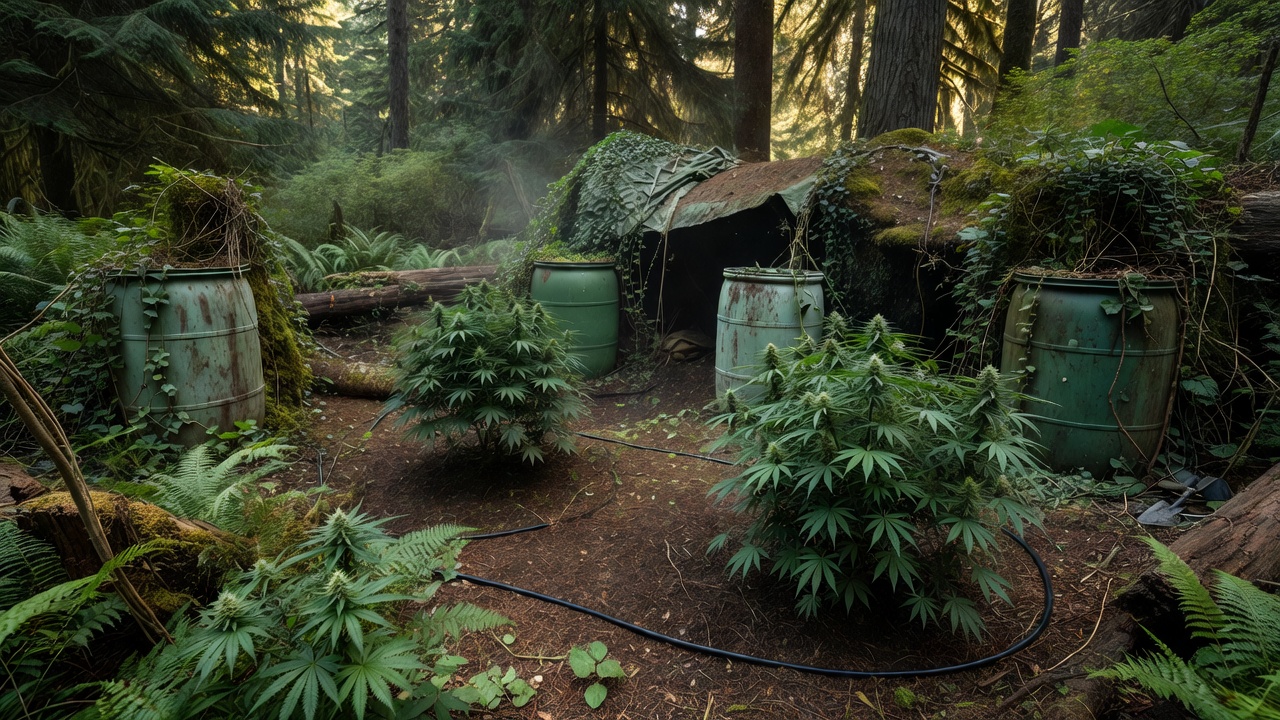
    Effective collection begins with camouflaged catchment areas. Use natural slopes or existing foliage to funnel rain into hidden barrels or bladders. Bury tanks partially underground where possible to maintain a low profile and protect against freezing in cooler months. Positioning the top rim just below ground level and covering it with a layer of leaves and twigs makes the setup nearly invisible even from a few feet away.

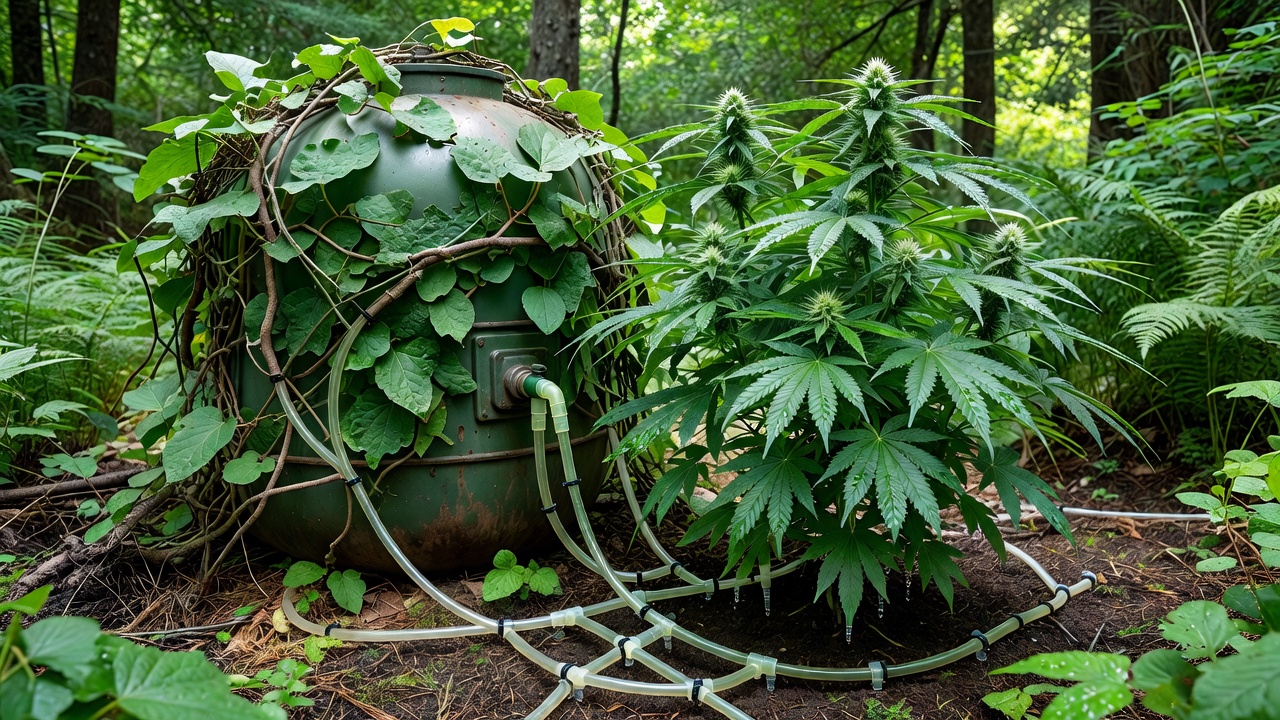
    Install fine mesh screens over collection points to filter debris and deter wildlife. Connect multiple barrels in series using discreet black tubing that matches surrounding vegetation. This setup captures substantial volumes during storms without requiring frequent maintenance visits. One grower in the Pacific Northwest collected over 400 gallons from a single three-day rain event by linking four barrels along a natural drainage line.

    Efficient Irrigation Techniques

    Drip irrigation delivers water directly to root zones, dramatically reducing evaporation and runoff. Pair systems with timers or gravity-fed valves activated only during low-light hours to further minimize visibility. Position emitters under mulch layers for added concealment. Using 1-gallon-per-hour drippers spaced 12 inches apart around each plant ensures even moisture without creating surface puddles that could attract animals or reveal the site.

    Schedule watering based on soil moisture tests rather than fixed routines. Overwatering invites root issues and creates detectable wet spots. Incorporate moisture-retaining amendments like coco coir or perlite into planting holes to stretch collected rainwater further. A simple finger testβ€”inserting a finger two inches into the soilβ€”tells growers whether irrigation is truly needed, preventing both underwatering stress and wasteful over-application.

    Water Distribution Best Practices

    1. Map plant locations in advance to run tubing along natural paths.
    2. Use pressure-compensating drippers for even flow across uneven terrain.
    3. Flush lines periodically with collected rainwater to prevent clogs.
    4. Monitor for leaks that could create visible trails or puddles.

    Sustainable Practices and Optimization

    Integrate companion planting with water-efficient herbs to improve soil moisture retention naturally. Rotate sites yearly to prevent soil depletion and reduce the chance of repeated discovery. Track rainfall data from nearby weather stations to anticipate collection volumes. Recording weekly rainfall totals on a small waterproof notepad helps predict how long stored water will last and informs decisions about adding more barrels in future seasons.

    These methods align with broader environmental guidelines from sources like the EPA water research program, promoting responsible resource use in sensitive ecosystems. Reusing greywater from cleaning tools adds another layer of efficiency when properly filtered. Filtering used water through a simple cloth-and-charcoal setup before returning it to barrels prevents introducing contaminants that could harm plants or leave chemical traces.

    Minimizing Detection Risks

    Every component must prioritize stealth. Paint containers in earth tones and conceal them with branches or rocks. Avoid shiny surfaces that reflect sunlight, and time all maintenance for dawn or dusk. Digital mapping apps help plan routes that avoid trails frequented by hikers or officials. Marking coordinates on an offline GPS device rather than carrying printed maps reduces the chance of leaving physical evidence if stopped.

    Regular site checks should focus on subtle indicators like wilting leaves rather than large-scale interventions. This disciplined approach ensures long-term success while protecting both the crop and the grower. Conducting checks no more than once every ten days and varying approach routes further lowers the probability of establishing recognizable patterns that could be noticed by others.

    Conclusion

    Mastering irrigation and rainwater collection transforms challenging remote locations into viable guerrilla cannabis sites. By combining resilient seed selection with low-impact water systems, growers achieve sustainable yields without compromising security. Apply these techniques consistently to optimize results season after season. Over multiple years, refining these methods based on site-specific observations leads to higher success rates and reduced risk, turning initial trial-and-error into reliable, repeatable practices.

  • Grow Tent Airflow Guide: Fans, Filters & Ducting for Cannabis 2026

    Grow Tent Airflow Guide: Fans, Filters & Ducting for Cannabis 2026

    Introduction to Optimal Airflow in Indoor Cannabis Cultivation

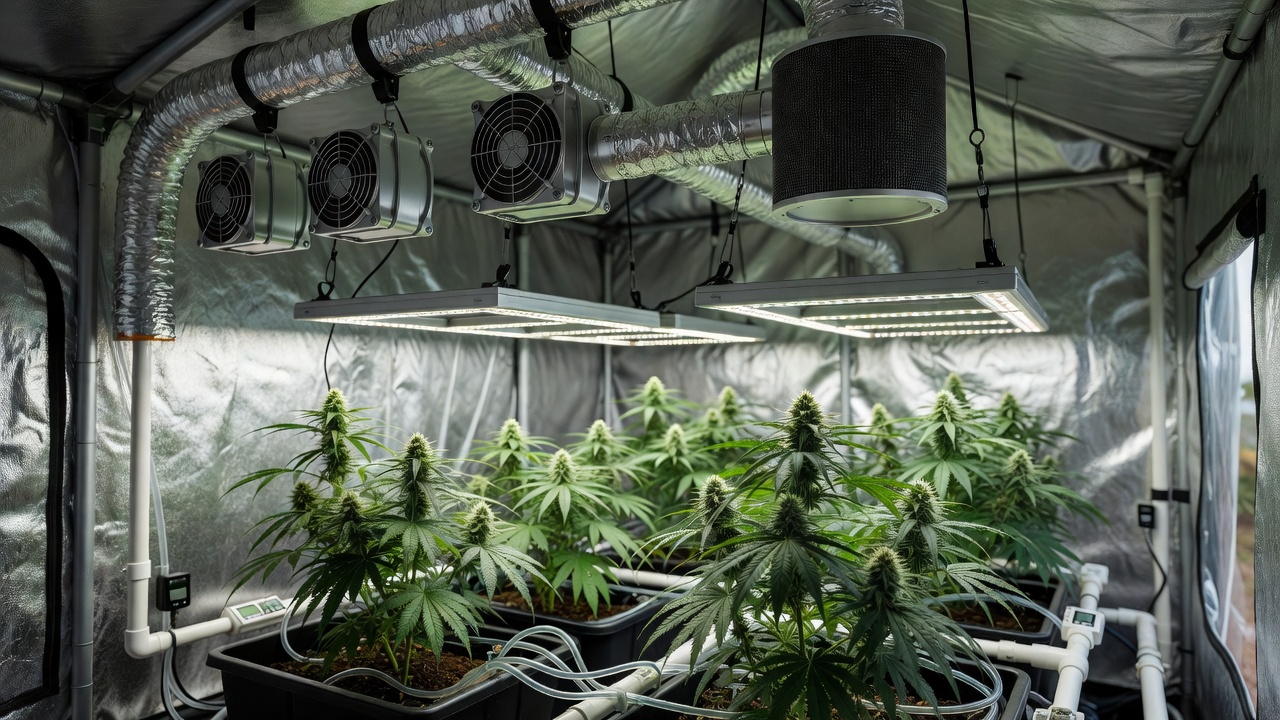
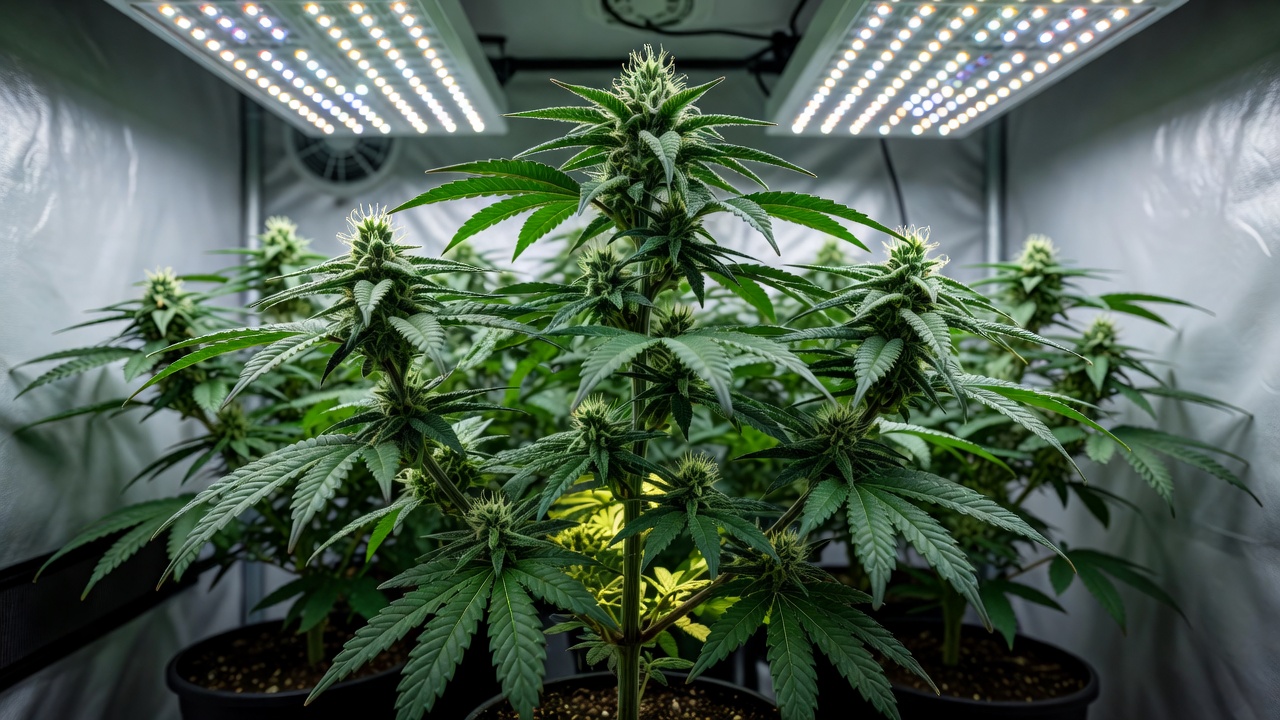
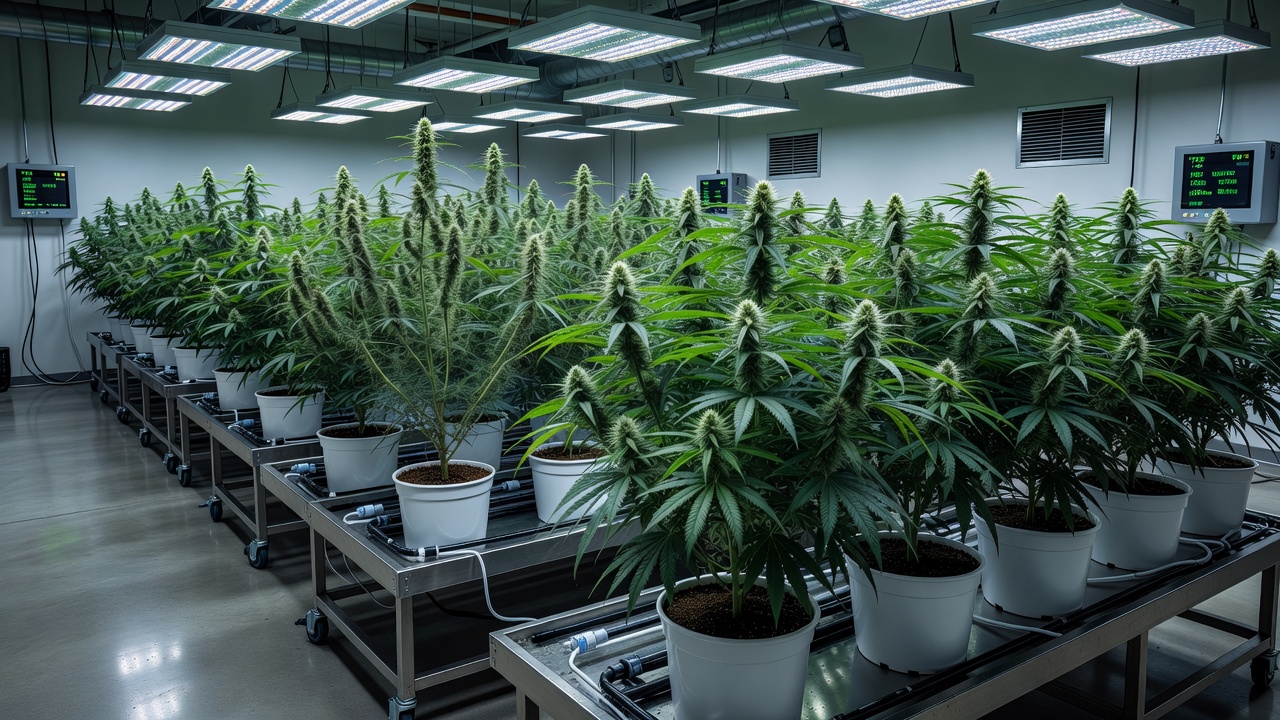
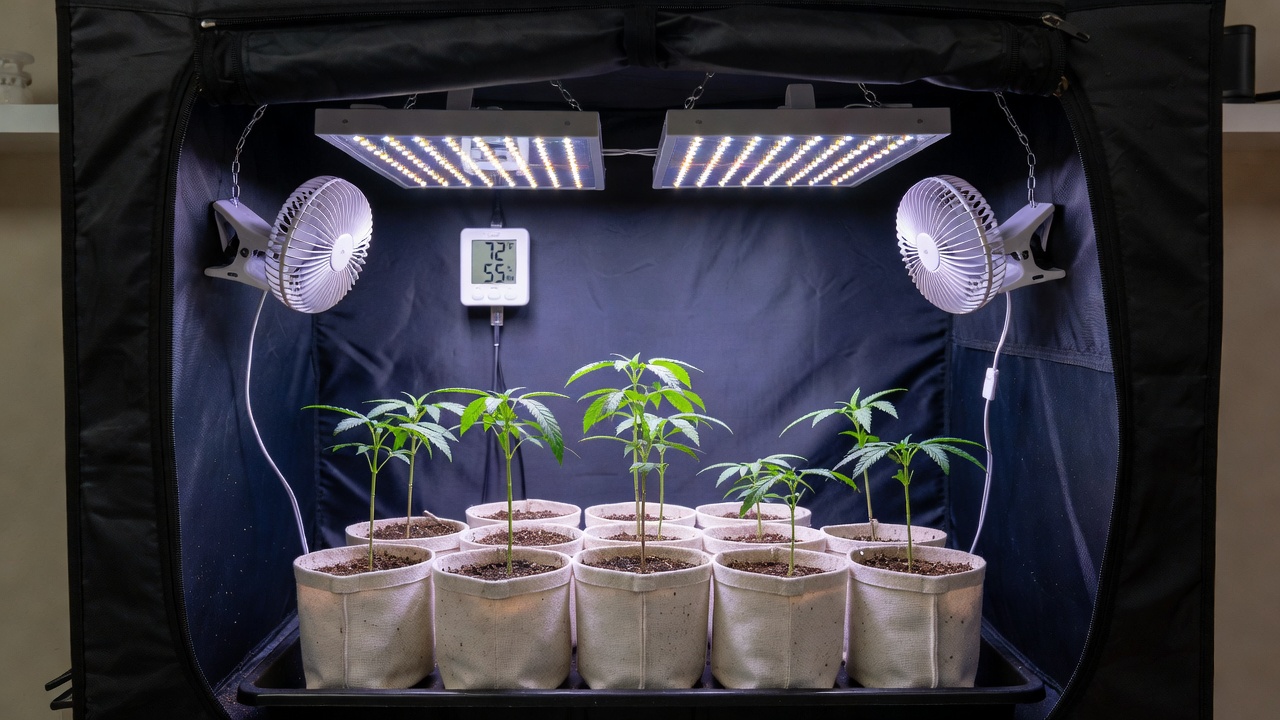
    Proper ventilation is the backbone of successful indoor cannabis growing, especially inside grow tents where space is limited and environmental control is critical. Without adequate airflow, growers face issues like stagnant air, excess humidity, mold outbreaks, and poor plant health that directly reduce yields. This guide focuses on selecting and installing fans, carbon filters, and ducting while calculating air exchange rates for home setups using various indoor seeds and hydroponic systems.

    In 2026, home growers continue to refine techniques that integrate mechanical ventilation with hydroponics to maintain ideal conditions. Effective airflow removes heat from lights, replenishes CO2, and controls odors, all while supporting robust growth from seed to harvest. Whether you are running a small 2×2 tent or a larger 4×4 setup, understanding these components ensures your plants thrive without common pitfalls. For example, a beginner using photoperiod seeds in a 2×2 tent can avoid stunted growth by installing a 150 CFM exhaust fan from day one rather than upgrading later.

    Understanding Airflow Requirements for Grow Tents

    Airflow in a grow tent serves multiple purposes: it regulates temperature and humidity, prevents mold and mildew, and strengthens plant stems through gentle movement. Cannabis plants in hydroponic systems transpire heavily, releasing moisture that must be extracted quickly to avoid fungal issues. Ideal conditions typically include temperatures between 70-80Β°F during lights-on and humidity levels of 40-60% depending on the growth stage.

    Stale air pockets can form in corners or behind equipment, leading to uneven growth and reduced potency in buds. By planning ducting routes and fan placement early, growers create a consistent environment that supports high yields from popular indoor seed varieties. This foundational knowledge helps avoid costly mistakes when scaling up operations. Consider a practical example where a grower places an oscillating fan at canopy height in a 3×3 tent to eliminate dead zones, resulting in more uniform bud development across all plants.

    Key Environmental Targets by Growth Stage

    Seedlings prefer 75-80Β°F with 60-70% humidity, while vegetative plants thrive at 70-78Β°F and 50-60% humidity. During flowering, drop humidity to 40-50% to protect dense buds. Monitoring with a digital hygrometer placed at mid-canopy level gives accurate readings every few hours.

    Calculating Air Exchange Rates Accurately

    To determine the right equipment size, calculate your tent’s air exchange rate, often expressed in cubic feet per minute (CFM). Measure the tent volume by multiplying length, width, and height in feet, then multiply by 1.5 to 3 for standard exchange every minute, adjusting higher for hydroponic setups with elevated humidity. For example, a 4x4x6.5-foot tent requires roughly 300-400 CFM to maintain optimal conditions.

    Factor in additional variables such as light heat output, number of plants, and external climate. Online calculators from grow suppliers provide starting points, but always add 20% buffer capacity for filters and ducting resistance. Accurate calculations prevent under-ventilation that invites mold or over-ventilation that stresses plants and wastes energy. A concrete walkthrough: for a 2x2x5-foot tent (50 cubic feet), multiply by 2 for 100 CFM base, then add 20% to reach 120 CFM, ensuring reliable performance even during peak summer heat.

    Selecting Fans, Carbon Filters, and Ducting

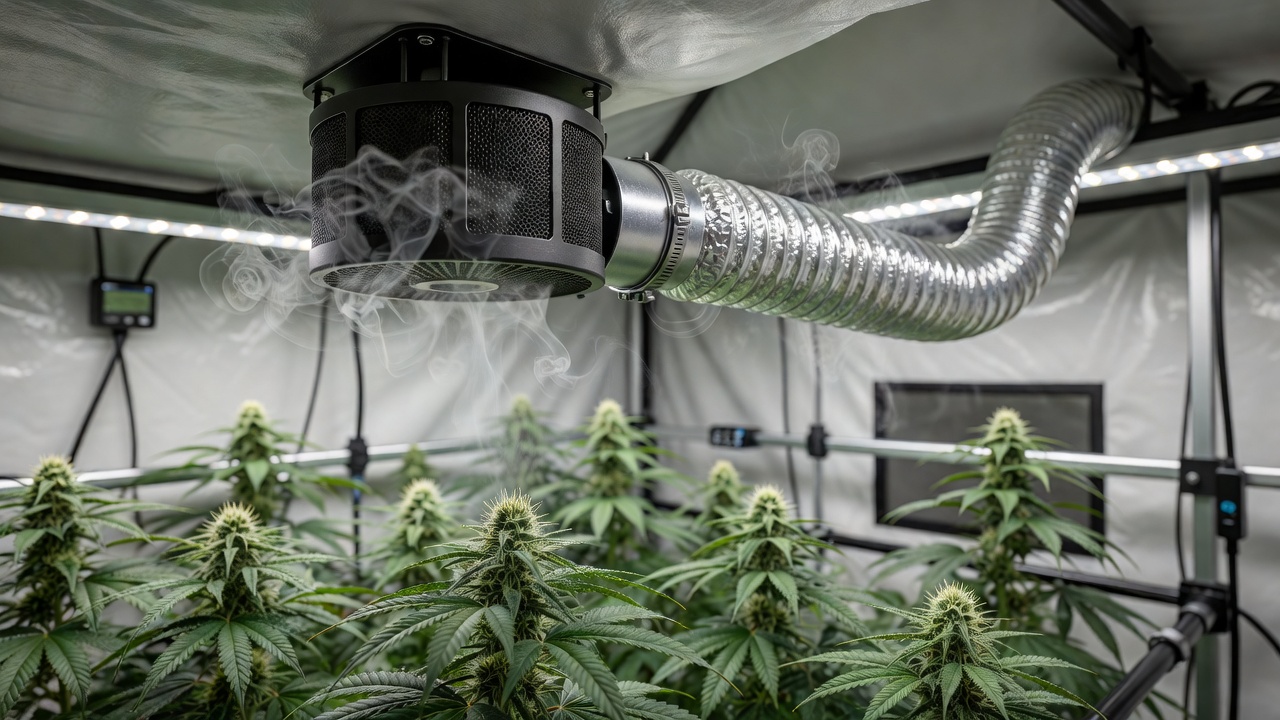
    Choose inline exhaust fans rated for continuous duty with quiet operation suitable for residential spaces. Pair them with activated carbon filters sized to match fan CFM, ensuring odor control without restricting airflow. Rigid or semi-rigid ducting minimizes bends that reduce efficiency, while insulated options help manage condensation in cooler rooms.

    Look for energy-efficient models with variable speed controls for fine-tuning. For hydroponic integration, select fans that can handle the higher moisture loads from reservoirs and grow mediums. Quality components last longer and deliver consistent performance across multiple grow cycles with different indoor seeds. Growers often report success pairing a 6-inch 250 CFM fan with a matching carbon filter in 4×4 tents, using 8-foot runs of insulated ducting to reach a nearby window without excessive noise.

    Step-by-Step Installation Process

    Begin by mounting the carbon filter at the top of the tent for efficient heat and odor extraction. Connect it to the inline fan using ducting clamps, then route exhaust outside or through a window. Intake fans or passive vents at the bottom create negative pressure that pulls fresh air through the canopy.

    Secure all connections tightly and test the system before introducing plants. Position oscillating fans inside the tent to circulate air around leaves without direct blasts that can cause windburn. In hydroponic setups, ensure ducting avoids splashing water to prevent electrical hazards and maintain system cleanliness. A useful tip is to run the full system for 24 hours with a thermometer and hygrometer logging data, confirming temperature drops of at least 5-8Β°F after lights activate.

    1. Measure and mark mounting points for the filter and fan.
    2. Install the filter high and the fan immediately after it.
    3. Route ducting with minimal 90-degree bends.
    4. Add bottom intake vents or a second small fan.
    5. Position two oscillating fans at opposite corners.

    Integrating Ventilation with Hydroponic Systems

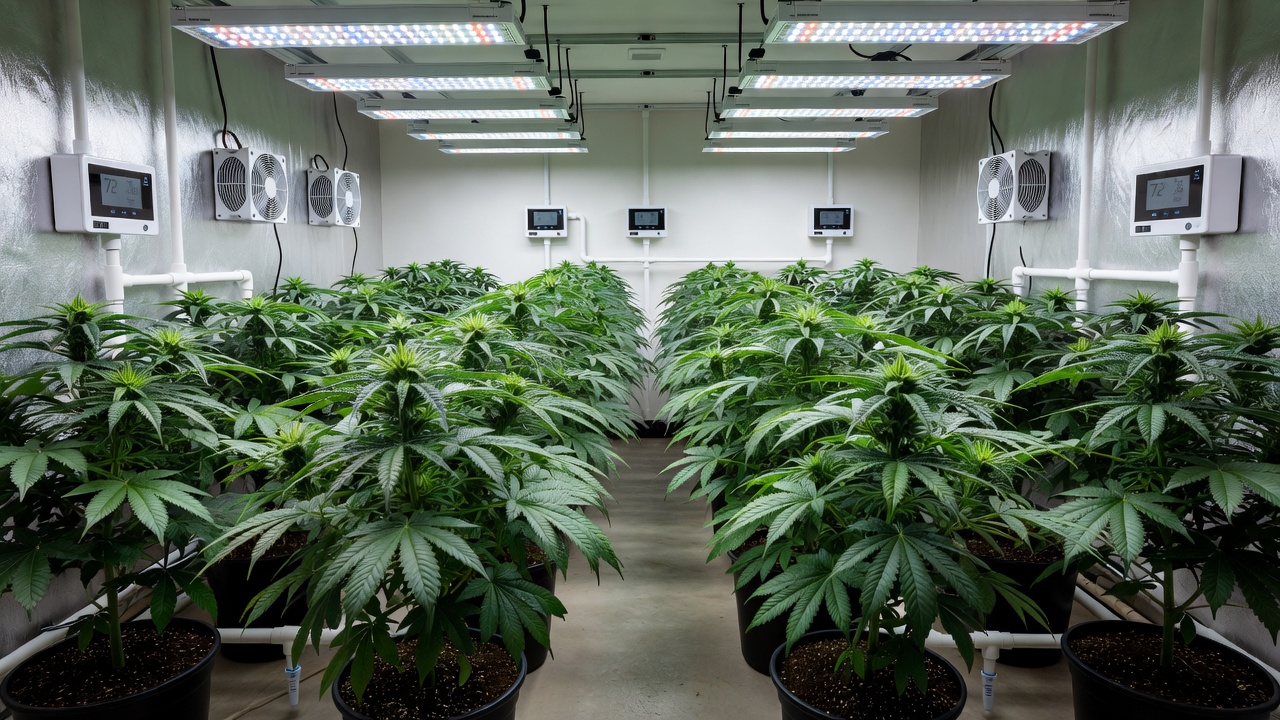
    Hydroponics demands precise humidity management because roots and reservoirs add extra moisture. Coordinate exhaust timing with irrigation cycles to expel humid air immediately after feeding. Use environmental controllers that link fans to sensors monitoring temperature, humidity, and VPD for automated adjustments.

    This integration maximizes yields by keeping nutrient uptake efficient and preventing root rot or leaf issues common in poorly ventilated tents. Regular monitoring ensures the system adapts as plants grow larger and transpire more during flowering stages. For instance, setting an exhaust fan to ramp up for 30 minutes post-irrigation in a deep-water culture setup prevents humidity spikes above 65% that could trigger powdery mildew.

    Maintenance Tips and Yield Optimization

    Inspect filters monthly and replace carbon every 12-18 months or when odors return. Clean fan blades and duct interiors to remove dust buildup that reduces performance. Monitor for mold signs like white powdery residue and adjust airflow immediately if detected.

    Consistent maintenance paired with proper air exchange supports vigorous growth and higher cannabinoid production. Many experienced growers report 20-30% yield increases after optimizing their ventilation setups. For authoritative guidance on indoor air quality principles applicable to grow spaces, refer to resources from the EPA and mold prevention advice at the CDC. Practical routines include vacuuming fan grills weekly and checking duct seals quarterly to sustain peak efficiency.

    Conclusion

    Mastering fans, carbon filters, and ducting transforms grow tent performance for cannabis enthusiasts. By calculating exchange rates correctly and integrating ventilation with hydroponics, home growers prevent mold while achieving maximum yields from their chosen indoor seeds. Consistent application of these practices leads to healthier plants and more satisfying harvests year after year.

  • Optimal Lighting for Feminized Photoperiod Cannabis 2026

    Optimal Lighting for Feminized Photoperiod Cannabis 2026

    Growing female cannabis plants from feminized seeds requires precise control over lighting, especially with photoperiod varieties that depend on light cycles to transition between growth stages. In 2026, home growers can leverage advanced, energy-efficient technologies and refined techniques to achieve superior results. This guide details optimal schedules, equipment choices, and seasonal adjustments tailored for photoperiod cannabis, helping enthusiasts maximize yields while minimizing issues like stress or hermaphroditism. For instance, maintaining exact photoperiods prevents the plant from reverting or showing stress signs such as leaf cupping, which can occur when timers drift by even 30 minutes. New LED fixtures with built-in dimmers and spectrum knobs further simplify these adjustments compared to older setups.

    Understanding Photoperiod Cannabis from Feminized Seeds

    Photoperiod cannabis strains respond to changes in daylight hours, unlike autoflowering varieties. Feminized seeds produce nearly all female plants, eliminating the need for sexing and allowing focus on lighting precision. Proper light management during vegetative and flowering phases promotes robust growth, dense bud formation, and high cannabinoid content. A common practical example involves starting 10–12 feminized photoperiod seeds in a 4Γ—4 tent; consistent 18-hour light periods encourage uniform canopy development so every plant reaches the same height before the flip to flower.

    Home growers in 2026 benefit from improved LED systems that mimic natural sunlight spectra more accurately than older technologies. Consistent schedules prevent light stress, which can reduce potency or trigger unwanted male flowers in feminized plants. Using a digital timer with battery backup ensures the cycle never breaks during power fluctuations, a frequent cause of hermaphroditism in sensitive genetics.

    Vegetative Stage Lighting Schedules

    The vegetative phase demands 18-24 hours of light daily to encourage leafy growth and strong root systems. An 18/6 schedule (18 hours on, 6 off) is standard for most photoperiod feminized plants, balancing energy use with vigorous development. Some cultivators prefer 20/4 or 24/0 for faster results, though the latter may increase electricity costs. In practice, an 18/6 cycle allows the root zone to rest and absorb oxygen at night, reducing the risk of damping-off in young seedlings. Growers often run 20/4 when space is limited and they need plants to fill a screen quickly, then drop back to 18/6 once the canopy is established.

    Use full-spectrum LEDs positioned 18-24 inches above the canopy, adjusting height as plants grow. Maintain temperatures between 70-85Β°F with 40-60% humidity. This setup supports healthy female plants that will later transition smoothly into flowering. Check light distance weekly with a ruler; if lower leaves yellow while tops stretch, raise the fixture 2–3 inches to restore balance.

    Recommended Light Intensity

    Target 300-600 PPFD during vegetation. Monitor with a PAR meter to avoid light burn while ensuring adequate coverage for even growth across multiple plants. Place the sensor at canopy level in several spots; readings below 300 PPFD at the edges usually indicate the need for an additional side light or reflector panel.

    Flowering Stage Lighting and Transitions

    Switch to a 12/12 schedule to initiate flowering in photoperiod strains. This reduction in light hours signals the plant to produce buds. Maintain this cycle strictly for 8-10 weeks, depending on the strain, to reach full maturity. Abruptly changing from 18/6 to 12/12 over two days instead of one can lessen stress; many growers dim lights 25 % on the first night and complete the change on the second night.

    Lower lights to 12-18 inches above buds and increase intensity to 600-900 PPFD. Reduce humidity to 30-50% and temperatures to 65-80Β°F. These conditions optimize resin production in female plants from feminized seeds. Keep a log of daily PPFD values; a sudden drop below 600 PPFD mid-flower often signals dirty lenses or bulbs that need cleaning.

    Advanced Setups and Equipment for 2026

    Modern LED grow lights with tunable spectra allow customization for each stage, improving efficiency over traditional HPS systems. Smart controllers automate schedules and integrate with apps for remote monitoring, ideal for 2026 home setups. A typical 4Γ—4 tent might use two 320 W quantum boards on separate channels so the grower can raise the blue spectrum percentage during vegetation and shift toward red during weeks 4–7 of flower.

    • Choose quantum board or bar-style LEDs for uniform coverage.
    • Incorporate supplemental UV and far-red lighting in late flower for enhanced terpene profiles.
    • Ensure proper ventilation to manage heat from high-intensity fixtures.

    Explore resources from https://www.ncbi.nlm.nih.gov/ for scientific insights on light spectrum effects. Pairing a PAR meter with a smartphone app that records daily light integrals helps fine-tune these advanced fixtures for maximum efficiency.

    Seasonal Adjustments and Troubleshooting

    For outdoor-indoor hybrid grows in 2026, align indoor lights with natural seasons to reduce energy use. In summer, increase ventilation; in winter, add insulation around grow spaces. Common issues like stretching or bud rot often stem from improper light distance or inconsistent cyclesβ€”always verify timers and bulb output. When outdoor temperatures exceed 85 Β°F, run intake fans on a thermostat so the indoor environment stays within the 65–80 Β°F flowering range without extra air-conditioning costs.

    Conclusion

    Mastering lighting for feminized photoperiod cannabis sets the foundation for abundant harvests. By following these 2026-optimized schedules and setups, home growers can consistently produce high-quality female plants with impressive yields. Tracking every variable from PPFD to nightly dark periods turns each cycle into a repeatable process that steadily improves results over successive grows.

  • Safe Defoliation Guide for Autoflowering Cannabis Plants

    Safe Defoliation Guide for Autoflowering Cannabis Plants

    Introduction to Defoliation for Autoflowers

    Defoliation is a strategic cultivation practice that involves selectively removing fan leaves from cannabis plants to improve light penetration and airflow within the canopy. For autoflowering varieties, which transition from vegetative growth to flowering based on age rather than light cycles, this technique requires careful application to avoid stressing the fast-paced life cycle. When performed correctly, defoliation can lead to denser bud sites, reduced risk of mold, and ultimately higher yields for home growers. In practice, many indoor cultivators working with a four-plant setup in a 4×4 tent notice that removing select leaves allows lower sites to receive 30 to 40 percent more direct light, translating into more uniform bud development across the entire plant rather than top-heavy colas only.

    Autoflowers typically complete their cycle in 8 to 12 weeks, making timing critical. Unlike photoperiod strains, they have less recovery time from stress, so growers must focus on minimal intervention. This guide explores evidence-based methods tailored to autoflower seeds, helping enthusiasts maximize production while maintaining plant health in 2026 indoor and outdoor setups. For example, a grower starting seeds in early spring under LED fixtures can plan defoliation sessions around day 20 and day 32 to align with the plant’s natural rhythm without interrupting the automatic shift into bloom.

    Understanding the Benefits and Risks

    Improved light penetration allows lower bud sites to develop fully, promoting even canopy growth and larger overall harvests. Enhanced airflow reduces humidity pockets that foster powdery mildew and pests, a common issue in dense autoflower grows. Studies from sources like Leafly highlight how proper canopy management boosts terpene profiles and cannabinoid potency without chemical additives. In one documented home grow of Sour Diesel autoflowers, consistent airflow after selective leaf removal lowered ambient humidity at the bud level from 68 percent to 52 percent, resulting in zero mold outbreaks through harvest.

    However, risks include stunted growth or hermaphroditism if overdone. Autoflowers are sensitive due to their ruderalis genetics, so excessive leaf removal can delay flowering or reduce resin production. Always prioritize plant signals like vibrant green leaves and strong stems before proceeding. A practical check involves observing whether new growth appears within 48 hours after any session; if growth stalls, the plant is signaling that further removal should wait until the next week.

    Optimal Timing During the Grow Cycle

    The best window for defoliation occurs during the late vegetative stage, around days 18 to 25 from sprout. At this point, plants have developed enough foliage for safe removal but have not yet initiated flowering. A light defoliation in early flower, between days 30 and 35, can further open the canopy without major disruption. Growers using a weekly calendar mark day 21 as the primary session and day 33 as a follow-up, allowing three full days between cuts so the plant can photosynthesize normally before the next adjustment.

    Avoid any leaf removal after week six, as autoflowers focus energy on bud maturation. Monitor growth weekly: if leaves are shading bud sites heavily, it is time to act. Strain-specific adjustments matterβ€”indica-dominant autoflowers may tolerate more aggressive pruning than sativa-leaning ones due to bushier structures. In a side-by-side trial, a Northern Lights auto handled removal of 25 percent foliage on day 22 with no visible slowdown, whereas an Amnesia Haze auto showed best results when limited to 15 percent on the same schedule.

    Essential Tools and Step-by-Step Techniques

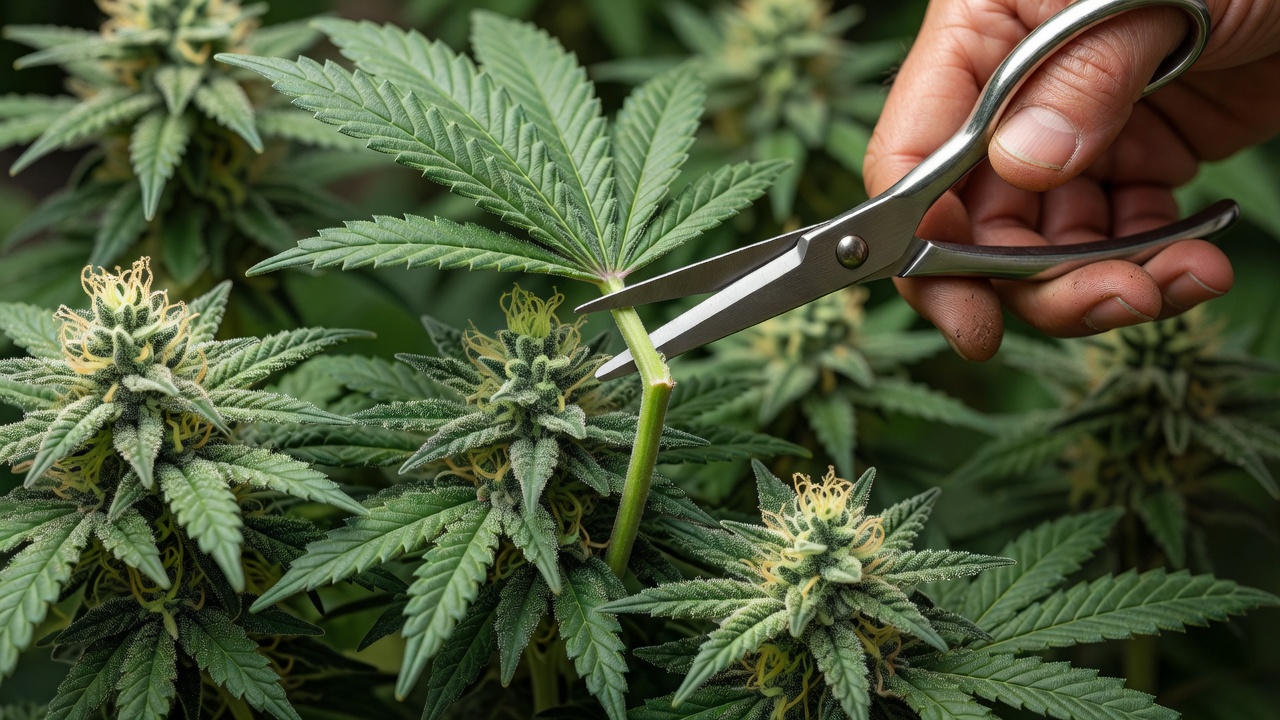
    Gather sterilized precision scissors, gloves, and a magnifying loupe for close inspection. Work in a clean environment to prevent contamination. Begin by removing only yellowing or damaged leaves at the base, then target large fan leaves blocking light to lower nodes. A typical sequence for a three-foot-tall plant starts at the bottom inner branches and works outward, always cutting at the petiole to leave no stubs that could invite pathogens.

    Remove no more than 20-30 percent of foliage per session, spread over multiple days if needed. Focus on inner canopy leaves first. After pruning, mist plants lightly and ensure optimal VPD levels to aid recovery.

    • Inspect plants under full spectrum lights before starting.
    • Cut at the petiole base to avoid stem damage.
    • Dispose of leaves away from the grow area to deter pests.

    Preparation Steps

    Before any cuts, wipe tools with 99 percent isopropyl alcohol and allow them to air dry. Turn off oscillating fans for 30 minutes to reduce airborne particles. Examine each plant under a 30x loupe to confirm no early signs of pests or nutrient issues that might compound stress.

    Execution Steps

    Work from the inside out, removing one leaf at a time and pausing after every five cuts to assess remaining coverage. In a 2×4 tent with six plants, this measured approach usually takes 12 to 15 minutes per plant and prevents accidental over-pruning.

    Strain-Specific Adjustments for Autoflower Seeds

    Fast-finishing strains like certain Northern Lights autoflowers benefit from moderate defoliation to prevent overcrowding. In contrast, taller varieties such as Amnesia Haze autoflowers may need earlier intervention on lower branches to support vertical growth. Always research seed bank specifics for your chosen genetics. A grower running Royal Queen Seeds autos noted that their Quick One variety required only one session at day 20, while taller Sour Diesel autos needed two lighter sessions spaced 12 days apart.

    Adjust based on environment: in high-humidity setups, increase defoliation slightly for better airflow. Low-light grows require conservative approaches to preserve photosynthetic capacity. Experimentation over multiple cycles refines these adjustments for consistent results. Outdoor growers in humid climates often remove an extra 10 percent foliage compared with indoor counterparts to combat evening moisture buildup.

    Avoiding Common Stress Pitfalls

    Over-defoliation ranks as the top error, leading to slowed metabolism and smaller buds. Introduce changes gradually and observe plant response for 48 hours post-procedure. Maintain stable temperatures between 68-77Β°F and avoid combining defoliation with other stressors like transplanting. If a plant shows any droop after pruning, raise humidity to 60 percent and reduce light intensity by 10 percent for two days to ease recovery.

    Nutrient burn or pH imbalances exacerbate recovery issues, so test soil or hydro solutions regularly. If plants show wilting, halt all interventions and provide calm conditions with gentle airflow from oscillating fans. Keeping a simple log noting leaf count removed, date, and plant response helps identify patterns across successive grows.

    Maximizing Bud Production After Defoliation

    Post-pruning, support plants with low-stress training ties to expose new growth sites. Supplement with bloom boosters rich in phosphorus once flowering begins. Track yields across grows to quantify improvements, often seeing 15-25 percent increases with refined techniques. One documented run of four Blue Cheese autos produced 142 grams dried after implementing the day-21 and day-33 protocol, compared with 118 grams from the previous cycle without defoliation.

    Combine defoliation with proper watering and organic amendments for robust results. Resources from Royal Queen Seeds offer additional insights into integrated grow strategies that complement these methods. Adding a weekly foliar spray of diluted seaweed extract on non-pruning days further supports leaf regeneration and terpene development.

    Conclusion

    Safe defoliation empowers home growers to optimize autoflowering cannabis for superior light exposure and ventilation. By adhering to precise timing, using the right tools, and tailoring approaches to specific strains, enthusiasts can avoid pitfalls and achieve abundant harvests. Consistent practice builds expertise, turning this technique into a reliable tool for quality cannabis production. Over successive seasons, growers develop an intuitive sense for each genetic line, allowing them to fine-tune leaf removal percentages for maximum return on every harvest.

  • Landrace Cannabis Strains 2026: Effects, Flavors & Grow Tips

    Landrace Cannabis Strains 2026: Effects, Flavors & Grow Tips

    Landrace cannabis strains represent the pure, unaltered genetics that evolved naturally in specific regions around the world. In 2026, home growers and seed buyers continue to seek these varieties for their stability, unique terpene profiles, and balanced cannabinoid content that commercial hybrids often lack. This guide examines several standout landraces, exploring their distinct effects, flavors, and practical applications in modern cultivation projects.

    Understanding Landrace Cannabis Strains

    Landrace strains developed over centuries in isolated environments, adapting to local climates, soils, and altitudes without human crossbreeding. These pure genetics offer predictable growth patterns and robust resistance to pests and diseases. Unlike modern hybrids, landraces typically display moderate THC levels paired with meaningful CBD content, creating functional effects suitable for both recreational and therapeutic use.

    Growers appreciate landraces for their genetic consistency across generations. When preserved correctly, these strains deliver authentic aromas ranging from spicy earth to sweet citrus. For 2026 projects, selecting landraces supports biodiversity in cannabis cultivation while providing reliable results in varied growing conditions.

    Key Advantages for Home Cultivators

    Landraces maintain stable phenotypes, meaning offspring closely resemble parent plants even after multiple generations of seed saving. This reduces the variability seen in hybrid crosses. Concrete examples include Afghan plants that consistently produce dense colas under 18/6 vegetative lighting followed by 12/12 flowering, with minimal stretching. Practical guidance involves starting seeds in a light, aerated mix of 50% coco coir, 30% perlite, and 20% compost to mimic native rocky soils while ensuring drainage.

    Afghan Landrace: Earthy Origins and Potent Effects

    The Afghan landrace originates from the Hindu Kush mountains, producing compact plants with thick resinous buds. THC levels average 12-16% while CBD often reaches 1-2%, delivering a deeply relaxing body high ideal for evening use. Users report relief from stress and muscle tension alongside a classic hash-like flavor of earth, spice, and subtle pine.

    These indica-dominant plants finish flowering in 7-9 weeks, making them suitable for shorter growing seasons. Their natural resistance to cold and mold supports outdoor cultivation in northern climates. Many enthusiasts value Afghan genetics for hash production due to exceptional trichome density.

    Practical Cultivation Examples

    Replicate native conditions by maintaining daytime temperatures of 68-75Β°F and dropping nights to 55-60Β°F during late flower. Use organic amendments such as bat guano for phosphorus boost in weeks 5-7. A real-world example: a 4×4 tent grower reported 450g per square meter by topping plants once at week 3 vegetative and employing low-stress training to create an even canopy. Monitor humidity below 45% in flower to leverage the strain’s mold resistance while avoiding overwatering, which can lead to root issues in dense soil.

    Thai Stick: Tropical Flavors and Energetic High

    Thai landrace strains developed in the tropical regions of Thailand, resulting in tall, stretchy sativas with long flowering times of 12-14 weeks. THC content typically ranges from 10-14% with low CBD, producing a clear-headed, uplifting cerebral effect that enhances creativity and focus. Flavors include sweet mango, citrus zest, and earthy undertones that reflect their Southeast Asian heritage.

    Thai plants excel in warm, humid environments and reward patient growers with massive yields. Their energetic profile suits daytime consumption and pairs well with activities requiring mental clarity. Preserving these genetics requires careful selection to maintain the signature elongated bud structure.

    Grower Guidance and Examples

    Provide consistent warmth of 78-85Β°F and humidity at 60-70% through mid-flower, then taper to 50%. Use a SCROG net to control the 2-3x stretch during the first four weeks of 12/12 lighting. One documented case involved a greenhouse grower achieving 600g per plant by feeding a 3-1-2 NPK ratio in veg transitioning to 1-4-5 in bloom, supplemented with molasses for terpene development. Extend the light cycle gradually in early veg to prevent premature flowering in these equatorial genetics.

    Jamaican Landrace: Balanced THC/CBD and Cultural Heritage

    Jamaican landraces carry a rich cultural legacy tied to the island’s reggae traditions. These balanced hybrids often show THC between 8-13% and CBD levels up to 2%, creating a harmonious effect that promotes relaxation without heavy sedation. Distinct flavors feature tropical fruit, sweet spice, and woody notes that stand out in the strain review landscape.

    Plants adapt well to both indoor and outdoor setups, flowering in 9-11 weeks. Their moderate potency makes them beginner-friendly while still offering therapeutic potential for mood enhancement and mild pain relief. Preserving Jamaican genetics helps maintain biodiversity in global cannabis collections.

    Specific Growing Tips

    Employ organic soil with added worm castings and bone meal for steady calcium. Space plants 3 feet apart outdoors to accommodate 5-7 foot heights. An indoor example shows successful results with 600W LED fixtures at 24 inches distance and a 10-week flowering cycle, yielding 400g per square meter when harvested at 10% amber trichomes. Avoid aggressive defoliation; instead, selectively remove lower fan leaves to improve airflow without stressing the balanced hybrid structure.

    Sourcing Authentic Landrace Seeds in 2026

    Locating genuine landrace seeds requires working with reputable banks that emphasize preservation over commercialization. Look for vendors providing detailed origin information, lab-tested cannabinoid profiles, and germination guarantees. Avoid sources offering suspiciously low prices or vague descriptions, as these often indicate hybridized stock mislabeled as landrace.

    Networking through grower communities and attending cannabis expos can reveal small-batch preservers. Always verify third-party lab results for THC and CBD content before purchase. In 2026, several established seed banks continue to focus on landrace preservation projects, offering reliable access to pure Afghan, Thai, and Jamaican varieties.

    Verification Checklist

    1. Request COAs showing exact THC/CBD ranges matching historical data.
    2. Confirm origin stories with photos of parental plants or grower testimonials.
    3. Test small batches first, tracking germination rates above 85%.

    Optimal Growing Practices for Landrace Varieties

    Successful cultivation of landraces begins with replicating their native conditions as closely as possible. Afghan strains prefer cooler nights and well-draining soil, while Thai varieties thrive in consistent warmth and high humidity. Jamaican plants respond well to organic nutrients and moderate training techniques that respect their natural height.

    Monitor environmental factors closely during the extended flowering periods common to sativas. Use organic pest management to preserve the strains’ natural resilience. Harvest timing should follow trichome development rather than strict calendars to capture peak cannabinoid and terpene expression. These practices ensure robust plants that reflect the authentic character of each landrace.

    Advanced Techniques

    • Implement companion planting with basil or marigolds for natural pest deterrence.
    • Track VPD levels between 0.8-1.2 kPa during flower for optimal resin production.
    • Save select seeds from the healthiest females each cycle to stabilize future crops.

    Conclusion

    Landrace cannabis strains provide home growers with time-tested genetics offering distinctive effects, rich flavors, and balanced cannabinoid profiles. By focusing on authentic sourcing and region-appropriate cultivation methods, enthusiasts can successfully incorporate these varieties into 2026 projects. Exploring Afghan, Thai, and Jamaican landraces connects modern cultivators with cannabis heritage while delivering reliable, enjoyable results season after season.

  • Cannabis Breeding Techniques 2026: Custom Strains Guide

    Cannabis Breeding Techniques 2026: Custom Strains Guide

    Cannabis Breeding Techniques 2026: Custom Strains Guide

    Experienced cannabis growers often seek to develop unique strains tailored to specific effects, flavors, or growing conditions. In 2026, breeding combines traditional methods with modern precision tools and sustainable practices. This guide covers parent selection, controlled pollination, seed stabilization, and seamless integration with standard seed-to-harvest workflows. By following structured approaches, cultivators can create consistent genetics that perform reliably across different environments while meeting personal or market demands for potency, aroma, and resilience.

    Selecting Ideal Parent Plants

    Choosing strong parent plants forms the foundation of successful breeding. Focus on phenotypes displaying desired traits such as high resin production, disease resistance, and terpene profiles. Evaluate both male and female candidates through multiple grow cycles to confirm genetic stability. Record detailed notes on growth patterns, flowering times, and environmental tolerances to guide selections. For instance, a grower might track how a particular female responds to nutrient fluctuations during weeks four through six of flower, noting any signs of stress that could indicate weaker genetics.

    Use genetic testing kits now widely available to home growers for deeper insights into cannabinoid ratios and potential recessive traits. Prioritize landrace or heirloom varieties when seeking novel genetics, but balance them with proven hybrids for vigor. Always quarantine new selections to prevent pest introduction into existing gardens. Practical guidance includes maintaining separate grow spaces for new acquisitions for at least two weeks, monitoring for spider mites or powdery mildew daily, and documenting visual inspections alongside lab results.

    Phenotype Evaluation and Record Keeping

    Implement a systematic evaluation process by growing at least ten seeds from each candidate line. Measure key metrics such as internode spacing, leaf morphology, and bud density at multiple stages. Use spreadsheets or dedicated breeding apps to log data points like yield per plant and resistance to common pathogens. This method helps identify standout individuals early, reducing wasted effort on unstable lines.

    Controlled Pollination Methods

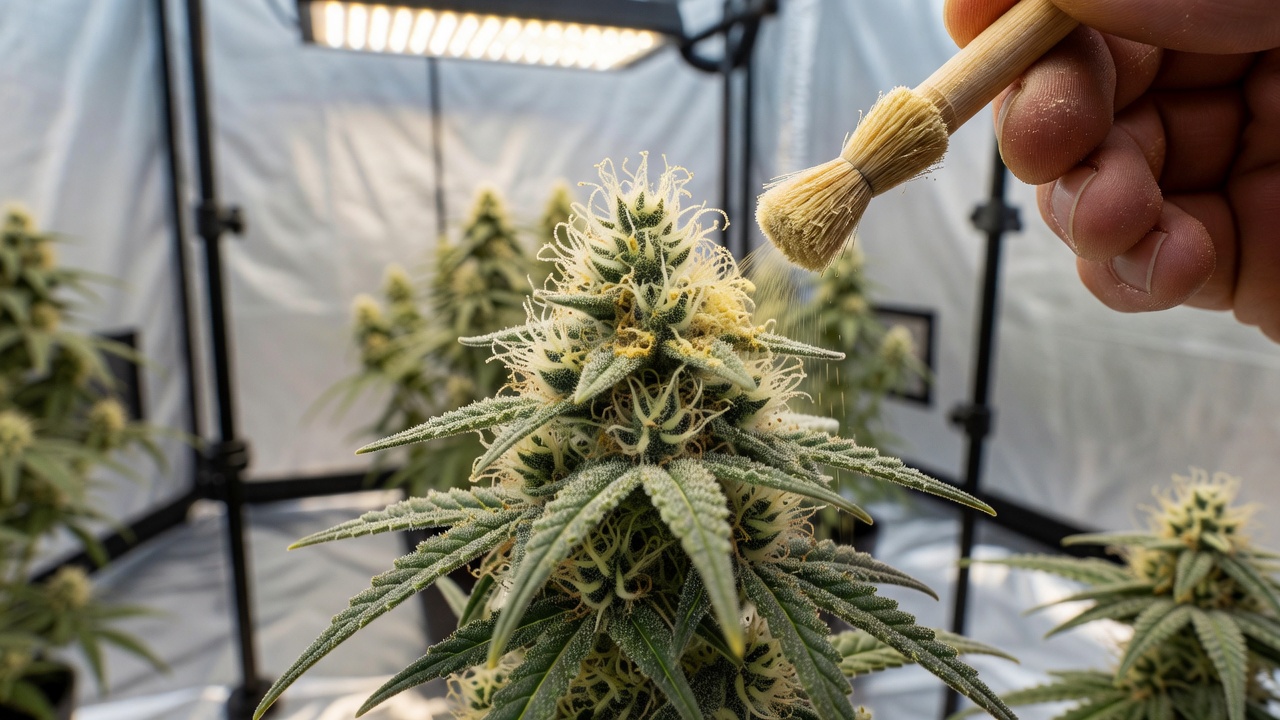
    Controlled pollination ensures targeted crosses without contamination. Isolate breeding pairs in dedicated tents or rooms equipped with HEPA filtration and precise climate controls. Collect pollen from selected males using gentle brushing techniques during peak release windows, typically weeks two through four of flowering. A concrete example involves selecting a male that produces abundant pollen sacs by day 18 of flower, then brushing collected grains onto a clean glass slide for storage in a desiccated container until needed.

    Apply pollen to female pistils with fine brushes or atomizers during optimal receptivity stages. Monitor humidity levels closely, maintaining 45-55% to encourage fertilization while discouraging mold.

    Label all crosses meticulously with dates, parent IDs, and environmental data for future reference and tracking. Growers can further refine this by creating a pollination schedule that staggers applications over three days to maximize seed set rates, often achieving 70-80% fertilization success when timing aligns with peak stigma receptivity.

    Step-by-Step Pollination Protocol

    1. Confirm male pollen viability by testing a small sample on a receptive female branch 48 hours prior to full application.
    2. Prepare females by removing lower branches to focus energy on upper pollination sites.
    3. Apply pollen in early morning hours when humidity naturally dips, then raise humidity slightly afterward to support fertilization.
    4. Seal the breeding area for 24 hours post-application to prevent stray pollen movement.

    Seed Collection and Stabilization

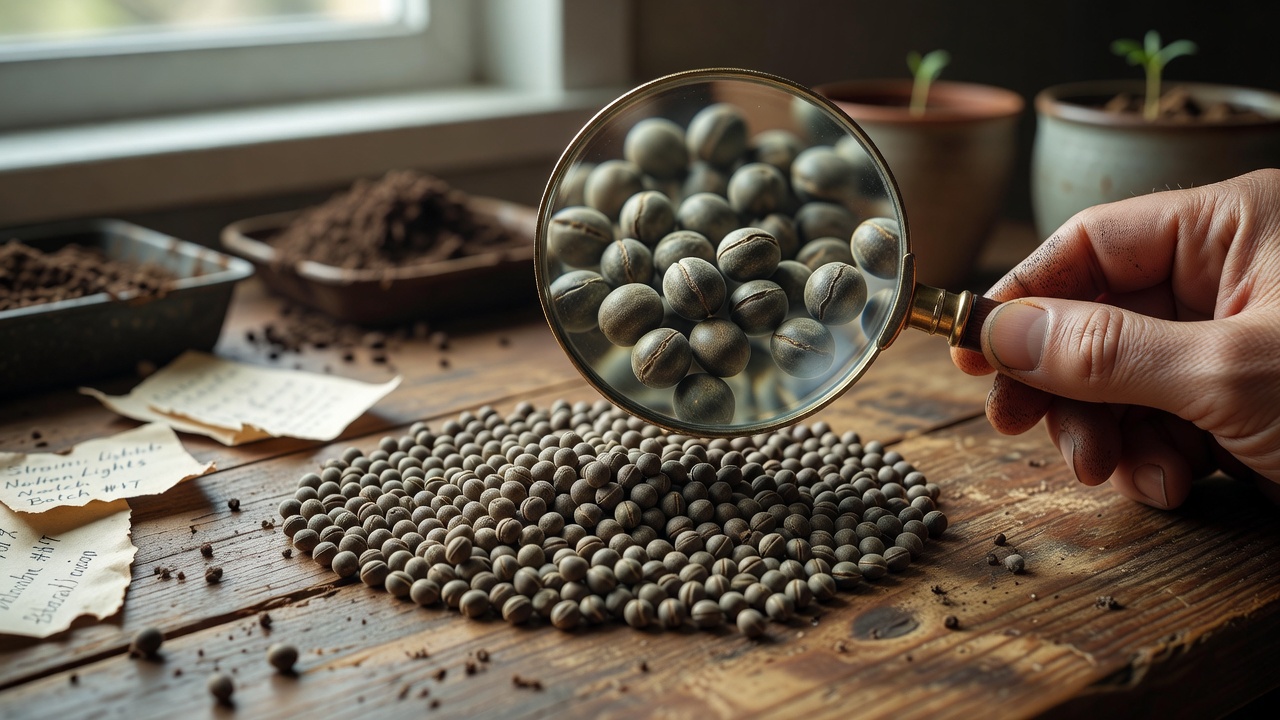
    Harvest seeds once calyxes swell and begin to split, usually eight to ten weeks post-pollination. Dry seeds thoroughly at low humidity before storage in cool, dark conditions. Initial F1 seeds often show hybrid vigor but require stabilization through successive generations to lock in desired traits. For practical illustration, a grower might collect 200 seeds from a single successful cross, then germinate 50 immediately while storing the rest at 4Β°C with silica gel packets to maintain viability for up to three years.

    Stabilize lines by backcrossing or selfing over three to five generations while culling outliers. Employ 2026-recommended LED spectrum tuning during seed production to enhance viability and uniformity. Test small batches for germination rates above 85% before scaling up production. Clear explanations of this process show that each generation reduces phenotypic variation; for example, selecting only plants that finish flowering within a five-day window by F3 helps create more predictable harvest schedules.

    Integrating Breeding with Standard Growing Workflows

    Blend breeding projects into routine seed grows by dedicating specific zones within larger operations. Start with regular photoperiod or autoflower seeds, then introduce select males only after confirming female performance in the main garden. This phased approach minimizes disruption while allowing data collection across environments. One effective example involves running a 4×4 foot breeding tent alongside a larger production room, using identical nutrient schedules so any resulting seeds perform consistently when scaled up.

    Track all plants using digital apps synced with sensor networks for real-time environmental logging. Rotate breeding stock through the same nutrient regimens and training techniques used for production crops to ensure compatibility. Many growers now incorporate automated monitoring systems that flag stress indicators early, supporting healthier breeding outcomes. Lists of compatible training methods include low-stress training for even canopy development and defoliation timed to match production cycles.

    2026 Cultivation Best Practices

    Adopt regenerative soil practices and organic amendments to support robust genetic expression. Utilize beneficial microbe inoculants and companion planting to reduce reliance on synthetic inputs. Energy-efficient HVAC and smart controllers help maintain optimal conditions while lowering operational costs. Concrete guidance recommends mixing compost teas weekly and planting basil or marigolds nearby to naturally deter pests without affecting cannabinoid profiles.

    Stay compliant with evolving local regulations by documenting all breeding activities. Source information from authoritative bodies such as the National Institutes of Health for research-backed insights on plant genetics. Experiment with emerging tissue culture techniques for virus-free clones of prized breeding stock. These practices ensure long-term sustainability and help maintain genetic integrity across multiple seasons.

    Conclusion

    Breeding custom cannabis strains rewards patience and meticulous record-keeping. By applying 2026 best practices in parent selection, pollination, and stabilization, home growers can produce distinctive varieties that stand out. Integrate these techniques thoughtfully into existing workflows to expand your genetic library sustainably and successfully. Consistent application of these methods leads to reliable seed banks that deliver repeatable results year after year.

  • Sativa vs Indica: Stability Factors for Buying Reliable Cannabis Seeds

    Sativa vs Indica: Stability Factors for Buying Reliable Cannabis Seeds

    Choosing the right cannabis seeds starts with understanding the core differences between sativa and indica genetics. For home growers, stability is the hidden factor that determines whether a strain delivers predictable results or surprises that can waste an entire cycle. This guide explores how these two primary types compare, what stability means in practical terms, and how to source seeds that perform reliably year after year. Home cultivation success often hinges on matching genetics to your specific environment, available time, and desired effects, turning what could be a gamble into a repeatable process.

    Core Genetic Differences Between Sativa and Indica

    Sativa Characteristics and Cultivation Needs

    Sativa genetics typically produce tall plants with narrow leaves and longer flowering times that can stretch 10 to 16 weeks. They often deliver uplifting effects that many enthusiasts associate with daytime use and creative activities. In practice, a pure sativa like an original Durban Poison landrace may reach heights of 8 feet indoors unless managed with techniques such as topping or low-stress training. Growers with limited vertical space should plan for at least 4 feet of clearance above the canopy during the stretch phase, or they risk plants outgrowing tents and lights.

    Indica Characteristics and Cultivation Needs

    Indica varieties, by contrast, stay shorter and bushier with broader leaves and faster flowering periods of 7 to 9 weeks. Their effects are frequently described as more relaxing and body-focused, suiting evening use. A classic Afghan indica might finish at just 3 to 4 feet, making it ideal for small closets or balconies. These traits are rooted in landrace origins but have been shaped by decades of selective breeding that refined yield and resilience.

    Modern hybrid crosses blur these lines, yet the underlying genetic tendencies remain important for cultivation planning. Growers must match plant structure and flowering speed to their available space and climate. For example, a sativa-dominant hybrid in a northern climate with short summers may never finish outdoors before frost arrives. Understanding these fundamentals helps avoid mismatches that lead to poor yields or management issues, such as constant pruning or supplemental lighting.

    Why Genetic Stability Matters for Home Growers

    Stability refers to how consistently a seed produces plants with the expected traits across multiple generations. Unstable seeds can result in uneven growth, varying cannabinoid profiles, or hermaphroditic tendencies that ruin harvests. In 2026, premium seed banks invest heavily in stabilization techniques such as backcrossing and phenotype selection to minimize variation, often running 5 to 8 generations of testing before release.

    Key stability indicators include uniform germination rates above 90 percent, consistent plant height within a 6-inch range, and predictable flowering times that vary by no more than 5 days. When evaluating seed listings, look for detailed lineage information and third-party testing data showing cannabinoid percentages and genetic markers. Stable genetics reduce risk and allow growers to focus on optimization rather than troubleshooting surprises, such as one plant finishing two weeks earlier than its siblings.

    Selecting Seeds from Reputable Seed Banks

    Not all seed banks maintain the same standards for genetic preservation. Prioritize vendors that publish lab results for germination viability and genetic markers, including batch-specific certificates. Established banks often offer detailed grow guides and customer support that reflect their commitment to quality, such as email consultations on nutrient schedules. Checking for organic certification or membership in industry associations adds another layer of confidence.

    Always verify that seeds are sold as regular, feminized, or autoflowering according to your needs. Feminized seeds offer convenience for beginners by eliminating males, yet regular seeds provide greater genetic diversity for advanced breeding projects. Reading recent grow reports from other users on forums supplies real-world insight into stability performance, revealing whether a strain truly lives up to its advertised height or effect profile.

    Advanced Techniques for Consistent Strain Performance

    Experienced growers employ several methods to further ensure reliable outcomes. Phenotype hunting involves growing multiple seeds from the same batch and selecting the best-performing mother plants for cloning. This approach locks in desirable traits and improves future consistency across harvests.

    • Test small batches of 3 to 6 seeds before committing to large grows of 12 or more plants.
    • Document growth metrics such as internode spacing, resin production, and leaf width in a simple notebook or spreadsheet.
    • Use tissue culture techniques when available to preserve elite genetics without repeated seed purchases.
    • Monitor environmental variables closely during the first few cycles, adjusting humidity from 60 percent in veg to 45 percent in flower.

    These steps transform a simple purchase into a long-term strategy for robust results. Many home cultivators now maintain private seed libraries built from proven stable lines, rotating two or three reliable varieties each year.

    Common Stability Pitfalls and How to Avoid Them

    One frequent mistake is chasing trendy new crosses without verifying their stabilization history. Novel hybrids may look appealing on paper but often require several generations of selection before they become reliable. Another issue arises from improper storage after purchase, such as leaving seeds in warm, humid drawers, which can degrade seed viability and apparent stability within months.

    Always purchase from sources that provide fresh stock and clear storage recommendations, like keeping seeds in cool, dark glass vials. Cross-reference multiple seed bank reviews and avoid deals that seem unusually cheap, as they frequently indicate older or poorly stabilized inventory. For authoritative background on cannabis breeding science, consult resources from government research databases.

    Conclusion: Building a Reliable Grow With Stable Genetics

    Mastering sativa and indica differences alongside stability evaluation empowers home growers to achieve consistent, high-quality results. By focusing on reputable seed banks, applying advanced selection techniques, and avoiding common pitfalls, cultivators can develop strains that perform reliably across multiple seasons. The investment in stable genetics pays dividends through better yields and fewer cultivation headaches, setting the foundation for successful home growing in 2026 and beyond.

  • Must-Have Tools for First-Time Cannabis Growers

    Must-Have Tools for First-Time Cannabis Growers

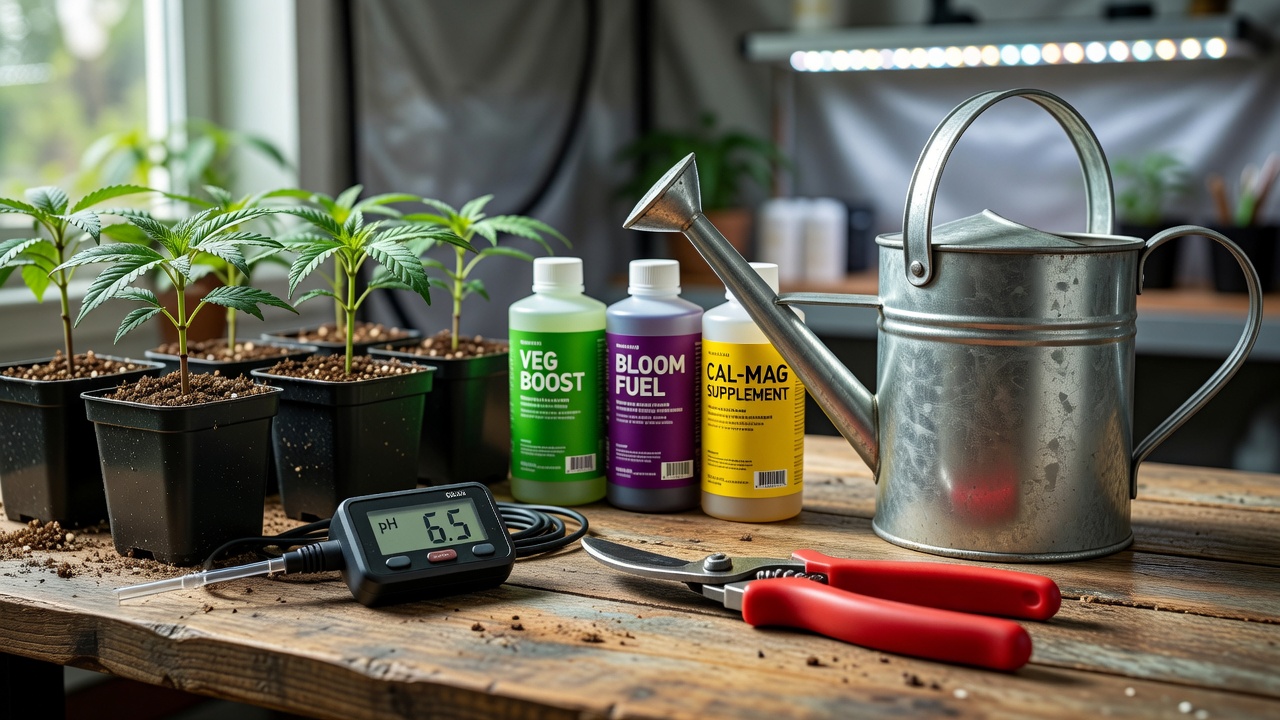
    Starting your first cannabis grow can feel overwhelming, but having the right tools makes the process straightforward and rewarding. This guide focuses on must-have equipment that keeps setups simple, budget-friendly, and effective for home enthusiasts. With these basics, beginners can create optimal conditions without unnecessary complexity or high costs. Many new growers succeed by starting with a modest four-plant tent and gradually scaling up after their first successful harvest. The emphasis remains on reliable gear that delivers consistent results rather than flashy extras that inflate expenses.

    Choosing the Right Lighting System

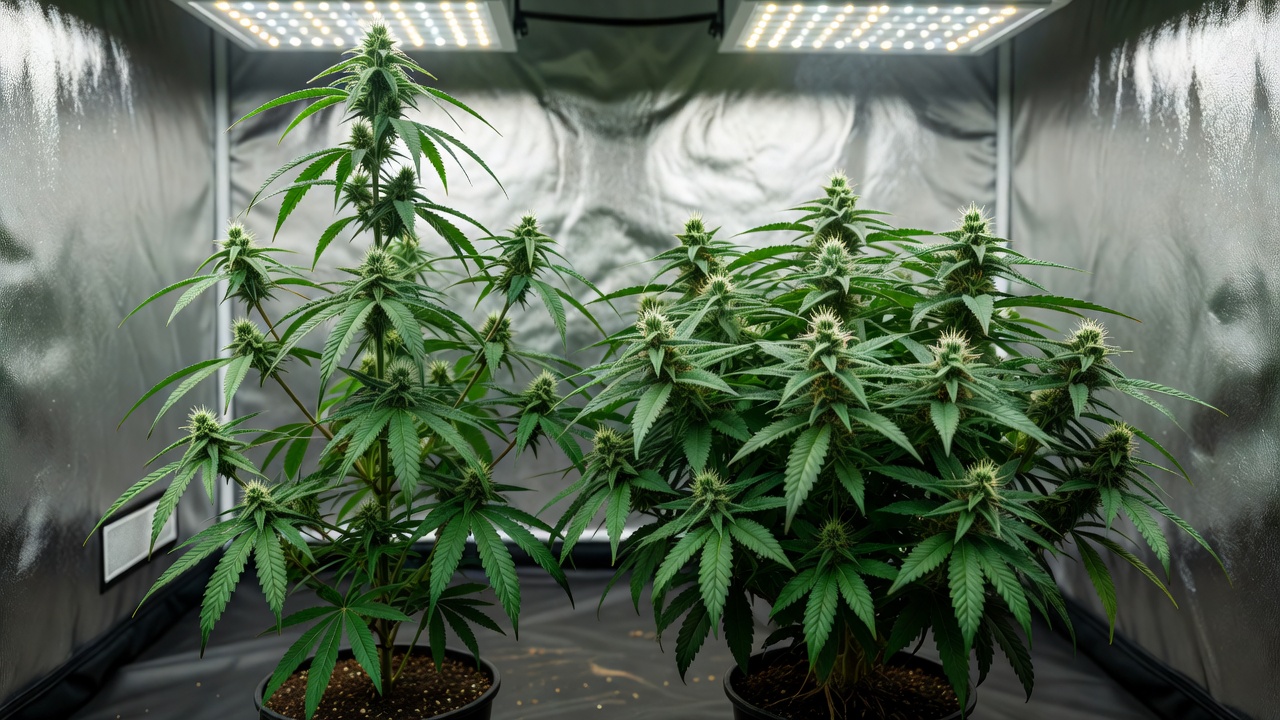
    Lighting forms the foundation of any indoor cannabis grow. Beginners should prioritize full-spectrum LED grow lights because they are energy-efficient and produce less heat than older options like HID bulbs. A 300-600 watt LED panel works well for small spaces of four to six plants. Position lights 18 to 24 inches above seedlings and adjust as plants mature to avoid light burn. Timers automate the 18/6 vegetative and 12/12 flowering schedules, ensuring consistency without daily intervention.

    Practical Lighting Setup Example

    Consider a 4×4 foot tent where a 450-watt LED provides even coverage. Hang the fixture using adjustable ratchet ropes so you can raise it easily as plants stretch. During week one of vegetative growth, keep the light 20 inches above the canopy; by week four, raise it to 24 inches. Check weekly for light burn signs such as upward-curling leaf tips or bleached spots. If stress appears, dim the fixture or increase distance immediately. Quality lighting directly influences yields and plant health. Affordable models from reputable brands often include built-in fans for cooling. Always measure canopy distance weekly and monitor for signs of stress such as yellowing leaves. This investment pays off quickly through healthier growth cycles.

    Selecting Containers and Growing Mediums

    Containers and mediums determine root development and nutrient uptake. Fabric pots or five-gallon plastic buckets with drainage holes suit most beginners. Fabric pots promote air pruning, preventing root circling while allowing better oxygenation. Start with quality potting soil amended with perlite for aeration, avoiding heavy garden soils that compact easily.

    Medium and Container Guidance

    Medium choice impacts watering frequency and pH stability. Organic options like coco coir blends offer forgiveness for new growers. Fill containers three-quarters full and transplant seedlings carefully to minimize shock. These affordable choices support robust root systems essential for later stages. A simple soil recipe mixes two parts quality potting soil, one part perlite, and one part compost. Water thoroughly after transplanting and wait until the top inch of medium feels dry before the next watering. Fabric pots dry faster than plastic, so check moisture daily during hot periods. This approach prevents both overwatering and underwatering while encouraging strong lateral root growth.

    Nutrients and Feeding Supplies

    Cannabis plants require balanced nutrients at each growth phase. A basic three-part liquid fertilizer set covering grow, bloom, and micro elements covers most needs without specialized additives. Begin with half-strength doses during the first weeks to prevent burn, then follow manufacturer schedules. Measuring spoons and mixing buckets ensure accurate application.

    Feeding Schedule Example

    Organic alternatives such as compost teas provide gentle feeding. Store nutrients in cool, dark places and shake bottles before use. Proper feeding supports vigorous foliage and dense buds while keeping costs low for home setups. In week three of vegetative growth, mix one teaspoon of grow formula per gallon of water and apply every other watering. During flowering, switch to bloom formula at full strength while monitoring leaf color. If tips yellow, flush with plain pH-balanced water for one cycle. Keep a notebook logging each feeding date, amount, and plant response to refine future applications.

    Monitoring and Climate Control Tools

    Accurate monitoring prevents common beginner mistakes. A digital thermometer-hygrometer tracks temperature and humidity in real time. Ideal ranges sit between 70-85Β°F during vegetative growth and 60-75Β°F in flowering, with humidity tapering from 60% to 40%. Small clip-on fans circulate air and strengthen stems without creating harsh drafts.

    Climate Management Tips

    Exhaust fans paired with carbon filters manage odor and fresh air exchange. These tools maintain stable environments critical for photosynthesis and disease prevention. Beginners benefit from simple plug-in models that require minimal setup. Place one fan at canopy level for gentle movement and another near the intake for fresh air. If humidity spikes above 65% during flowering, add a small dehumidifier. Record daily readings in a log so you can spot trends and adjust before problems develop, such as mold on lower leaves.

    Watering and pH Management Essentials

    Water quality and pH balance affect nutrient absorption. A digital pH meter provides quick readings, targeting 6.0-7.0 for soil grows. pH up and down solutions allow precise adjustments. Watering cans with fine spouts deliver moisture evenly, while collection trays catch runoff to protect floors.

    Daily Watering Routine

    Let tap water sit overnight to dissipate chlorine. Test pH before every feeding session. Consistent management avoids lockout issues and supports steady progress from seed to harvest. Water until 10-20% of the volume drains from the bottom, then test that runoff pH. If it drifts outside the target range, adjust the next watering accordingly. This simple check catches problems early and keeps plants healthy through the entire cycle.

    Pruning and Maintenance Tools

    Basic hand tools keep plants tidy and productive. Sharp pruning shears make clean cuts that heal quickly, reducing infection risk. Training ties and stakes support branches during flowering when buds add weight. Gloves protect hands during handling of sticky resins.

    Maintenance Techniques

    Regular maintenance removes lower growth and improves light penetration. These inexpensive items extend throughout multiple grows, proving their value over time. In week four of vegetative growth, remove the lowest two sets of leaves to boost airflow. Use soft plant ties for low-stress training by gently bending branches and securing them horizontally. Always sterilize shears with isopropyl alcohol between plants to prevent disease spread. These steps increase yields and keep the canopy manageable in small spaces.

    Conclusion

    Equipping a beginner cannabis garden with these targeted tools creates a solid foundation for success. Focus on quality basics rather than excess gadgets to maintain simplicity and affordability. With consistent application of lighting, mediums, nutrients, monitoring, and maintenance equipment, first-time growers achieve satisfying results. For additional guidance on safe practices, consult resources from epa.gov and nih.gov. Start small, observe your plants closely, and refine techniques each cycle. Documenting every grow allows you to repeat successes and correct mistakes efficiently in future runs.

  • Organic Soil Prep Guide for Outdoor Cannabis Cultivation

    Organic Soil Prep Guide for Outdoor Cannabis Cultivation

    Preparing organic soil is the foundation of successful outdoor cannabis cultivation. In 2026, home growers increasingly turn to sustainable methods that avoid synthetic chemicals while boosting plant health and yields. This guide walks you through testing soil, selecting natural amendments, mastering composting techniques, and balancing pH levels for robust growth. By investing time upfront in soil preparation, cultivators create an environment where roots access steady nutrition, leading to resilient plants and higher-quality harvests season after season.

    Why Organic Soil Matters for Outdoor Cannabis

    Organic soil supports thriving microbial life that delivers nutrients steadily to cannabis roots. Unlike chemical fertilizers, it builds long-term fertility and improves water retention in outdoor beds. Home growers benefit from reduced costs and healthier plants that resist pests naturally. Living soil also buffers against weather extremes common in raised beds or in-ground plots.

    By focusing on living soil, cultivators mimic natural ecosystems. This approach enhances terpene profiles and cannabinoid potency without environmental harm. Sustainable practices also align with regulations favoring eco-friendly methods. Many experienced growers report that plants grown in well-prepared organic beds require fewer interventions for pests or nutrient issues compared to those started in depleted native dirt.

    Testing Soil pH and Composition

    Begin by assessing your native soil with a reliable pH meter or test kit. Cannabis thrives in slightly acidic conditions between 6.0 and 7.0. Collect samples from multiple spots in your growing area at a depth of 6-8 inches. Mix the samples thoroughly before testing to obtain an average reading that represents the entire bed.

    Send samples to a local extension service for detailed nutrient analysis. Results reveal deficiencies in nitrogen, phosphorus, or potassium. Adjust based on findings before adding amendments. For example, a soil test showing low nitrogen might prompt adding aged manure, while phosphorus shortages call for bone meal or rock phosphate. Always retest after amendments settle to confirm the target range.

    Regular testing every season prevents imbalances. Record data to track improvements over time. This step ensures your soil supports vigorous vegetative growth and heavy flowering. Growers who skip this step often discover problems only after plants show yellowing leaves or stunted buds, wasting weeks of the season.

    Selecting Natural Amendments

    Common organic amendments include composted manure, bone meal, and kelp. These materials supply essential minerals while feeding soil biology. Worm castings add beneficial microbes that aid nutrient uptake. Choosing the right combination depends on your soil test results and the specific needs of cannabis during vegetative and flowering stages.

    • Composted chicken manure for nitrogen boostβ€”apply 2-3 inches worked into the top 6 inches of soil before planting
    • Rock phosphate for phosphorusβ€”use 5 pounds per 100 square feet in phosphorus-deficient beds
    • Greensand for potassium and trace mineralsβ€”spread 10 pounds per 100 square feet for long-term availability
    • Biochar to improve structure and retain moistureβ€”mix 5-10% by volume into new beds for better aeration

    Source amendments from reputable suppliers to avoid contaminants. Apply them sparingly at first and monitor plant response. Over-amending can disrupt soil balance. Start with half the recommended rate on a small test plot, then scale up once you observe healthy green growth and strong root development.

    Composting Techniques for Cannabis Soil

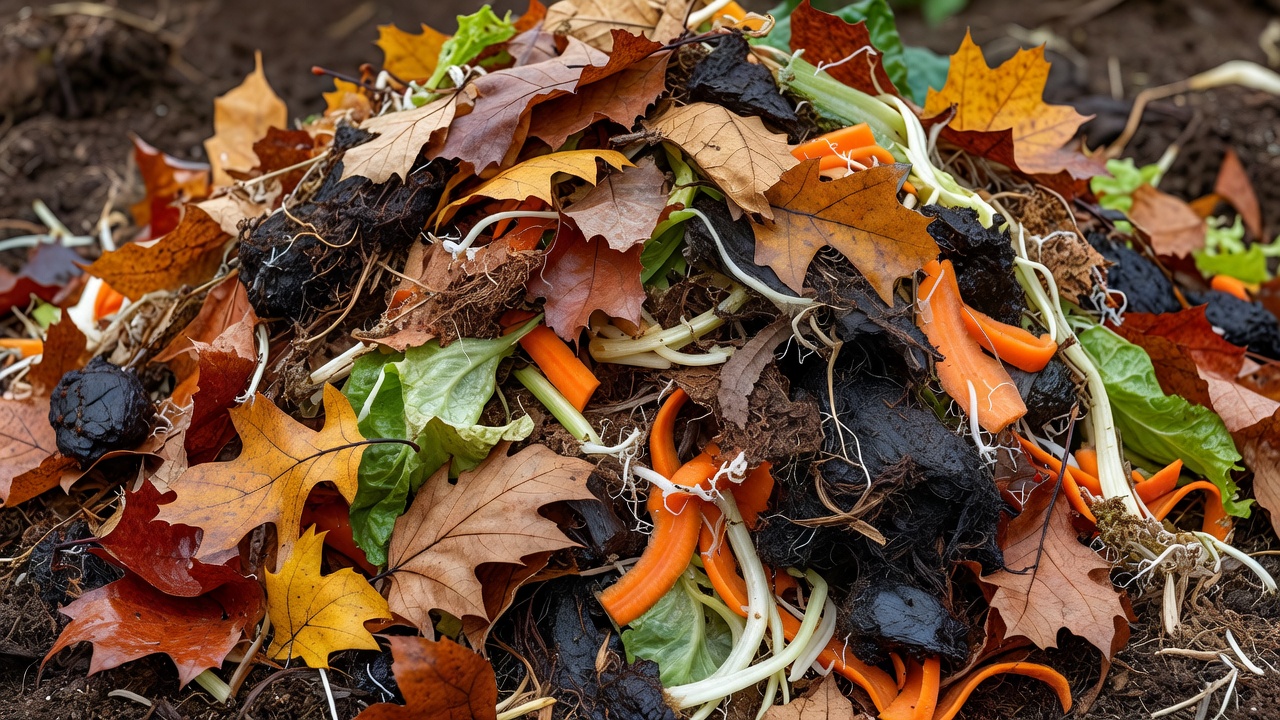
    Hot composting accelerates breakdown of kitchen scraps, yard waste, and manure. Maintain temperatures around 140Β°F by turning piles weekly. This kills pathogens and creates rich humus ideal for cannabis. Use a compost thermometer to track heat and add water as needed to maintain 50-60% moisture, similar to a wrung-out sponge.

    Cold composting suits slower, low-maintenance setups. Layer browns and greens in bins or directly in beds. Add finished compost to soil mixes at a 30% ratio for optimal results. Many growers build dedicated bins near their garden for easy access throughout the year.

    Monitor moisture levels to keep piles damp but not soggy. Aeration prevents odors and speeds decomposition. In six months, you will have dark, earthy compost ready for your outdoor plots. A practical example is layering 6 inches of leaves, 3 inches of kitchen scraps, and a thin layer of manure, then turning the pile every 7-10 days until it cools and crumbles easily between your fingers.

    Mixing and Preparing Your Soil Beds

    Combine tested native soil with compost and amendments in raised beds or amended ground plots. Aim for a loamy texture that drains well yet holds moisture. Incorporate materials to a depth of 12 inches. For a standard 4×8 raised bed, this typically means blending 6 cubic feet of compost with your existing soil and chosen amendments.

    Top-dress with mulch such as straw or wood chips to suppress weeds and retain humidity. This protects soil life from temperature swings common in outdoor settings. Apply a 2-3 inch layer after planting to avoid smothering young seedlings.

    Allow the mix to settle for two weeks before planting. Water lightly to activate microbes. Proper preparation leads to faster establishment and stronger plants throughout the season. Growers who rush this step often notice slower root growth and increased transplant shock.

    Sustainable Practices to Enhance Yields

    Rotate crops annually and introduce cover crops like clover between seasons. These practices fix nitrogen and prevent erosion. Avoid tilling excessively to preserve soil structure. Planting clover in fall and chopping it into the soil in spring adds free nitrogen for the next cannabis crop.

    Integrate companion planting with herbs that deter insects. Collect rainwater for irrigation to reduce reliance on municipal sources. Document yields to refine methods each year. Simple records of amendment rates, rainfall, and final harvest weights help identify what works best in your specific microclimate.

    Resources from the EPA and USDA provide additional guidance on organic standards. These approaches deliver consistent results while protecting the environment. Many home growers also join local organic gardening groups to exchange region-specific tips and troubleshoot issues together.

    Conclusion

    Mastering organic soil preparation transforms outdoor cannabis cultivation into a rewarding, sustainable endeavor. Through careful testing, thoughtful amendments, and diligent composting, growers achieve superior yields naturally. Start small, observe results, and scale successful techniques for future seasons. With consistent attention to soil health, your outdoor garden can produce robust plants year after year while supporting a healthy local ecosystem.

We use cookies to improve your experience and analyse site traffic. See our Privacy Policy and Cookie Policy for details.