
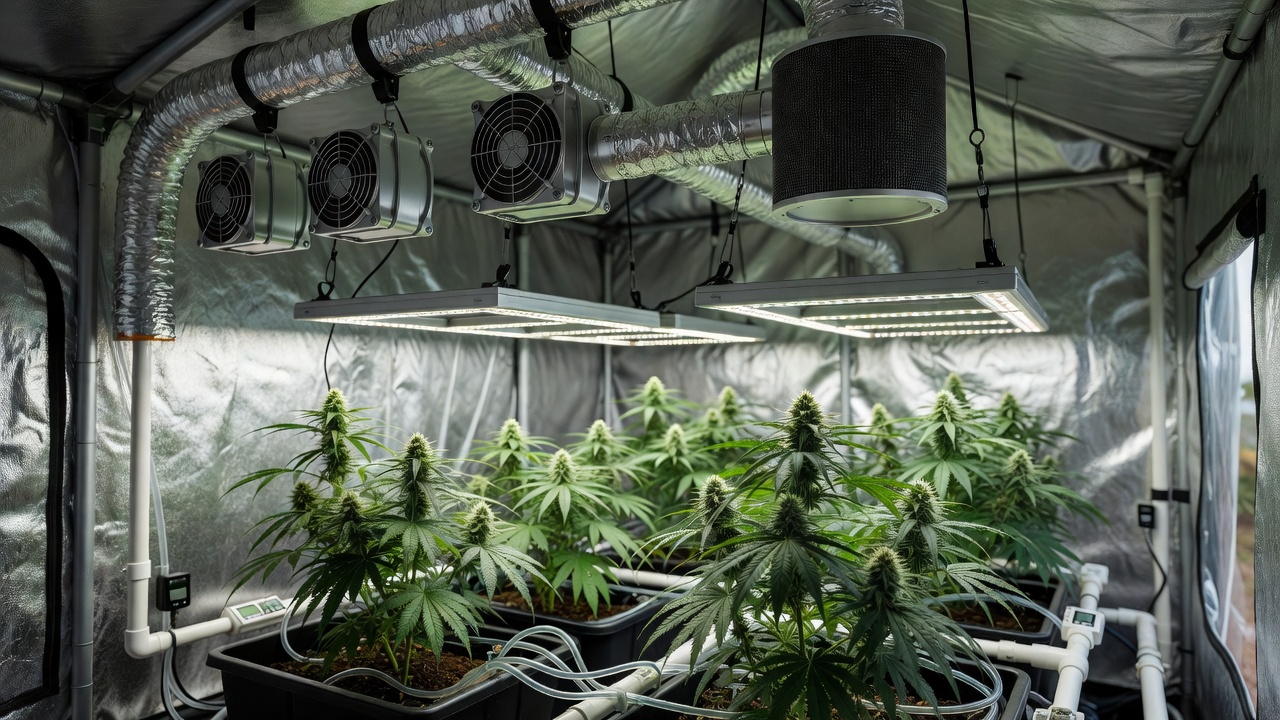
Introduction to Optimal Airflow in Indoor Cannabis Cultivation
Proper ventilation is the backbone of successful indoor cannabis growing, especially inside grow tents where space is limited and environmental control is critical. Without adequate airflow, growers face issues like stagnant air, excess humidity, mold outbreaks, and poor plant health that directly reduce yields. This guide focuses on selecting and installing fans, carbon filters, and ducting while calculating air exchange rates for home setups using various indoor seeds and hydroponic systems.
In 2026, home growers continue to refine techniques that integrate mechanical ventilation with hydroponics to maintain ideal conditions. Effective airflow removes heat from lights, replenishes CO2, and controls odors, all while supporting robust growth from seed to harvest. Whether you are running a small 2×2 tent or a larger 4×4 setup, understanding these components ensures your plants thrive without common pitfalls. For example, a beginner using photoperiod seeds in a 2×2 tent can avoid stunted growth by installing a 150 CFM exhaust fan from day one rather than upgrading later.
Understanding Airflow Requirements for Grow Tents
Airflow in a grow tent serves multiple purposes: it regulates temperature and humidity, prevents mold and mildew, and strengthens plant stems through gentle movement. Cannabis plants in hydroponic systems transpire heavily, releasing moisture that must be extracted quickly to avoid fungal issues. Ideal conditions typically include temperatures between 70-80°F during lights-on and humidity levels of 40-60% depending on the growth stage.
Stale air pockets can form in corners or behind equipment, leading to uneven growth and reduced potency in buds. By planning ducting routes and fan placement early, growers create a consistent environment that supports high yields from popular indoor seed varieties. This foundational knowledge helps avoid costly mistakes when scaling up operations. Consider a practical example where a grower places an oscillating fan at canopy height in a 3×3 tent to eliminate dead zones, resulting in more uniform bud development across all plants.
Key Environmental Targets by Growth Stage
Seedlings prefer 75-80°F with 60-70% humidity, while vegetative plants thrive at 70-78°F and 50-60% humidity. During flowering, drop humidity to 40-50% to protect dense buds. Monitoring with a digital hygrometer placed at mid-canopy level gives accurate readings every few hours.
Calculating Air Exchange Rates Accurately
To determine the right equipment size, calculate your tent’s air exchange rate, often expressed in cubic feet per minute (CFM). Measure the tent volume by multiplying length, width, and height in feet, then multiply by 1.5 to 3 for standard exchange every minute, adjusting higher for hydroponic setups with elevated humidity. For example, a 4x4x6.5-foot tent requires roughly 300-400 CFM to maintain optimal conditions.
Factor in additional variables such as light heat output, number of plants, and external climate. Online calculators from grow suppliers provide starting points, but always add 20% buffer capacity for filters and ducting resistance. Accurate calculations prevent under-ventilation that invites mold or over-ventilation that stresses plants and wastes energy. A concrete walkthrough: for a 2x2x5-foot tent (50 cubic feet), multiply by 2 for 100 CFM base, then add 20% to reach 120 CFM, ensuring reliable performance even during peak summer heat.
Selecting Fans, Carbon Filters, and Ducting
Choose inline exhaust fans rated for continuous duty with quiet operation suitable for residential spaces. Pair them with activated carbon filters sized to match fan CFM, ensuring odor control without restricting airflow. Rigid or semi-rigid ducting minimizes bends that reduce efficiency, while insulated options help manage condensation in cooler rooms.
Look for energy-efficient models with variable speed controls for fine-tuning. For hydroponic integration, select fans that can handle the higher moisture loads from reservoirs and grow mediums. Quality components last longer and deliver consistent performance across multiple grow cycles with different indoor seeds. Growers often report success pairing a 6-inch 250 CFM fan with a matching carbon filter in 4×4 tents, using 8-foot runs of insulated ducting to reach a nearby window without excessive noise.
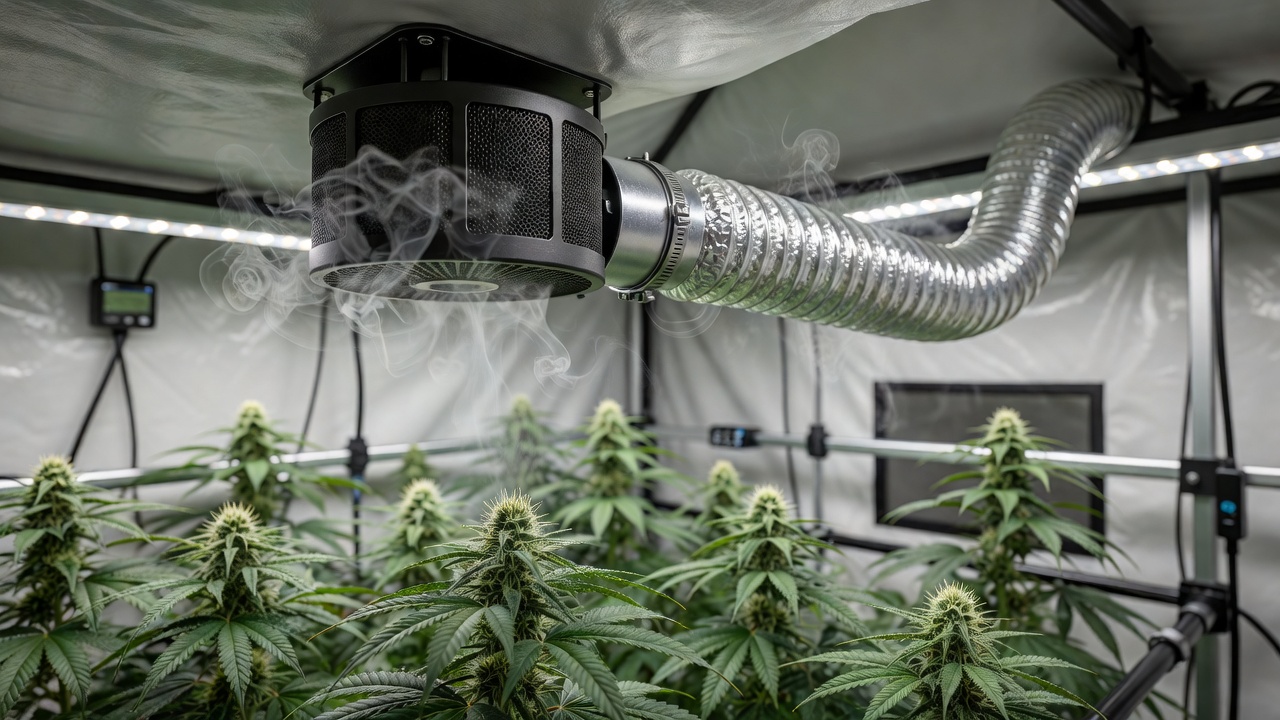
Step-by-Step Installation Process
Begin by mounting the carbon filter at the top of the tent for efficient heat and odor extraction. Connect it to the inline fan using ducting clamps, then route exhaust outside or through a window. Intake fans or passive vents at the bottom create negative pressure that pulls fresh air through the canopy.
Secure all connections tightly and test the system before introducing plants. Position oscillating fans inside the tent to circulate air around leaves without direct blasts that can cause windburn. In hydroponic setups, ensure ducting avoids splashing water to prevent electrical hazards and maintain system cleanliness. A useful tip is to run the full system for 24 hours with a thermometer and hygrometer logging data, confirming temperature drops of at least 5-8°F after lights activate.
- Measure and mark mounting points for the filter and fan.
- Install the filter high and the fan immediately after it.
- Route ducting with minimal 90-degree bends.
- Add bottom intake vents or a second small fan.
- Position two oscillating fans at opposite corners.
Integrating Ventilation with Hydroponic Systems
Hydroponics demands precise humidity management because roots and reservoirs add extra moisture. Coordinate exhaust timing with irrigation cycles to expel humid air immediately after feeding. Use environmental controllers that link fans to sensors monitoring temperature, humidity, and VPD for automated adjustments.
This integration maximizes yields by keeping nutrient uptake efficient and preventing root rot or leaf issues common in poorly ventilated tents. Regular monitoring ensures the system adapts as plants grow larger and transpire more during flowering stages. For instance, setting an exhaust fan to ramp up for 30 minutes post-irrigation in a deep-water culture setup prevents humidity spikes above 65% that could trigger powdery mildew.
Maintenance Tips and Yield Optimization
Inspect filters monthly and replace carbon every 12-18 months or when odors return. Clean fan blades and duct interiors to remove dust buildup that reduces performance. Monitor for mold signs like white powdery residue and adjust airflow immediately if detected.
Consistent maintenance paired with proper air exchange supports vigorous growth and higher cannabinoid production. Many experienced growers report 20-30% yield increases after optimizing their ventilation setups. For authoritative guidance on indoor air quality principles applicable to grow spaces, refer to resources from the EPA and mold prevention advice at the CDC. Practical routines include vacuuming fan grills weekly and checking duct seals quarterly to sustain peak efficiency.
Conclusion
Mastering fans, carbon filters, and ducting transforms grow tent performance for cannabis enthusiasts. By calculating exchange rates correctly and integrating ventilation with hydroponics, home growers prevent mold while achieving maximum yields from their chosen indoor seeds. Consistent application of these practices leads to healthier plants and more satisfying harvests year after year.