Starting your first cannabis grow can feel overwhelming, but having the right tools makes the process straightforward and rewarding. This guide focuses on must-have equipment that keeps setups simple, budget-friendly, and effective for home enthusiasts. With these basics, beginners can create optimal conditions without unnecessary complexity or high costs. Many new growers succeed by starting with a modest four-plant tent and gradually scaling up after their first successful harvest. The emphasis remains on reliable gear that delivers consistent results rather than flashy extras that inflate expenses.
Choosing the Right Lighting System
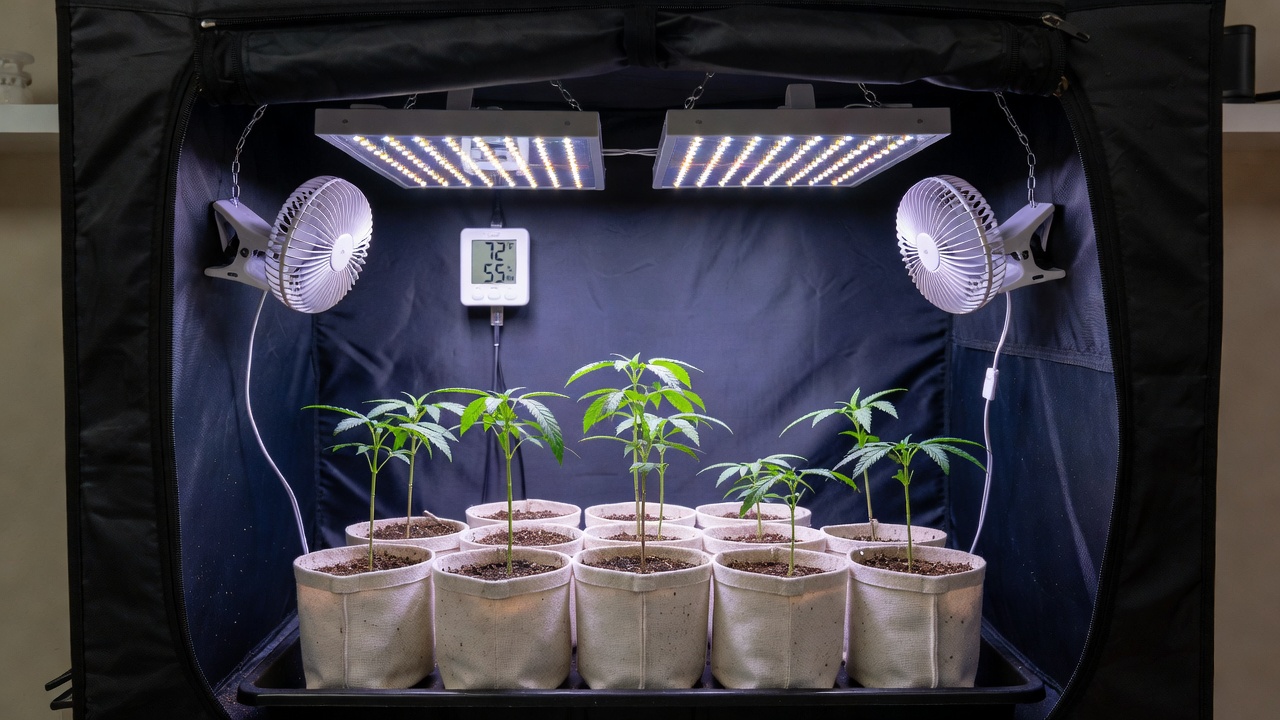
Lighting forms the foundation of any indoor cannabis grow. Beginners should prioritize full-spectrum LED grow lights because they are energy-efficient and produce less heat than older options like HID bulbs. A 300-600 watt LED panel works well for small spaces of four to six plants. Position lights 18 to 24 inches above seedlings and adjust as plants mature to avoid light burn. Timers automate the 18/6 vegetative and 12/12 flowering schedules, ensuring consistency without daily intervention.
Practical Lighting Setup Example
Consider a 4×4 foot tent where a 450-watt LED provides even coverage. Hang the fixture using adjustable ratchet ropes so you can raise it easily as plants stretch. During week one of vegetative growth, keep the light 20 inches above the canopy; by week four, raise it to 24 inches. Check weekly for light burn signs such as upward-curling leaf tips or bleached spots. If stress appears, dim the fixture or increase distance immediately. Quality lighting directly influences yields and plant health. Affordable models from reputable brands often include built-in fans for cooling. Always measure canopy distance weekly and monitor for signs of stress such as yellowing leaves. This investment pays off quickly through healthier growth cycles.
Selecting Containers and Growing Mediums
Containers and mediums determine root development and nutrient uptake. Fabric pots or five-gallon plastic buckets with drainage holes suit most beginners. Fabric pots promote air pruning, preventing root circling while allowing better oxygenation. Start with quality potting soil amended with perlite for aeration, avoiding heavy garden soils that compact easily.
Medium and Container Guidance
Medium choice impacts watering frequency and pH stability. Organic options like coco coir blends offer forgiveness for new growers. Fill containers three-quarters full and transplant seedlings carefully to minimize shock. These affordable choices support robust root systems essential for later stages. A simple soil recipe mixes two parts quality potting soil, one part perlite, and one part compost. Water thoroughly after transplanting and wait until the top inch of medium feels dry before the next watering. Fabric pots dry faster than plastic, so check moisture daily during hot periods. This approach prevents both overwatering and underwatering while encouraging strong lateral root growth.
Nutrients and Feeding Supplies
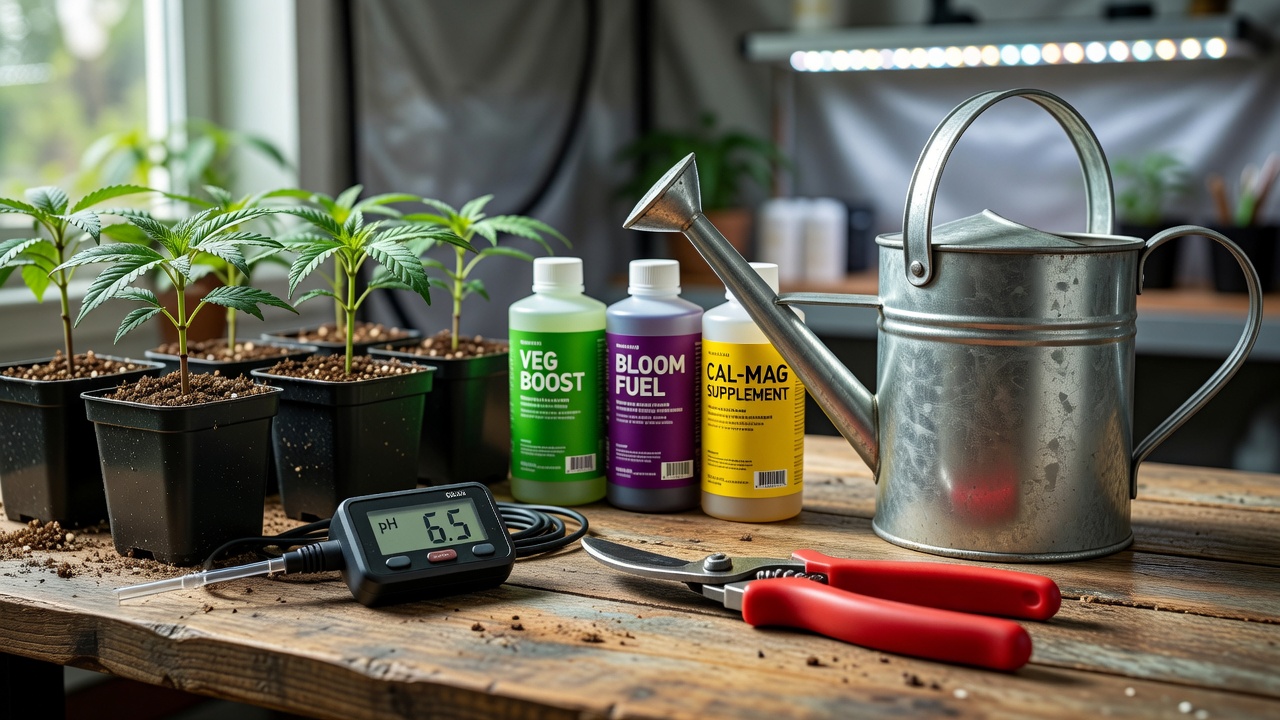
Cannabis plants require balanced nutrients at each growth phase. A basic three-part liquid fertilizer set covering grow, bloom, and micro elements covers most needs without specialized additives. Begin with half-strength doses during the first weeks to prevent burn, then follow manufacturer schedules. Measuring spoons and mixing buckets ensure accurate application.
Feeding Schedule Example
Organic alternatives such as compost teas provide gentle feeding. Store nutrients in cool, dark places and shake bottles before use. Proper feeding supports vigorous foliage and dense buds while keeping costs low for home setups. In week three of vegetative growth, mix one teaspoon of grow formula per gallon of water and apply every other watering. During flowering, switch to bloom formula at full strength while monitoring leaf color. If tips yellow, flush with plain pH-balanced water for one cycle. Keep a notebook logging each feeding date, amount, and plant response to refine future applications.
Monitoring and Climate Control Tools
Accurate monitoring prevents common beginner mistakes. A digital thermometer-hygrometer tracks temperature and humidity in real time. Ideal ranges sit between 70-85°F during vegetative growth and 60-75°F in flowering, with humidity tapering from 60% to 40%. Small clip-on fans circulate air and strengthen stems without creating harsh drafts.
Climate Management Tips
Exhaust fans paired with carbon filters manage odor and fresh air exchange. These tools maintain stable environments critical for photosynthesis and disease prevention. Beginners benefit from simple plug-in models that require minimal setup. Place one fan at canopy level for gentle movement and another near the intake for fresh air. If humidity spikes above 65% during flowering, add a small dehumidifier. Record daily readings in a log so you can spot trends and adjust before problems develop, such as mold on lower leaves.
Watering and pH Management Essentials
Water quality and pH balance affect nutrient absorption. A digital pH meter provides quick readings, targeting 6.0-7.0 for soil grows. pH up and down solutions allow precise adjustments. Watering cans with fine spouts deliver moisture evenly, while collection trays catch runoff to protect floors.
Daily Watering Routine
Let tap water sit overnight to dissipate chlorine. Test pH before every feeding session. Consistent management avoids lockout issues and supports steady progress from seed to harvest. Water until 10-20% of the volume drains from the bottom, then test that runoff pH. If it drifts outside the target range, adjust the next watering accordingly. This simple check catches problems early and keeps plants healthy through the entire cycle.
Pruning and Maintenance Tools
Basic hand tools keep plants tidy and productive. Sharp pruning shears make clean cuts that heal quickly, reducing infection risk. Training ties and stakes support branches during flowering when buds add weight. Gloves protect hands during handling of sticky resins.
Maintenance Techniques
Regular maintenance removes lower growth and improves light penetration. These inexpensive items extend throughout multiple grows, proving their value over time. In week four of vegetative growth, remove the lowest two sets of leaves to boost airflow. Use soft plant ties for low-stress training by gently bending branches and securing them horizontally. Always sterilize shears with isopropyl alcohol between plants to prevent disease spread. These steps increase yields and keep the canopy manageable in small spaces.
Conclusion
Equipping a beginner cannabis garden with these targeted tools creates a solid foundation for success. Focus on quality basics rather than excess gadgets to maintain simplicity and affordability. With consistent application of lighting, mediums, nutrients, monitoring, and maintenance equipment, first-time growers achieve satisfying results. For additional guidance on safe practices, consult resources from epa.gov and nih.gov. Start small, observe your plants closely, and refine techniques each cycle. Documenting every grow allows you to repeat successes and correct mistakes efficiently in future runs.