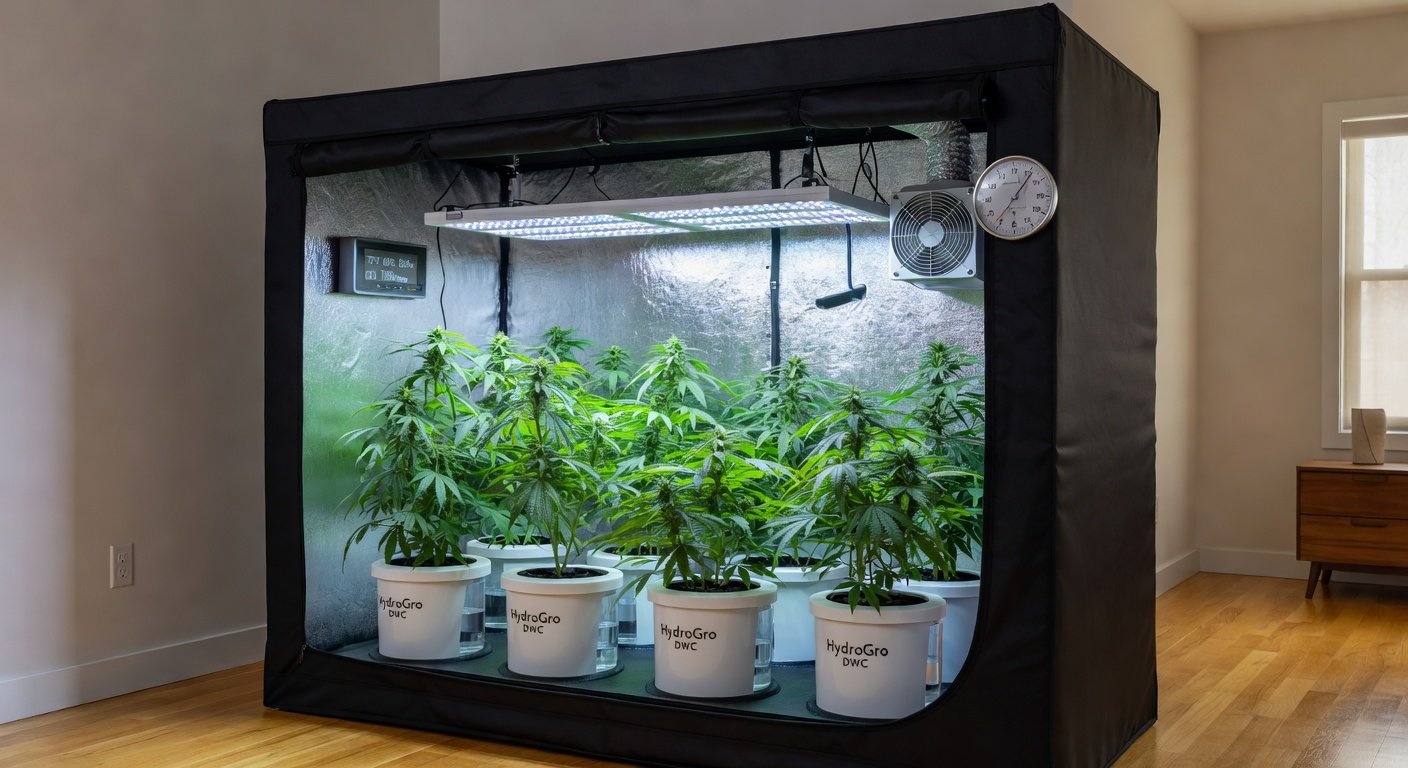
Introduction to Custom Hydroponic Grow Tents
In 2026, indoor cannabis cultivation has reached new heights of efficiency, especially with hydroponic systems that deliver faster growth and higher yields without soil. For home growers and enthusiasts, building a custom grow tent tailored for hydroponics offers complete control over your environment. This guide walks you through every step, from selecting components like reflective walls, ventilation, and reservoirs to integrating cutting-edge grow lights and choosing seeds optimized for hydro setups. Whether you’re a beginner or seasoned cultivator, you’ll learn troubleshooting tips and yield-boosting hacks to maximize your 2026 harvest.
Planning Your Grow Tent Setup
Before diving into construction, assess your space and goals. A standard hydroponic grow tent ranges from 4×4 feet for small operations to 8×8 feet for larger yields. Consider your local climate—indoor setups thrive in controlled environments, but electricity costs and noise from fans are key factors. Budget-wise, expect $500–$2,000 for a basic custom build, scaling up for premium features.
Key considerations include light-proofing to prevent mold, scalability for multiple plants, and compliance with local regulations. For authoritative guidance on safe indoor growing, check resources from the Leafly Growing Guide.
Essential Components for Your Hydro Grow Tent
Reflective Walls for Maximum Light Efficiency
Reflective walls are the backbone of light optimization in hydroponic tents. They bounce photons back to your plants, increasing photosynthetic efficiency by up to 30%. Opt for Mylar or diamond reflector material—it’s durable, lightweight, and achieves 95–98% reflectivity. Avoid cheap foils that degrade quickly.
To install: Measure your tent frame (PVC pipes or metal poles work best), cut Mylar sheets to fit, and secure with adhesive tape or Velcro. For hydro setups, ensure walls are waterproof to handle potential spills from reservoirs. Pro tip: Panda film (black/white plastic) on the exterior blocks light leaks while the interior Mylar maximizes reflection.
Ventilation System: Airflow and Odor Control
Proper ventilation prevents heat buildup, controls humidity (ideal 40–60% for veg, 40–50% for flower), and exchanges CO2 for optimal growth. In hydroponics, where roots are submerged, stale air can lead to root rot.
Core elements: Inline fans (6–8 inch for small tents), carbon filters for odor scrubbing, and oscillating fans for circulation. Calculate CFM (cubic feet per minute) based on tent volume—aim for 1 CFM per square foot. Ducting routes exhaust outside or through a window. In 2026, smart vents with app controls monitor VPD (vapor pressure deficit) automatically.
- Exhaust fan: Pulls hot air out.
- Intake fan: Brings fresh air in.
- Filter: Neutralizes cannabis aromas.
Install by mounting the fan at the top, filter inline, and seal all connections to avoid leaks.
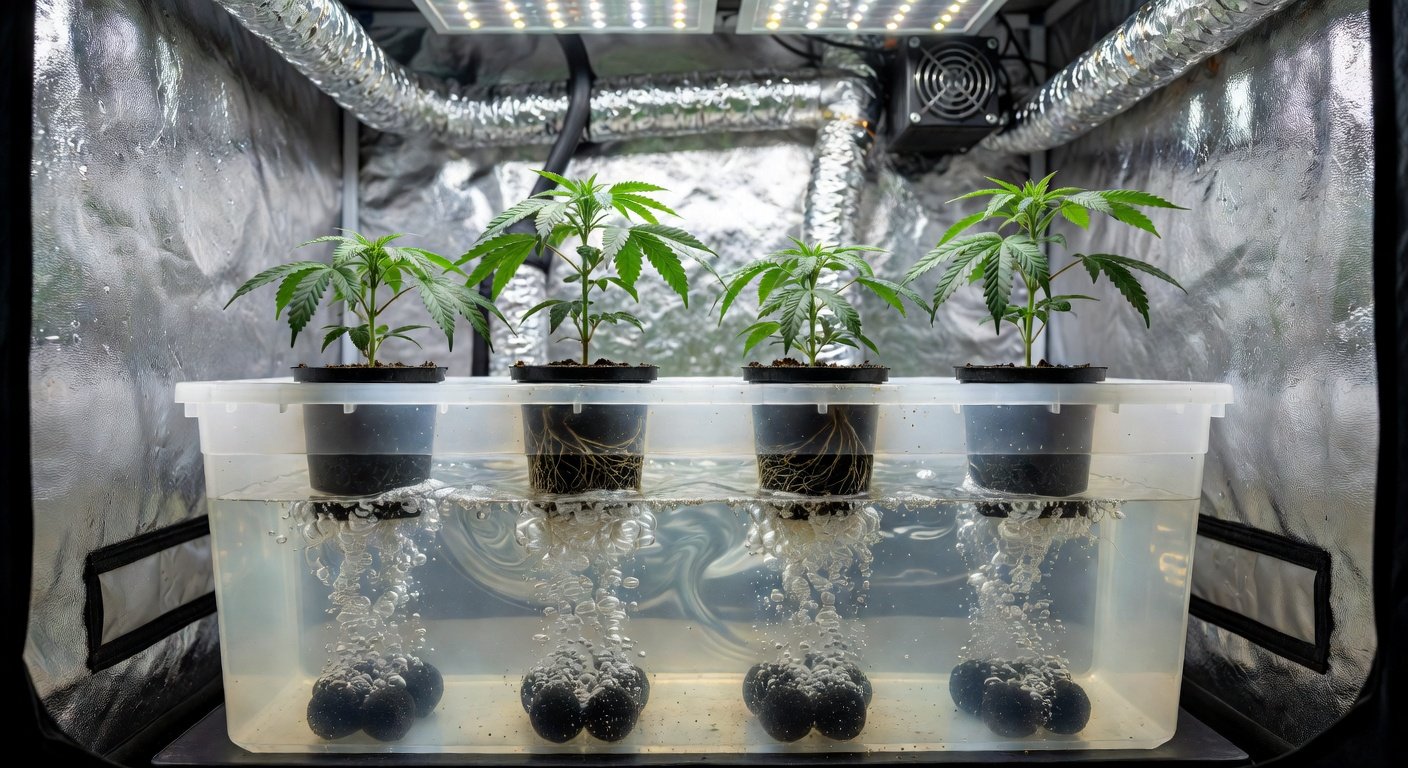
Hydroponic Reservoirs and Nutrient Delivery
The heart of hydroponics is the reservoir—a 20–50 gallon tote or custom tank holding nutrient-rich water. For cannabis, use Deep Water Culture (DWC) or Nutrient Film Technique (NFT) systems suited to tents.
Select food-grade plastic reservoirs with lids to minimize algae. Integrate submersible pumps (200–400 GPH) for circulation and air stones for oxygenation—roots need dissolved oxygen above 6 ppm. pH balance (5.5–6.5) and EC (electrical conductivity) monitoring tools are essential. Add reservoirs under the tent floor, elevated for easy access, and use black tubing to prevent light exposure.
For multi-plant setups, consider automated dosers that adjust nutrients via sensors, a 2026 staple for precision growing.
Integrating Top Grow Lights for Efficiency
Lighting is crucial in hydroponic tents, where plants rely on artificial spectra for 18/6 (veg) or 12/12 (flower) cycles. In 2026, LED lights dominate for their low heat and full-spectrum output, mimicking sunlight.
Recommended: Full-spectrum LEDs like Mars Hydro TS series or Spider Farmer SF models—400–600W for a 4×4 tent, delivering 2.5–3 µmol/J efficiency. Hang lights 18–24 inches above canopy, adjustable via ratchet cords. UV and IR diodes enhance resin production and terpenes.
- Calculate wattage: 30–50W per square foot.
- Mount centrally for even coverage.
- Use timers for photoperiod control.
- Monitor heat—pair with ventilation to keep temps 70–85°F.
Integrate dimmable drivers for seedling stages. For energy savings, explore quantum board LEDs certified by ENERGY STAR.
Selecting High-Performing Indoor Seeds for Hydro Systems
Choose feminized or autoflowering seeds bred for hydroponics—fast-rooting, disease-resistant strains like Gorilla Glue or Blue Dream hybrids. In 2026, look for THC/CBD profiles suited to your market, with compact structures for tents.
Top picks: From reputable banks like ILGM or Seedsman, select hydro-optimized genetics with high yields (1–2g/watt). Germinate in rockwool cubes, transplant to net pots. Ensure seeds are EU/US compliant; for more on strain selection, visit the Royal Queen Seeds Hydro Guide.
Plant 4–9 per tent, spacing 12–18 inches. Hydro seeds thrive on rapid nutrient uptake, yielding 20–30% more than soil.
Step-by-Step Guide to Building Your Tent
Now, let’s assemble:
- Frame Assembly: Connect poles into a cube, securing corners with connectors. Cover floor with waterproof tray.
- Wall Installation: Attach Mylar to interior, seal seams.
- Ventilation Setup: Install exhaust at top, intake at bottom, run ducting.
- Lighting Rig: Suspend LEDs, wire to outlet with surge protector.
- Hydro System: Place reservoir, connect pumps and tubing to buckets or trays.
- Monitoring: Add hygrometer, thermometer, and pH meter.
- Sealing and Testing: Check for light leaks, run systems dry.
Power with a dedicated circuit to avoid overloads. Total build time: 4–6 hours.
Troubleshooting Common Issues
Hydroponics can hit snags—here’s how to fix them:
- Nutrient Burn: Yellow tips? Flush reservoir, lower EC to 1.0–1.8. Use calmag supplements for deficiencies.
- Root Rot: Brown roots? Increase aeration, add beneficial bacteria like Hydroguard. Maintain water temps below 72°F.
- pH Drift: Test daily; adjust with pH up/down solutions. Stabilize with RO water.
- Light Burn: Bleached tops? Raise lights 6 inches or dim.
- Pests: Spider mites love hydro—use neem oil or IPM sprays early. Quarantine new plants.
Log data with apps like GrowBuddy for patterns. In 2026, AI sensors from companies like Argus Controls predict issues preemptively.
Yield-Boosting Hacks for 2026 Indoor Setups
Elevate your harvest with these tips:
- CO2 Enrichment: Add bags or generators to hit 800–1200 ppm, boosting growth 20–30%.
- SCROG Training: Use nets to create even canopy, increasing light penetration in hydro.
- Supplemental UV: 2–4 hours daily in flower for denser buds and higher potency.
- Automated Nutrients: pH/EC auto-adjusters save time and prevent errors.
- LED Upgrades: Switch to phosphor-converted LEDs for better PAR output.
Harvest when 70% trichomes are cloudy—expect 1–1.5 lbs from a 4×4 tent with optimized hydro. Dry and cure in the tent’s veg space for quality.
Building your custom hydro grow tent empowers you to cultivate premium cannabis at home. With these steps, components, and hacks, your 2026 setup will yield exceptional results. Happy growing!