
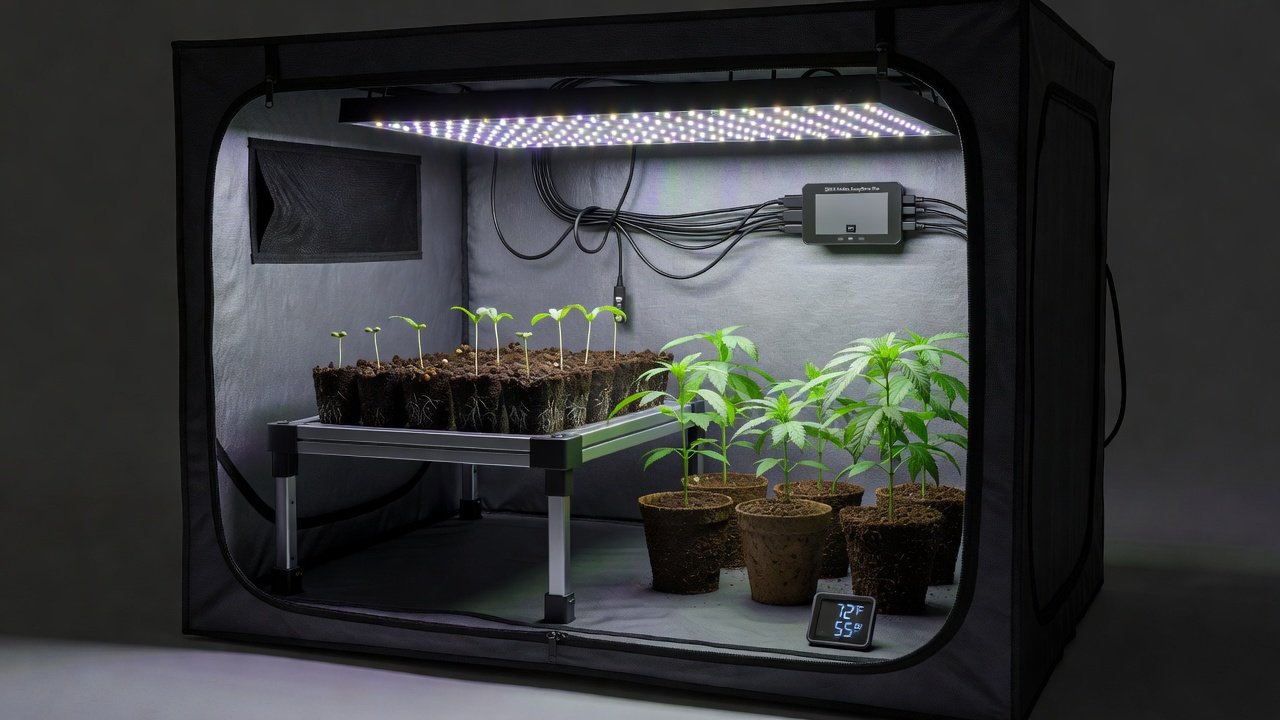
Starting your first cannabis grow can feel overwhelming, but understanding the complete plant life cycle makes success much more achievable. In 2026, home growers have access to improved easy cannabis seeds, better lighting options, and refined techniques that simplify each stage. This guide walks first-time cultivators through every phase from germination to harvest, answering common questions and offering practical adjustments for modern conditions. By following clear steps and learning from real-world examples, beginners can avoid common pitfalls and produce healthy plants with satisfying yields.
Germination: Starting Your Easy Cannabis Seeds
Germination marks the exciting beginning of the cannabis life cycle. Easy cannabis seeds from reputable breeders typically achieve high success rates when given the right environment. Soak seeds in distilled water for 12-24 hours until they sink, then transfer to a moist paper towel inside a dark, warm spot around 70-80°F. Most viable seeds crack within 2-7 days, revealing a small taproot. A practical example involves placing three or four seeds between folded paper towels in a sealed plastic container on top of a refrigerator where gentle warmth is consistent. Check daily to ensure the towel stays damp without pooling water.
First-time growers often wonder about optimal moisture levels. Keep the paper towel damp but never soaking wet to prevent rot. Once the taproot reaches 0.5 inches, plant the seed root-down in a small container with light, well-aerated soil. Maintain gentle warmth and indirect light during this delicate transition. An alternative method is direct planting into starter cubes, which reduces handling and transplant shock for fragile taproots.
Practical Germination Tips
- Use distilled or filtered water to avoid chlorine that can inhibit sprouting.
- Label each seed with strain and date to track progress in your grow journal.
- If seeds fail to sink after 24 hours, gently tap them to break surface tension before discarding non-viable ones.
Seedling Stage: Early Care Essentials
Seedlings emerge with two rounded cotyledon leaves followed by the first serrated true leaves. At this stage, plants need 18-24 hours of light daily and consistent moisture without overwatering. Use a spray bottle to keep the top inch of soil lightly moist while roots establish. A common scenario is watching seedlings stretch toward light that is too far away, resulting in weak stems that require gentle support with a toothpick.
Common questions include lighting distance and nutrient timing. Position LED or fluorescent lights 24-36 inches above seedlings to avoid stretching. Hold off on feeding until the plant develops 3-4 sets of true leaves. Watch for signs of damping-off, which can be prevented with sterile soil and good airflow. In practice, many growers run a small fan on low speed to strengthen stems while maintaining 70-75°F temperatures.
Seedling Troubleshooting
- Yellowing leaves often signal overwatering; allow soil to dry slightly between mistings.
- Leggy growth means increase light intensity or lower fixtures gradually over several days.
- White spots may indicate early pest issues; inspect undersides of leaves weekly.
Vegetative Growth: Building Strong Plants
The vegetative phase focuses on rapid leaf and stem development. Maintain an 18/6 light schedule and begin light feeding with nitrogen-rich nutrients once the plant shows healthy growth. Repot into larger containers as roots fill the current space to prevent becoming root-bound. For example, a plant in a one-gallon pot may need moving to a three-gallon container after three weeks when roots appear at drainage holes.
Pruning and training techniques such as topping or low-stress training help shape bushier plants with higher yields later. Monitor humidity around 50-70% and temperature between 70-85°F.
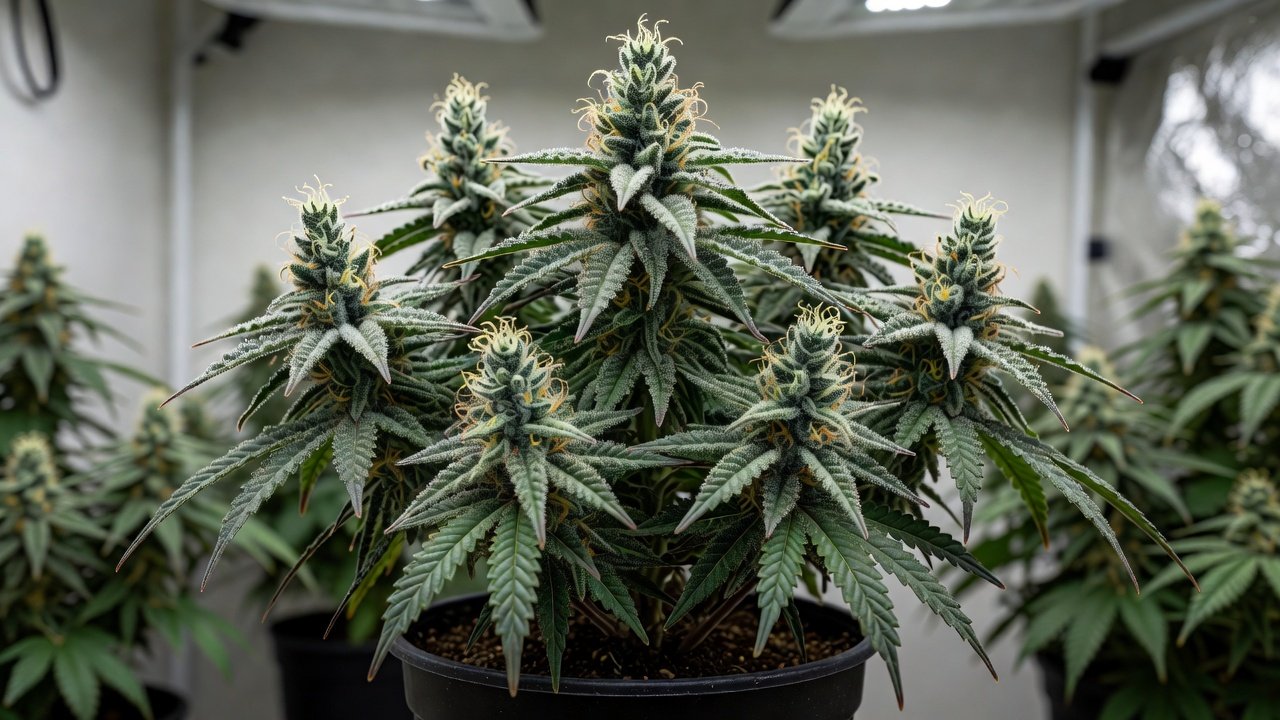
First-time growers should check pH levels regularly, aiming for 6.0-7.0 in soil to maximize nutrient uptake. A concrete example is using pH-adjusted water at 6.5 when mixing a half-strength vegetative nutrient solution every other watering.
Training Methods for Beginners
- Top plants above the fourth node to encourage two main colas instead of one.
- Apply low-stress training by gently bending branches and securing with soft ties to create an even canopy.
- Remove lower fan leaves that receive little light to improve airflow and focus energy upward.
Flowering Phase: Transition and Bloom
Switch to a 12/12 light schedule to trigger flowering, usually after 4-8 weeks of vegetative growth depending on strain. Plants will stretch significantly during the first two weeks before focusing energy on bud production. Reduce nitrogen and increase phosphorus and potassium through bloom-specific nutrients. In one grow journal example, switching nutrients at week five produced noticeably denser buds compared to continuing vegetative formulas.
Support heavy branches with stakes or trellis netting as buds develop. Maintain lower humidity at 40-50% to prevent mold. In 2026, many growers benefit from smart climate controllers that automatically adjust conditions. Watch for hermaphroditic traits in stressed plants and remove any male flowers immediately to protect your harvest. Checking trichomes weekly with a jeweler’s loupe helps time the transition accurately.
Harvest, Drying, and Curing
Harvest timing depends on trichome color—mostly cloudy with some amber indicates peak potency for most strains. Cut branches and hang them in a dark space with 45-55% humidity and temperatures around 60-70°F for 7-14 days until stems snap cleanly. A practical tip is to harvest in sections over several days if plants mature unevenly, allowing focus on the ripest tops first.
Curing in glass jars for 2-8 weeks improves flavor and smoothness. Burp jars daily for the first week, then less frequently. Proper drying and curing preserve terpenes and cannabinoids while preventing harsh smoke. Store finished jars in a cool, dark cabinet and label each with harvest date and strain for future reference.
Common Questions and 2026 Adjustments
Many beginners ask about outdoor versus indoor growing. Indoor setups offer better control in 2026, especially with energy-efficient LEDs and automated irrigation. Outdoor growers should select fast-finishing easy cannabis seeds suited to their local climate. For instance, choosing autoflowering varieties allows two outdoor cycles in regions with short summers.
Pest management remains crucial. Integrated approaches using beneficial insects and neem oil work well without harsh chemicals. For the latest best practices, consult resources from usda.gov and cdc.gov regarding safe cultivation guidelines. Adjustments for 2026 include monitoring for new pest pressures due to changing weather patterns and using updated LED spectra that promote better resin production. Start small, keep detailed grow journals, and be patient with each learning curve. Recording daily temperature, humidity, and observations helps identify patterns that improve future harvests.
Conclusion
Mastering the cannabis life cycle from seed to harvest builds confidence and consistent results. By focusing on each stage’s specific needs and applying practical tips for 2026 conditions, first-time growers using easy cannabis seeds can achieve rewarding home harvests. Stay observant, adapt as needed, and enjoy the process of cultivating your own plants. With steady attention to detail and incremental improvements, even novice cultivators develop the skills for reliable, high-quality yields year after year.