
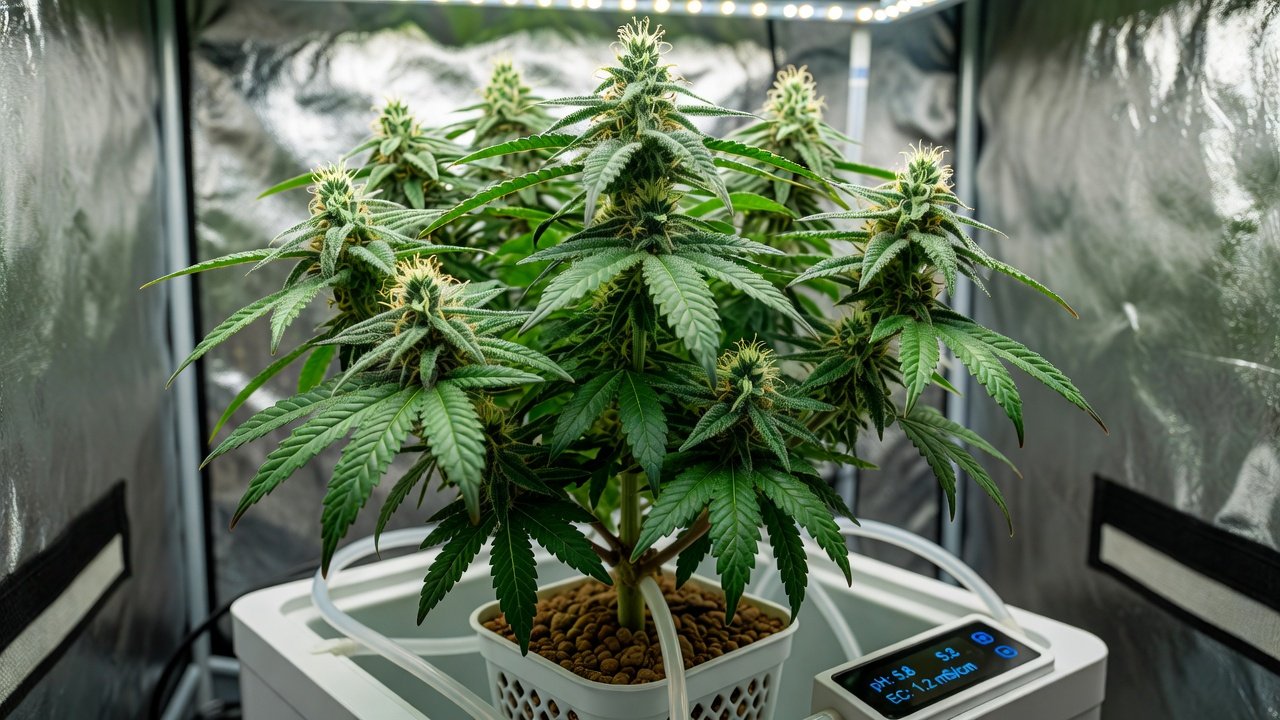
Introduction to Topping Autoflowers
Autoflowering cannabis strains have transformed indoor growing by offering fast cycles and resilience, yet many enthusiasts hesitate to apply high-stress training like topping. This guide details proven, low-risk methods tailored specifically for autoflowers, helping you multiply bud sites while preserving the plant’s natural 8-10 week timeline. Indoor growers using quality autoflower seeds can expect 20-40% more colas when techniques are executed correctly in 2026 setups featuring LED lighting and automated environments. For example, a grower in a 4×4 tent with two 300W full-spectrum LEDs might harvest 180 grams from four topped plants instead of 120 grams from untrained ones, simply by creating extra main colas that fill the canopy evenly.
Topping removes the main growing tip to encourage lateral branching. Unlike photoperiod plants, autos lack an extended vegetative window, so timing and precision are critical. Done right, it delivers bushier plants with higher overall yields without the stunting that plagued earlier attempts. Always start with healthy genetics from reputable seed banks and monitor environmental factors closely. A practical example comes from a 2025 test grow where a Northern Lights auto was topped at day 19, resulting in eight strong colas that matured uniformly under 18/6 lighting without any delay in flowering.
Understanding Autoflower Biology and Topping Benefits
Autoflowers transition to flower based on age rather than light cycle, typically flowering around week 3-4. This fixed schedule means any stress must occur early. Topping works by disrupting apical dominance, redirecting hormones to lower nodes and creating multiple main stems. Research from agricultural extensions shows trained autoflowers often produce more uniform canopies under LEDs, improving light penetration and airflow. In practice, this means each new branch receives roughly equal photon exposure, reducing the tall central cola that often shades lower growth.
Benefits extend beyond yield. Branching creates better structure for support nets and reduces mold risk in dense indoor grows. Expect each topped plant to develop 6-12 strong bud sites instead of 4-6 on untrained specimens. In 2026, smart sensors help track recovery via humidity and VPD data, minimizing setbacks. One concrete case involved a grower using a Bluetooth VPD monitor who noticed humidity spikes after topping and adjusted fans within hours, allowing the plant to push new shoots within four days instead of seven.
Additional Biological Advantages
Beyond yield, topped autoflowers develop stronger root-to-shoot ratios because energy is distributed across several stems rather than one dominant leader. This often translates to better nutrient uptake during the critical weeks four through six when bud formation accelerates.
Optimal Timing for Topping Autoflowers
Top between days 18-22 from sprout when plants have 5-6 nodes and are 15-20 cm tall. Earlier intervention risks permanent stunting; later risks flowering onset before recovery. Monitor for the first true fan leaves to confirm vigor. In 2026 indoor tents, use grow journals or apps to log node development precisely. A useful tip is to photograph the plant daily starting at day 14 so you can spot the exact moment the fifth node fully expands.
Never top once pre-flowers appear. If growth seems slow due to cooler temps or low light, delay by 2-3 days. Multiple light topping sessions spaced 5-7 days apart can work on vigorous strains but require extra monitoring. For instance, a Sour Diesel auto grown at 20°C was topped first at day 18 and again at day 25, producing ten colas without any visible stress once humidity was held at 62%.
Recognizing Plant Readiness Signals
Look for vibrant green coloration, upright leaves during lights-on, and visible new growth every 24 hours. If the plant shows any purple stems or drooping, postpone the procedure until conditions improve.
Essential Tools and Preparation Steps
Use sharp, sterilized micro-snips or precision scissors cleaned with 70% isopropyl alcohol. Have pH-balanced water, mild seaweed extract, and clean gloves ready. Work under red-spectrum LEDs to reduce plant stress during the procedure.
- Choose plants showing strong roots and no deficiencies.
- Water lightly 24 hours prior to increase turgor pressure.
- Prepare recovery space with 60-65% humidity and 22-24°C temperatures.
- Keep a small fan running at low speed to maintain gentle air movement without direct wind on the cut site.
These steps reduce infection risk and support rapid healing in modern sealed grow rooms. Many growers also prepare a small spray bottle with diluted aloe vera gel for its natural antifungal properties.
Step-by-Step Safe Topping Method
Identify the newest growth tip at the sixth node. Make a clean 45-degree cut just above the fifth node, removing only the apical meristem. Avoid crushing stems. Immediately mist with water and apply a light rooting hormone if desired for faster callusing.
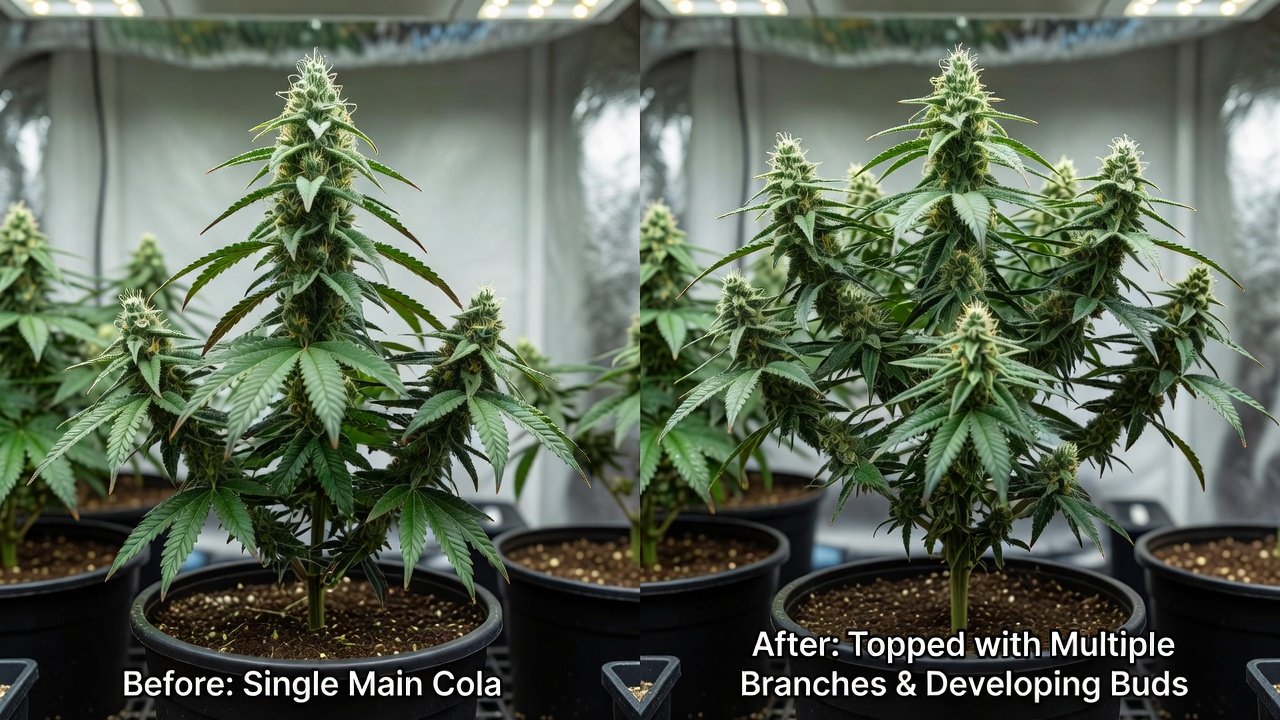
After topping, lower light intensity slightly for 48 hours and maintain gentle airflow. Plants typically resume growth within 3-5 days, pushing out new shoots from nodes below the cut. Document progress with photos for future reference. A practical walkthrough: at day 19, the grower locates the sixth node under 6500K veg light, snips cleanly, then raises humidity to 65% and dims LEDs from 100% to 70% for two days.
Post-Cut Plant Response Monitoring
Within 12 hours you should see the cut site dry to a light callus. By day three, two or three new shoots usually appear at the nodes directly below the cut. If no growth is visible by day five, check EC and temperature before considering any further intervention.
Recovery Tips and Common Mistakes to Avoid
Support new branches with soft ties once they reach 10 cm. Feed a balanced grow nutrient at 75% strength during week one post-top. Watch for yellowing leaves indicating over-stress and adjust EC accordingly. In 2026 setups, integrate CO2 supplementation only after full recovery to avoid compounding stress.
Common errors include topping too late, using dull tools causing tears, or neglecting humidity spikes that invite pests. Over-topping weak genetics or ignoring pH fluctuations also leads to reduced yields. Always verify seed stability before training. One grower avoided a major setback by testing pH daily and catching a drift from 6.2 to 5.4 within 48 hours of topping.
Expected Yield Improvements for Indoor Growers
Properly topped autoflowers in optimized 2026 indoor environments routinely deliver 150-250 g/m² compared to 100-150 g/m² untrained. Multiple colas fill screens better under full-spectrum LEDs, boosting resin production. Track results across 2-3 cycles to refine your approach. In one documented 2026 run, four plants trained with single topping plus LST produced 210 g/m² while the control group yielded 135 g/m² under identical lighting and nutrients.
Combine topping with low-stress training for even greater gains while staying within autoflower tolerances. Many growers report that the extra colas also improve bag appeal because buds develop more uniform size and density.
Conclusion
Mastering topping on autoflowers empowers indoor cultivators to achieve professional-level yields safely. Focus on early timing, sterile tools, and attentive aftercare for consistent success. With 2026 technology aiding precision, these techniques transform average harvests into abundant ones. Start small, document everything, and scale successful methods across your garden. Over repeated cycles you will develop an intuitive sense for exactly when each strain is ready, turning topping into a reliable part of your standard workflow.